Create Application and Embedded Code
The first step to enabling Real User Monitoring (RUM) is to create an application and inject the monitoring code. Once the application is instrumented with the code, it will automatically report comprehensive runtime data to the ONE platform, providing the data foundation for subsequent tasks like user experience monitoring and performance analysis. The code injection for applications offers two deployment methods to choose from: Manual Injection and Automatic Injection.
Usage Scenarios
New Application Monitoring Onboarding Scenario: The process involves three steps: "Create Application -> Configure Code Injection -> Validate Data Reporting". First, create the application in the RUM platform by filling in details like name and application type to generate an Application ID. Then, based on the application type, select the code injection method; native APP should choose Manual Injection for the SDK, while Web applications are recommended to prioritize Automatic Injection. After completing the code injection, start the application and trigger key actions to confirm data is being correctly synchronized to the ONE platform, finalizing the onboarding.
SDK Update for an Already Monitored Application Scenario: First, obtain the new SDK version from the RUM platform and confirm compatibility with the application's technology stack. Update using the original injection method: Manual Injection requires replacing the code followed by a canary release, while Automatic Injection requires updating the bound backend service in the "Deployment -> Web Application -> Automatic Injection" module. After the update, verify the completeness of data reporting from the new SDK version to ensure no interruption in monitoring data and normal functionality.
Getting Started
Manual Injection
-
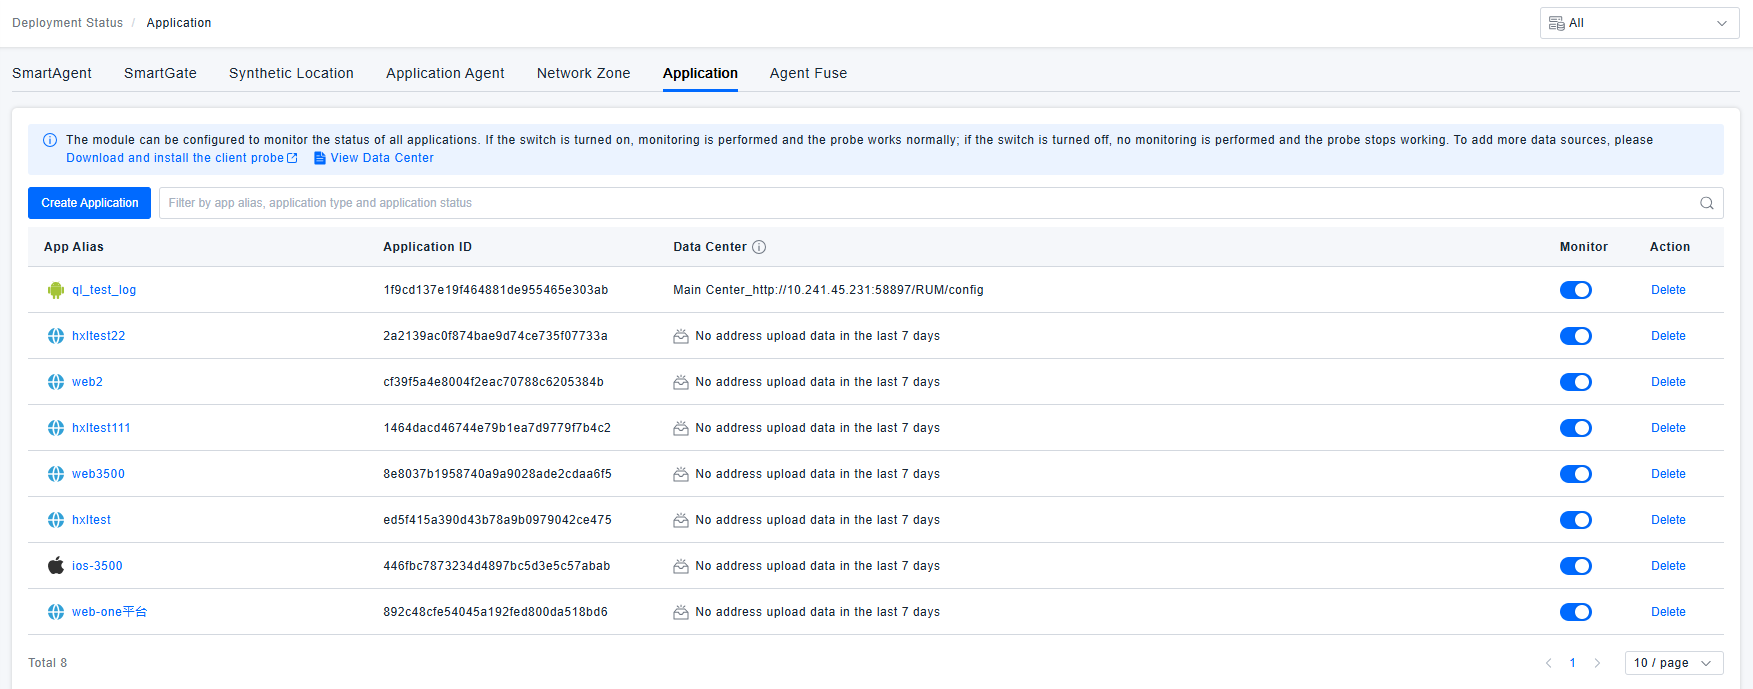
In Configuration / Deployment Status / Application, click Create Application.
tipPlease ensure you have a Real User Monitoring (RUM) license and application creation permissions.
For Web Applications that do not use service-based automatic instrumentation, if the instrumentation script changes after configuration modifications, re-instrumentation is required. Configurations that involve changes to the instrumentation script include: Data Collection/Application/Data Collection Rules, Data Collection/Network Request Whitelist Rules, Data Collection/Request Tracing, Data Protection/Data Obfuscation/Network Request Obfuscation Rules, Header, Body, URL parameter Keys of Data Processing/Business Module, as well as configurations related to SM4 encryption, Network Request Header collection policies, and instrumentation address parameters in Nacos.
For your convenience, we have also added a Create Application button under RUM / Application for quick access.
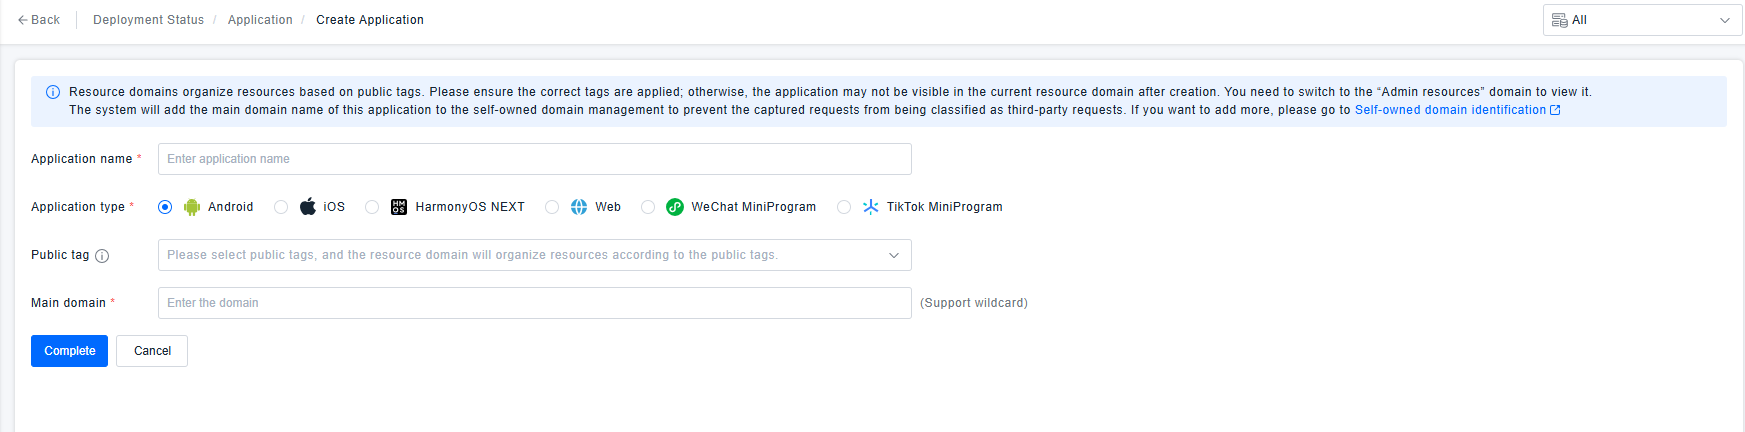
-
Fill in the application name, application type, share tags, and primary domain. The system will add this application's primary domain to the owned domain management to prevent captured requests from being categorized as third-party requests.
tipResource domains organize resources based on share tags. Please ensure correct tags are applied. Otherwise, the application might not be visible in the current resource domain after creation and may need to be viewed by switching to the 'Admin resources' domain.
-
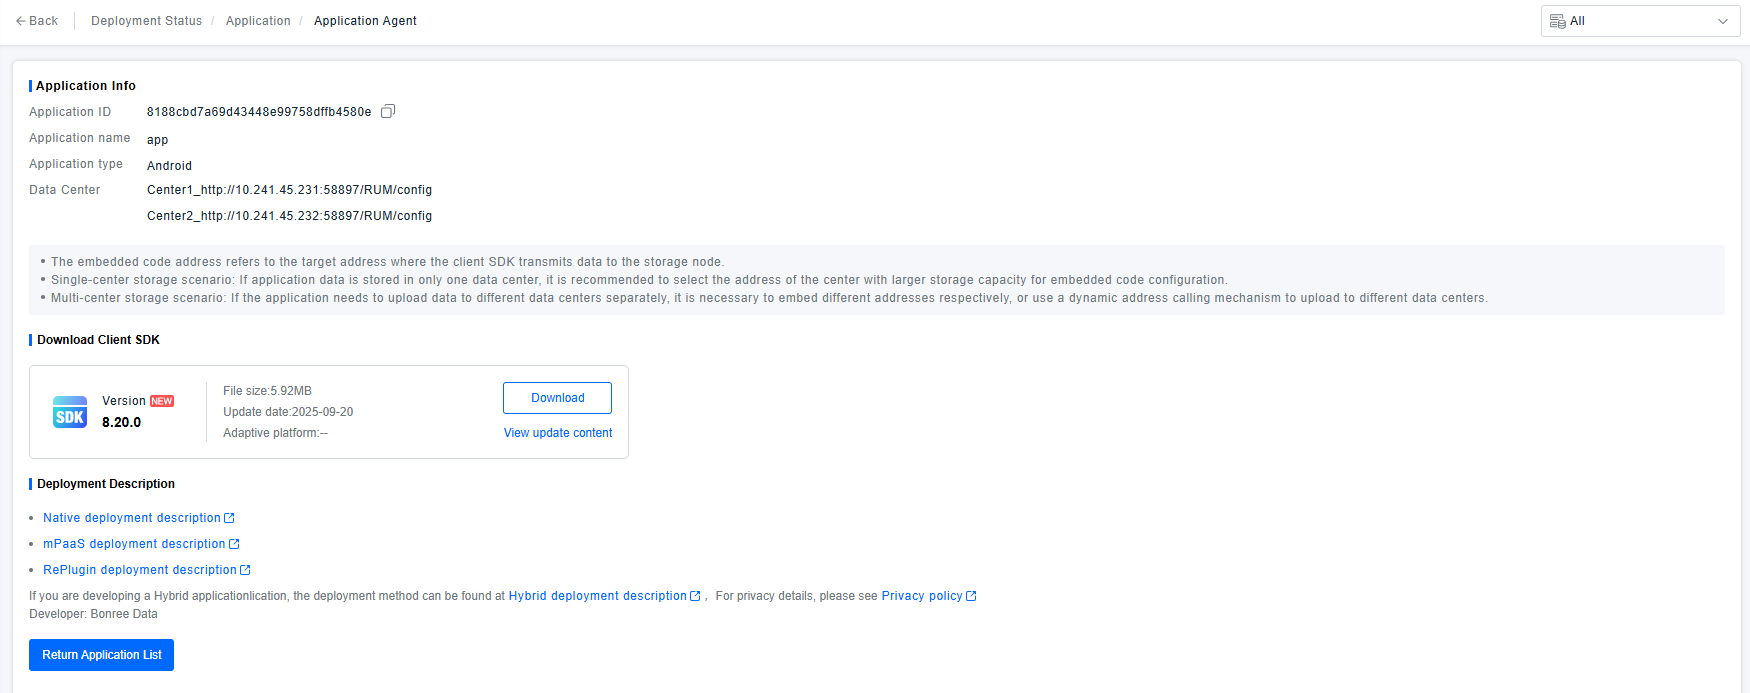
Download the Client SDK and click the corresponding deployment instructions link to view the code injection steps. Complete the application code injection.
-
If you haven't downloaded the Client SDK and have left step 3, you can download it from Configuration / Deployment / Client SDK.
-
If you haven't clicked the deployment instructions link and have left step 3, you can find and click the link on the Configuration / Deployment / Client SDK page to view the injection steps.
-
Since code injection requires the Application ID and injection URL, if you have left step 3, you can find this information in Configuration / Deployment Status / Application.
-
If you wish to disable monitoring for a specific application, you can do so in Configuration / Deployment Status / Application.
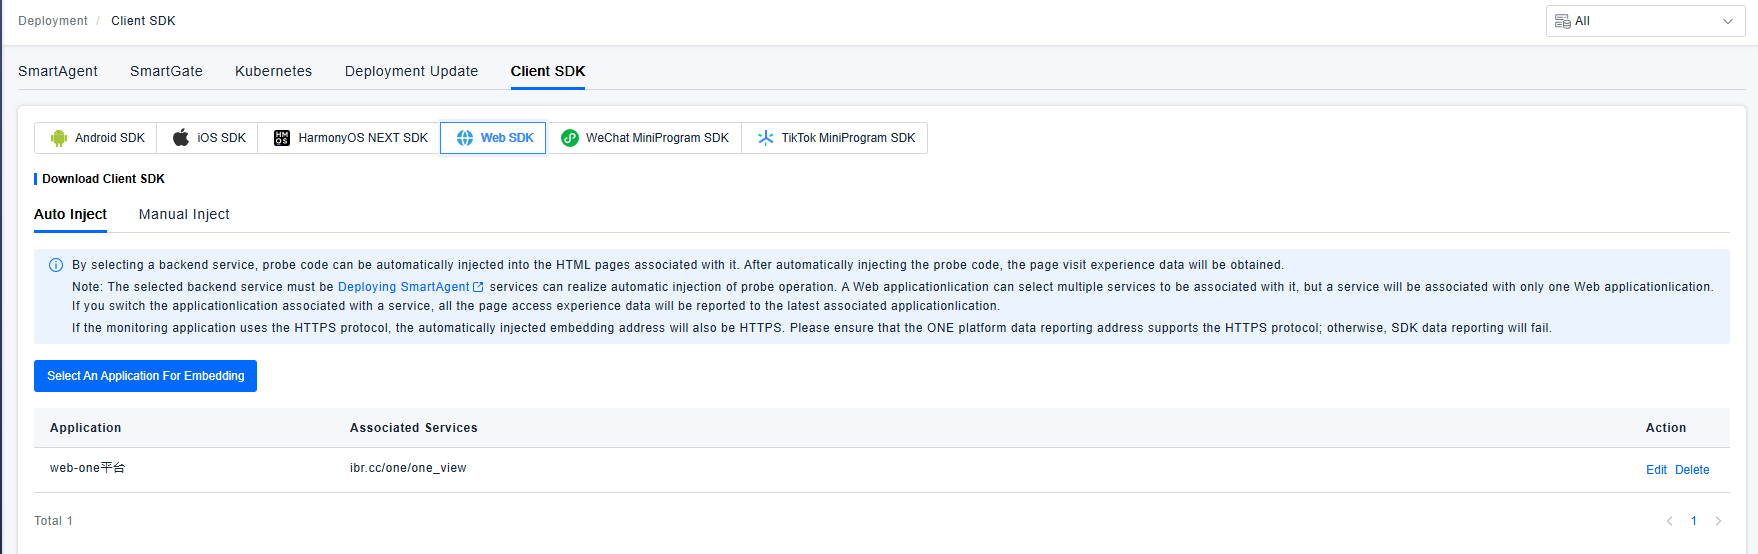
Automatic Injection
By selecting a backend service, the SDK code can be automatically injected into the associated HTML pages. After automatic injection, page access experience data will be collected.
Only the Web SDK supports automatic injection.
The selected backend service must be a service where the ONE SmartAgent is deployed to enable automatic Client SDK injection. One Web application can be associated with multiple services, but one service will only be associated with one Web application. If you change the application associated with a service, all page access experience data will be reported to the newly associated application.