Agents
Prerequisites
Feature Menu: Access to the AI Studio / Agent menu is required.
Operation Permission: Read and write access to AI Studio is required.
Data Permission: Access to at least one resource domain under an environment is required.
Model Configuration: At least one LLM must be added to the model list when creating an Autonomous Decision or Knowledge Planning Agent.
Overview
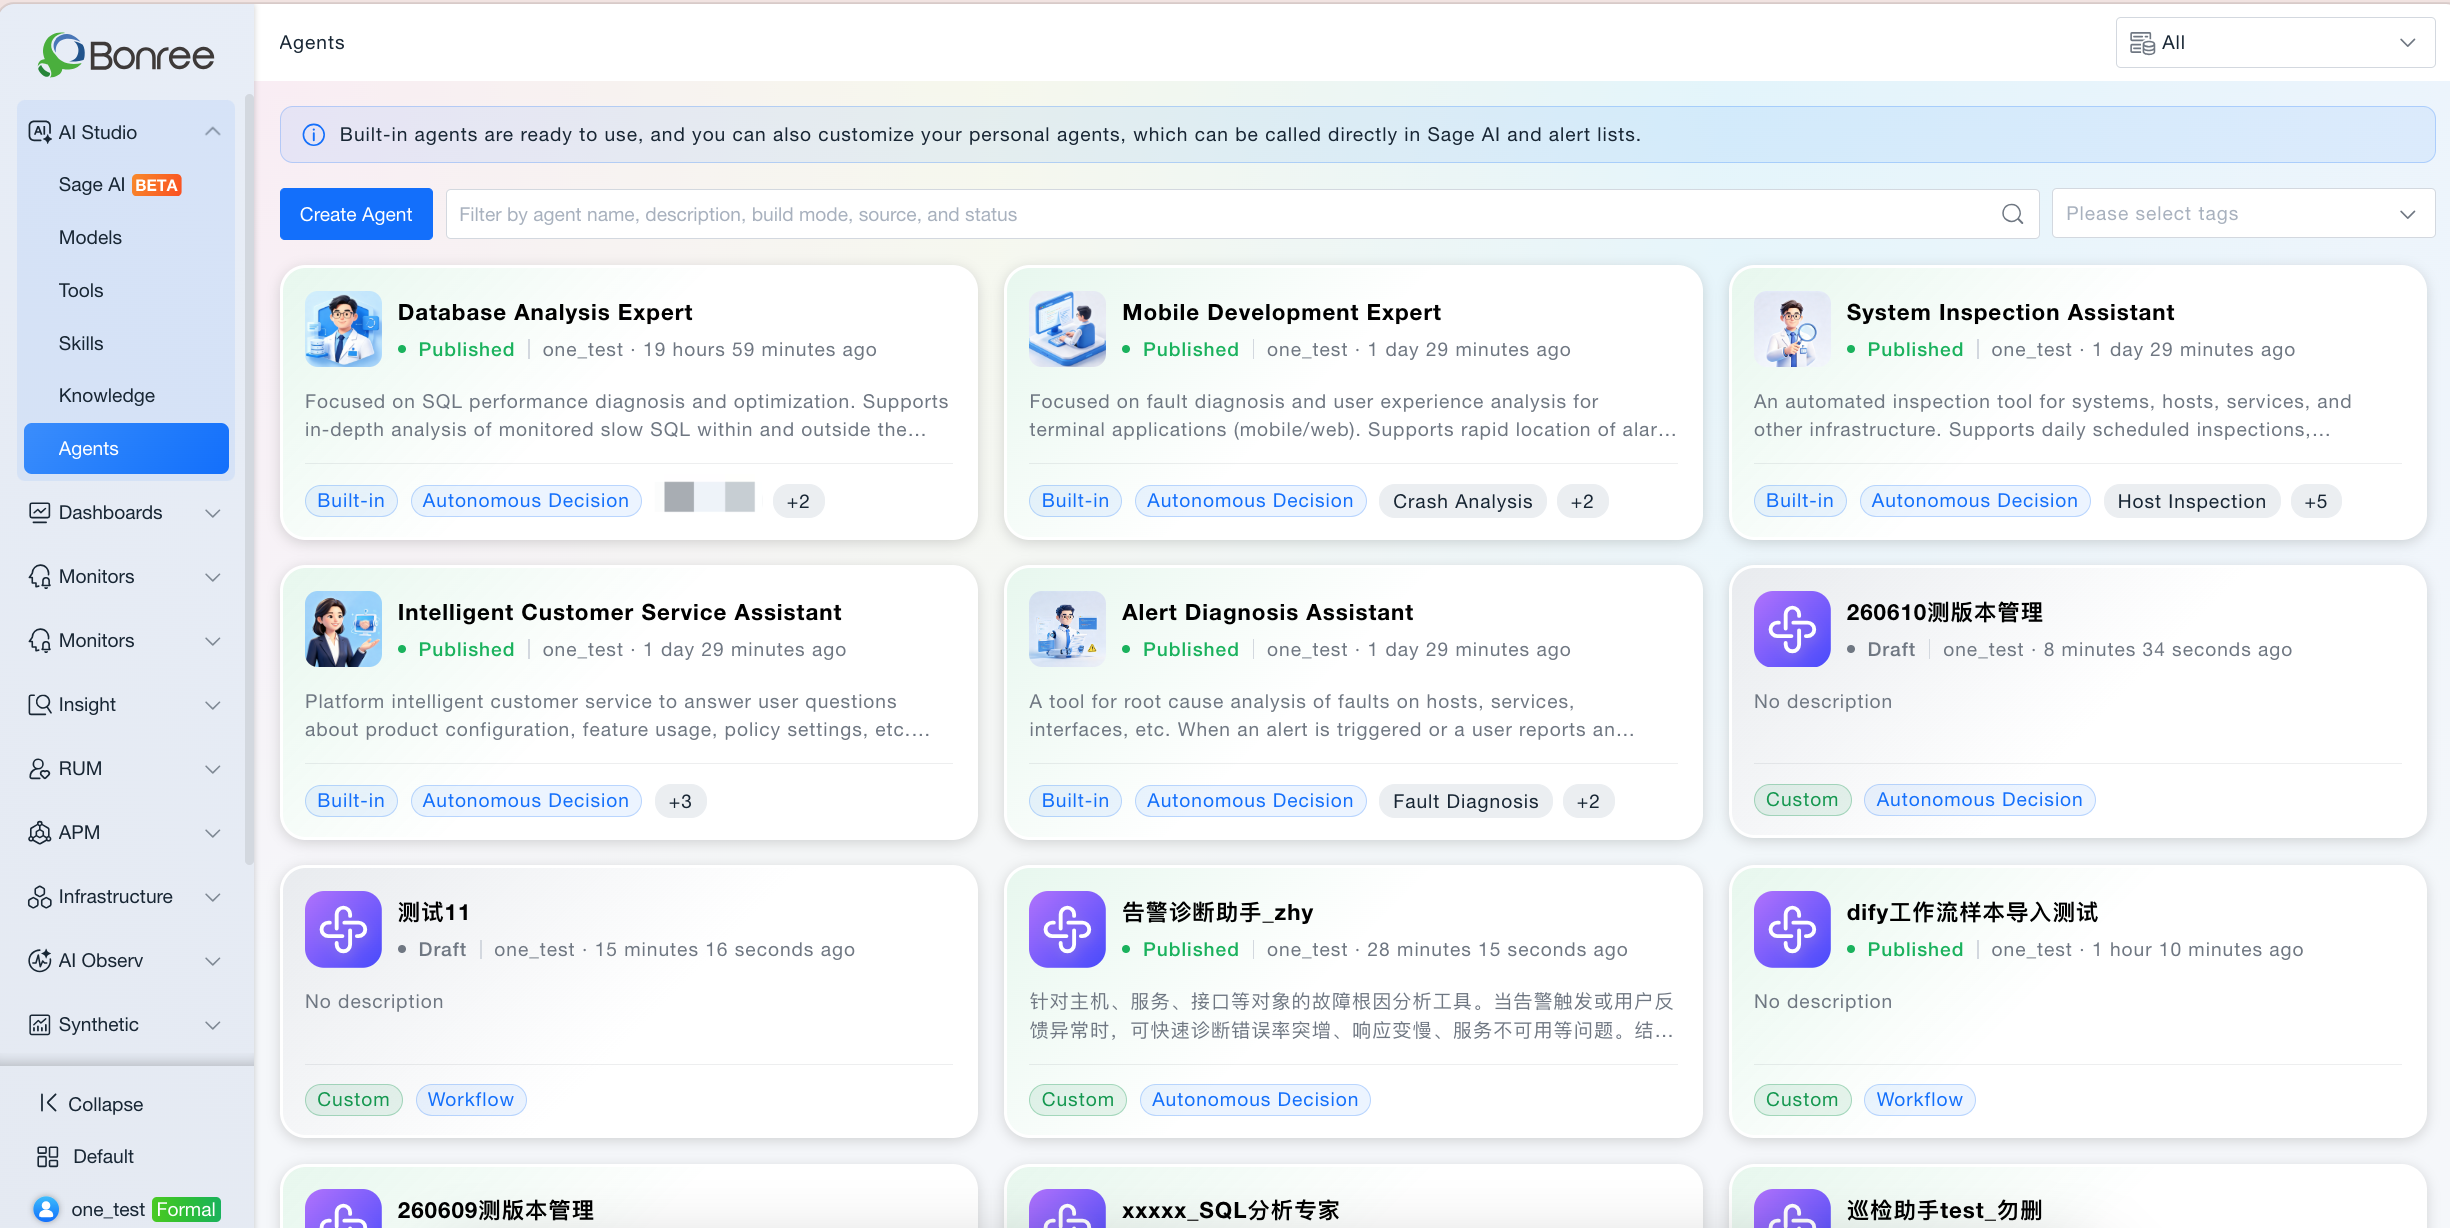
- An Agent is the core capability carrier of Bonree ONE AI Studio, encapsulating the reasoning logic, tool and Skill invocation flow, and knowledge sources for a specific scenario. The platform provides built-in general-purpose Agents that are ready to use out of the box, and users can also build their own personal Agents to meet customized business needs.
- Agents are defined across three dimensions: source (Built-in / User-built), build mode (Workflow / Autonomous Decision), and labels. Once built, Agents can be invoked directly from the Sage AI conversational interface, the Alert List, and other pages.
Value
Built-in Agents ready to use, quickly addressing high-frequency scenarios
The platform provides pre-built Agents including a Mobile Development Assistant, System Inspection Assistant, Alert Diagnosis Assistant, Intelligent Customer Service Assistant, and more. No configuration is needed — teams can immediately benefit from AI capabilities, lowering the adoption barrier.
Multiple build modes to cover varying levels of complexity
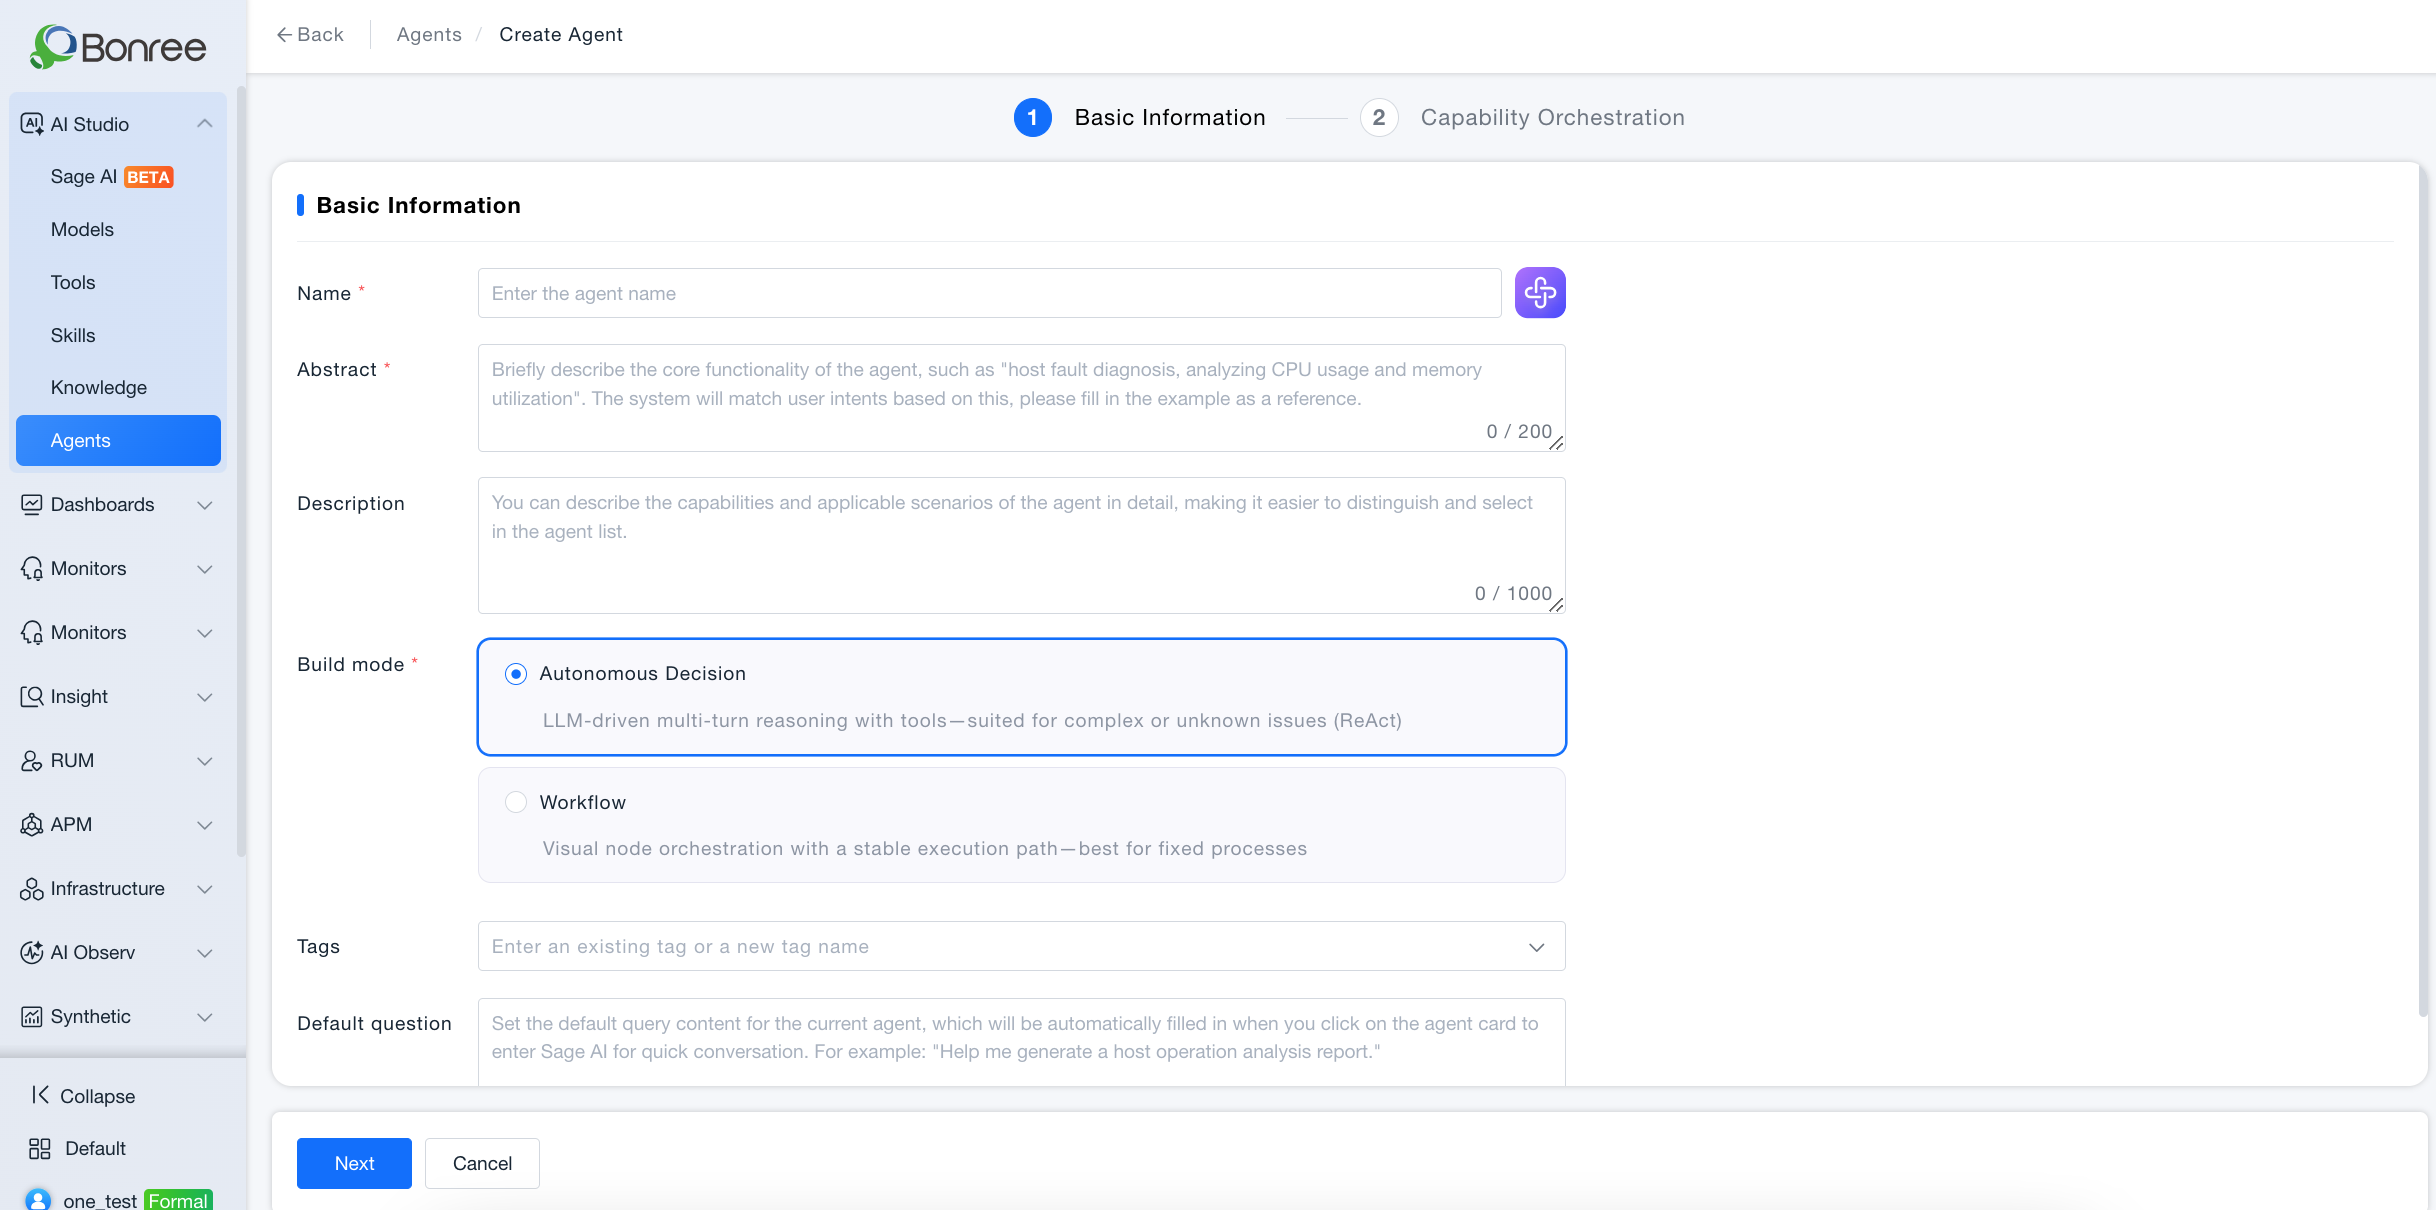
Workflow mode is suited for tasks with fixed execution paths; Autonomous Decision mode is suited for complex and unpredictable scenarios, with the LLM performing multi-turn autonomous reasoning. Users can choose the most appropriate build mode for their actual use case.
Deep customization to build business-specific Agents
Users can upload a dedicated knowledge base, connect MCP tools, and configure Skills, combined with a custom system prompt, to build a personal Agent that truly understands the business context.
Multiple entry points, seamlessly integrated into operations workflows
Once built and published, Agents can be invoked directly from the Sage AI conversational interface and the Alert List — no platform switching needed — embedding AI capabilities into daily operations workflows.
Clone mechanism to improve configuration reuse efficiency
All Agents support cloning. Users can quickly derive a new version from an existing built-in or user-built Agent, make targeted modifications, and publish — avoiding redundant setup work.
Use Cases
Fault Diagnosis
When a production alert is triggered, invoke the built-in "Alert Diagnosis Assistant" Agent or a custom diagnostic Agent. It automatically collects multi-dimensional data including monitoring metrics, logs, and slow queries, performs LLM-based reasoning, and outputs a structured diagnostic report to help engineers quickly identify the root cause and reduce mean time to repair (MTTR).
Knowledge Document Q&A
Upload internal operations documentation, architecture descriptions, and runbooks to the knowledge base, and add them to the Intelligent Customer Service Assistant. Operations personnel can query information directly in natural language without manually searching through documents, improving day-to-day operations efficiency.
Domain-Specific Diagnostic Agents
For specific database types, specific business systems, or specific failure categories, users can build specialized diagnostic Agents with dedicated MCP tools, knowledge bases, and system prompts, giving the Agent a deep understanding of the relevant business context and improving diagnostic accuracy.
Operation Scenarios
- View Agent list: Browse all built-in and user-built Agents on the Agent list page. Filter by label, source, or build mode to quickly locate a target Agent.
- View Agent details: Click the main area of an Agent card to enter the detail page and view the complete information including basic settings and orchestration configuration.
- Create a new Agent: Click "New Agent", complete the basic settings in Step 1, then complete the orchestration configuration in Step 2 according to the selected build mode. Save as a draft or publish directly.
- Clone an Agent: Click "Clone" on any Agent card (built-in or user-built). The system pre-fills all configuration from the source Agent. After making modifications, publish it as a new user-built Agent.
- Edit an Agent: Click "Edit" on a user-built Agent to enter the same step-by-step flow as creating a new Agent (the build mode cannot be changed). Built-in Agents do not support direct content editing, but their model and knowledge source can be modified. For full customization, cloning is recommended.
- Publish / Save as draft: After completing the orchestration configuration, click "Publish Agent" to make it immediately effective and available for invocation, or click "Save as Draft" to preserve the current progress for further editing later.
- Invoke in Sage AI: Agents that are currently published or have been published previously will appear in the Agent selection list in Sage AI, and can be selected to start a conversation.
Getting Started
Creating a New Agent
Log in to Bonree ONE. Select AI Studio > Agent from the left navigation.
Click "Create Agent" to enter Step 1 — Basic Settings: fill in the name and description, and select labels and build mode (Workflow / Autonomous Decision / Knowledge Planning).
Click "Next" to proceed to Step 2 — Orchestration Configuration. Complete the configuration corresponding to the selected build mode (see the individual build mode sections below).
After completing the configuration, click "Publish Agent" to officially publish, or click "Save as Draft" to save progress.
Workflow Agent
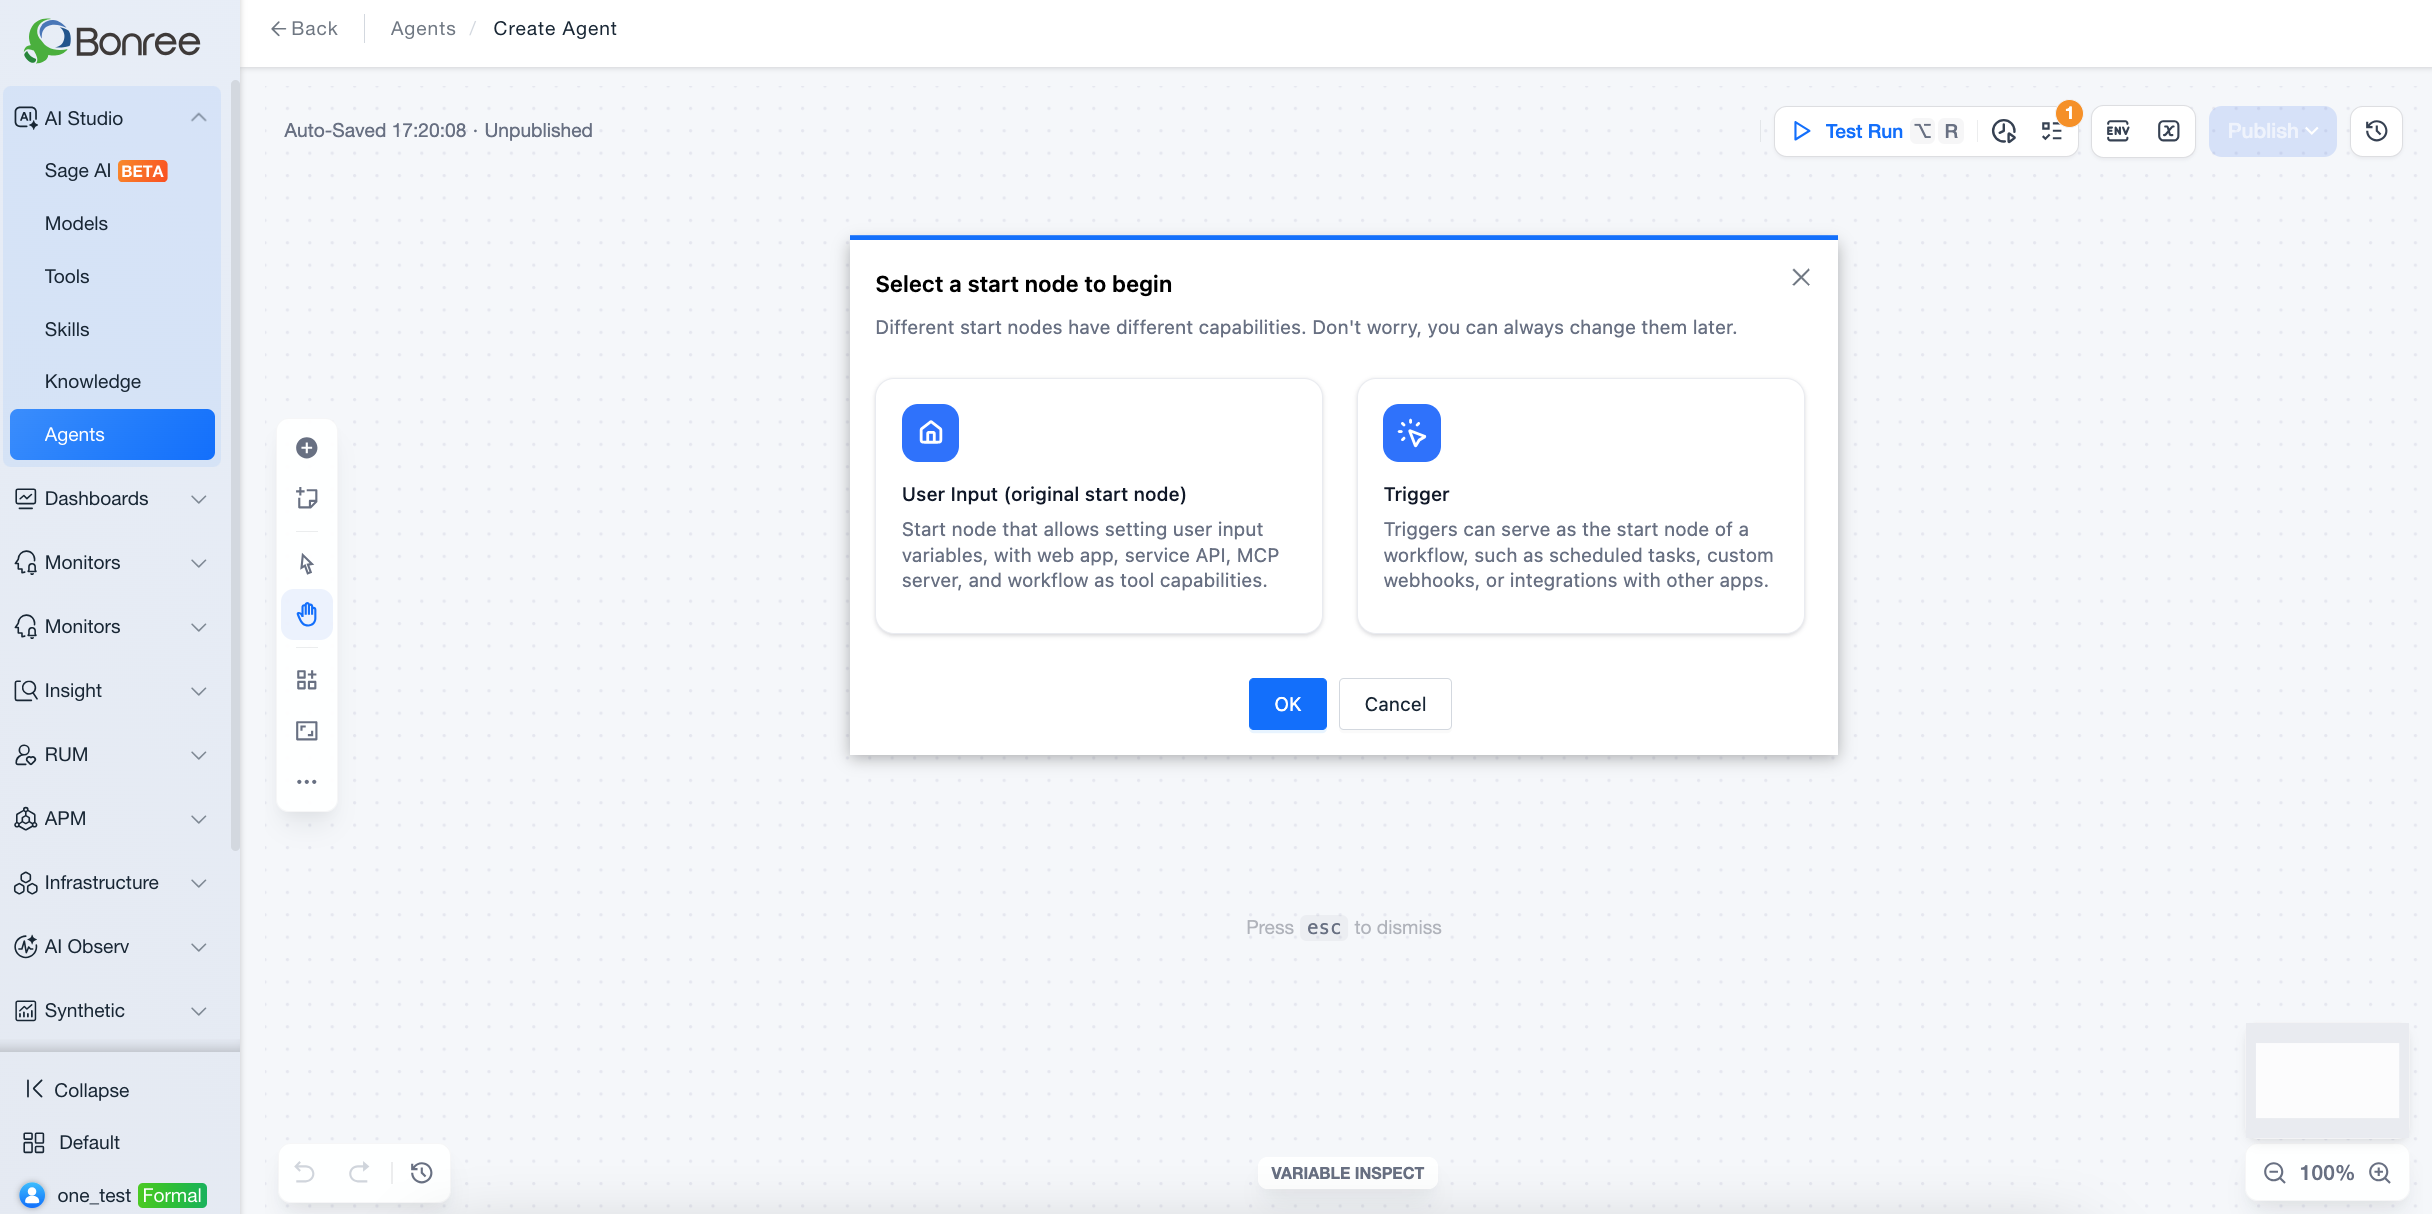
In the Step 2 workflow canvas, orchestrate execution steps, conditional branches, and tool invocation sequences through visual node editing.
You can choose "Import" mode to upload an existing workflow file, or "Custom" mode to build the workflow manually on the canvas.
A "Publish" button is provided in the top-right corner of the workflow canvas. Click it to publish directly once the configuration is complete.
Autonomous Decision Agent
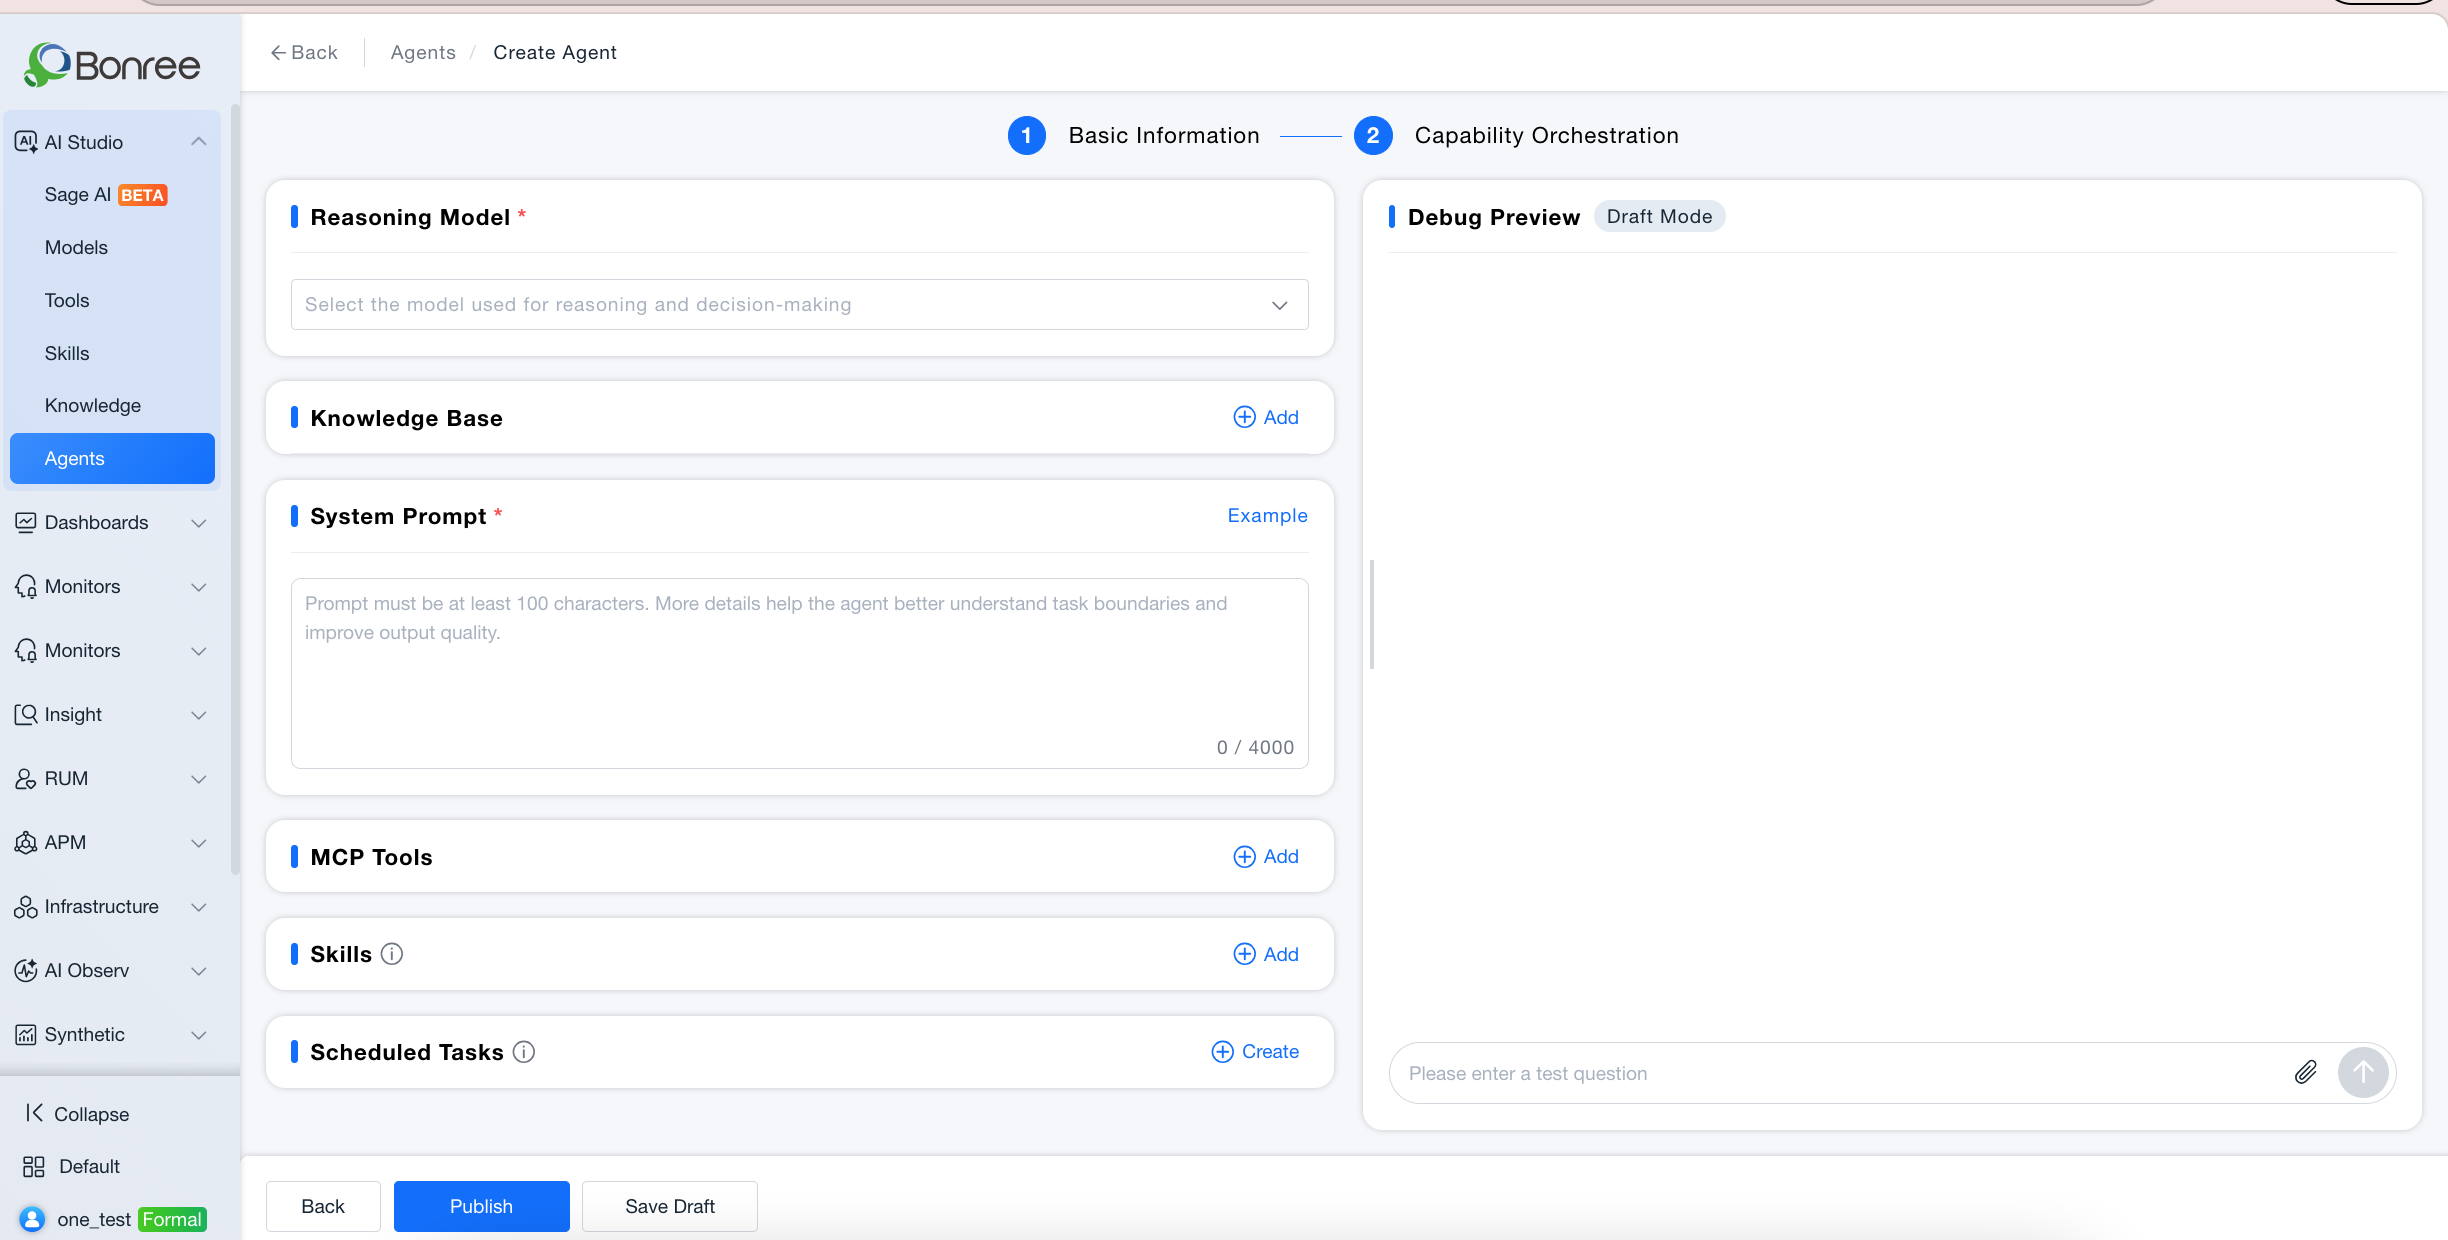
Step 2 uses a left-right split layout: the left side is for orchestration configuration, the right side provides a real-time debug preview.
Left-side configuration items include: reasoning model selection, associated knowledge base, system prompt (AI-generated draft available), MCP tools, and Skills available for invocation.
Right-side debug area: enter a test question and send it to simulate the Agent's execution and verify the configuration. The top of the debug window is labeled "⚠ Draft Mode" to indicate the Agent is not yet published.
Once satisfied with the debugging results, click "Publish Agent" at the bottom to officially publish.
Cloning an Agent
On the Agent list page, hover over the target Agent card and click the "Clone" button.
The system automatically enters Step 1 with all configuration from the source Agent pre-filled.
Modify the fields that need to be changed (the build mode cannot be modified), then publish as a new user-built Agent.
The cloned Agent has a source of "User-built" and an initial status of "Draft". It must be manually published before it can be invoked.