Install SmartAgent on Linux as a Non-root User
Overview
This document describes how to install SmartAgent on a Linux system as a non-root user.
Key characteristics of this installation method:
- No
rootprivileges required - Only monitors applications started by the current user
- Limited functionality, suitable for restricted environments or quick trials
If you have root privileges, it is recommended to use the Linux (root) Installation for full functionality.
Prerequisites
Before installation, make sure the following conditions are met:
- Network access to the
SmartAgentdownload source - Required system tools are installed (e.g.,
wget,tar) - Technology Support Matrix
- Host Resource Requirements
Limitations
Supported since version 7.2.0:
-
Supported on Linux (x86, x64, aarch64) only
-
Does not support multiple non-root agents on the same host
-
Cannot coexist with a root-installed
SmartAgent -
Does not support monitoring containerized applications
-
Does not support collecting container-related metrics
-
Does not support auto-start on boot
-
Does not support enabling user data isolation (
--enable-user-data-isolation) -
Does not support monitoring applications with privilege bits (setuid / any capabilities)
Example:
# nginx with setuid enabled
ls -l $(which nginx)
-rwsr-sr-x 1 root root 1338032 Jun 28  2023 /usr/sbin/nginx

# application with capabilities
getcap $(which nginx)
/usr/sbin/nginx = cap_net_bind_service+eip
Installation & Upgrade
-
Log in to the
Bonree ONEplatform, go to Configuration > Agent Installation, and select Host Mode as the deployment mode.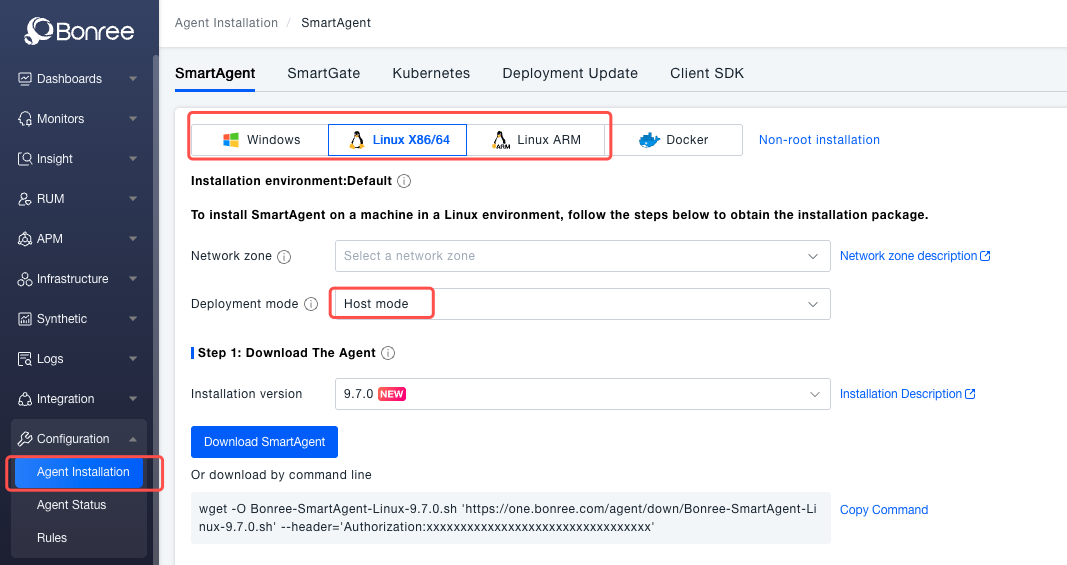
-
Download the latest
SmartAgent-Linuxinstallation package for your CPU architecture:wget -O Bonree-SmartAgent-Linux-<version>.sh \
'https://one.bonree.com/agent/down/Bonree-SmartAgent-Linux-<version>.sh' \
--header='Authorization:<token>' -
Run the installation command with the necessary parameters (detailed installation parameters):
infoNon-root installation requires the --force parameter.
/bin/sh Bonree-SmartAgent-Linux-<version>.sh config \
  -a "<accountGUID>" \
  -u "https://oneupload.bonree.com/APM" \
  -t "java,php,go,dotnet" \
  --set-env-id "default" \
  --force
-
Re-login to the
shellor run the following command to configure the current session and auto-inject required environment variables:source $HOME/.smartagent/conf/setup.sh -
Example: restart the application to be monitored.
warningAfter first installation, if the target application is managed by another process manager, you must restart that manager.
It is recommended to check if environment variables are active after restarting the shell session.nohup java -jar demo.jar &
Uninstallation
bash $HOME/bonree/apm/scripts/uninstall.sh
After uninstallation, do not immediately delete the agent directory until all monitored applications or containers have been restarted, otherwise business issues may occur.
Service Management (executed by install user)
# Check status
$HOME/bonree/apm/scripts/bonree-agent.sh status

# Stop the agent
$HOME/bonree/apm/scripts/bonree-agent.sh stop

# Restart the agent
$HOME/bonree/apm/scripts/bonree-agent.sh restart
About Auto-injection
Environment Configuration
- During installation,
$HOME/.bashrcor$HOME/.bash_profilewill be modified - If
.bashrcor.bash_profileexists, the following line will be appended:source $HOME/.smartagent/conf/setup.sh 2>/dev/null - Other files may be modified depending on system and user configuration
Check if Auto-injection Works
env | grep LD_PRELOAD
If the output contains LD_PRELOAD with the correct path, it is effective.
If not, add the following line at the beginning of your application startup script:
source $HOME/.smartagent/conf/setup.sh
[username@myhost ~]$ env | grep LD_PRELOAD
LD_PRELOAD=/home/lll/bonree/apm/$LIB/libagentloader.so
Limitations
- By default, only monitors applications started by the current user
Cross-user Support
- Create a dedicated agent user (e.g.,
bonreeapm) and ensure every directory in the access path (for example,/homeand/home/bonreeapm) has755permissions - Install the agent under that user
- Add the following line to other monitored users’
.bashrcor.bash_profile:
source /home/{probe-user-dir}/.smartagent/conf/setup.sh 2>/dev/null
- Re-login and restart applications to be monitored
Starting from version 10.0.2, permissions for the logs/* and cache/* directories changed from 777 to 775. Therefore, when the application runtime user group differs from the agent user group, some features, such as memory dump and Profiling, may not work properly.
To support monitoring across user groups, manually change the permissions of the directories above,
as well as cache/java/dump and /home/{probe-user-dir}/.smartagent/tmp, to 777
in the agent installation directory:
chmod 777 logs/*
chmod 777 cache/*
chmod 777 cache/java/dump
chmod 777 /home/{probe-user-dir}/.smartagent/tmp