Agent Fuse
Agent Fuse is a critical feature within the ONE platform designed to ensure system stability. When matching rules take effect, the Agent Fuse mechanism is triggered: the agent stops data collection and resumes it only after resources are released. This functionality effectively prevents system failures caused by issues like excessive resource consumption, ensuring smooth business operations and enhancing system reliability and stability.
Prerequisites
Ensure that the agent is deployed correctly and data transmission between the agent and the platform is smooth. You must be able to access the Agent Fuse system interface and possess the corresponding operational permissions.
Use Cases
During the operation of enterprise business systems, when the utilization of resources such as hosts or applications (e.g., CPU, memory) reaches certain thresholds and may impact normal system operation, the Agent Fuse feature becomes effective. For example, in high-concurrency business scenarios, if the host CPU usage or memory usage for a Java application becomes too high, triggering Agent Fuse rules, data collection will stop to prevent system crash due to resource exhaustion. Once resource pressure eases, the agent resumes data collection, ensuring normal business operations.

Getting Started
Navigate to Deployment Configuration → Deployment Status → Agent Fuse from the system navigation bar to open the Agent Fuse management interface.
Agent Fuse Toggle
At the top of the interface is the "Agent Fuse" toggle. Click it to enable or disable the Agent Fuse functionality. When enabled, the Agent Fuse mechanism triggers upon matching rule conditions; when disabled, it will not trigger.

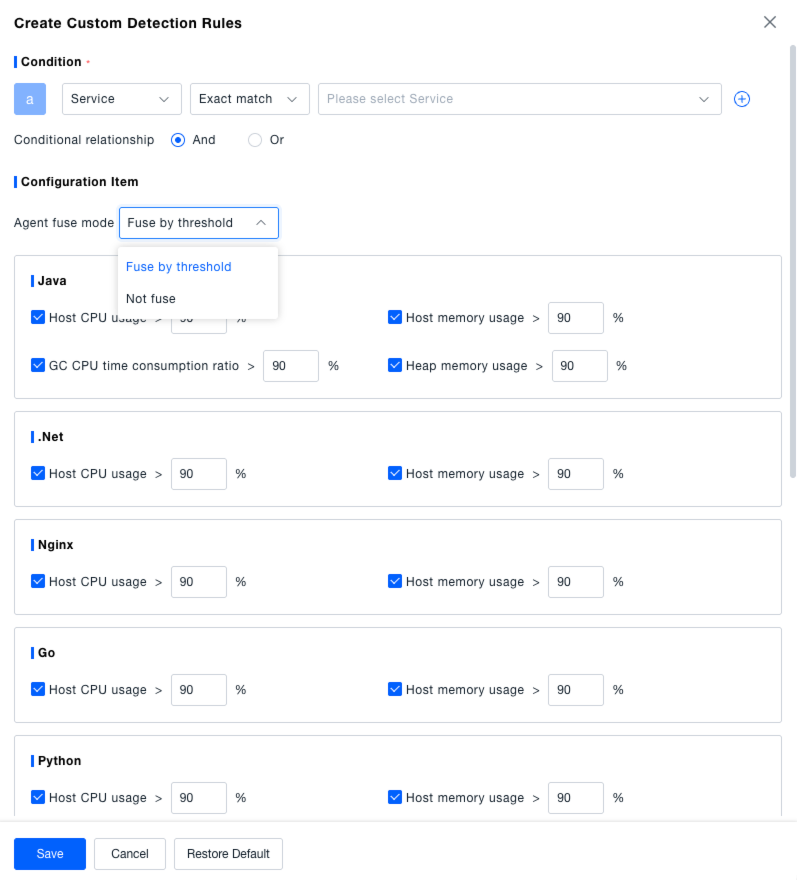
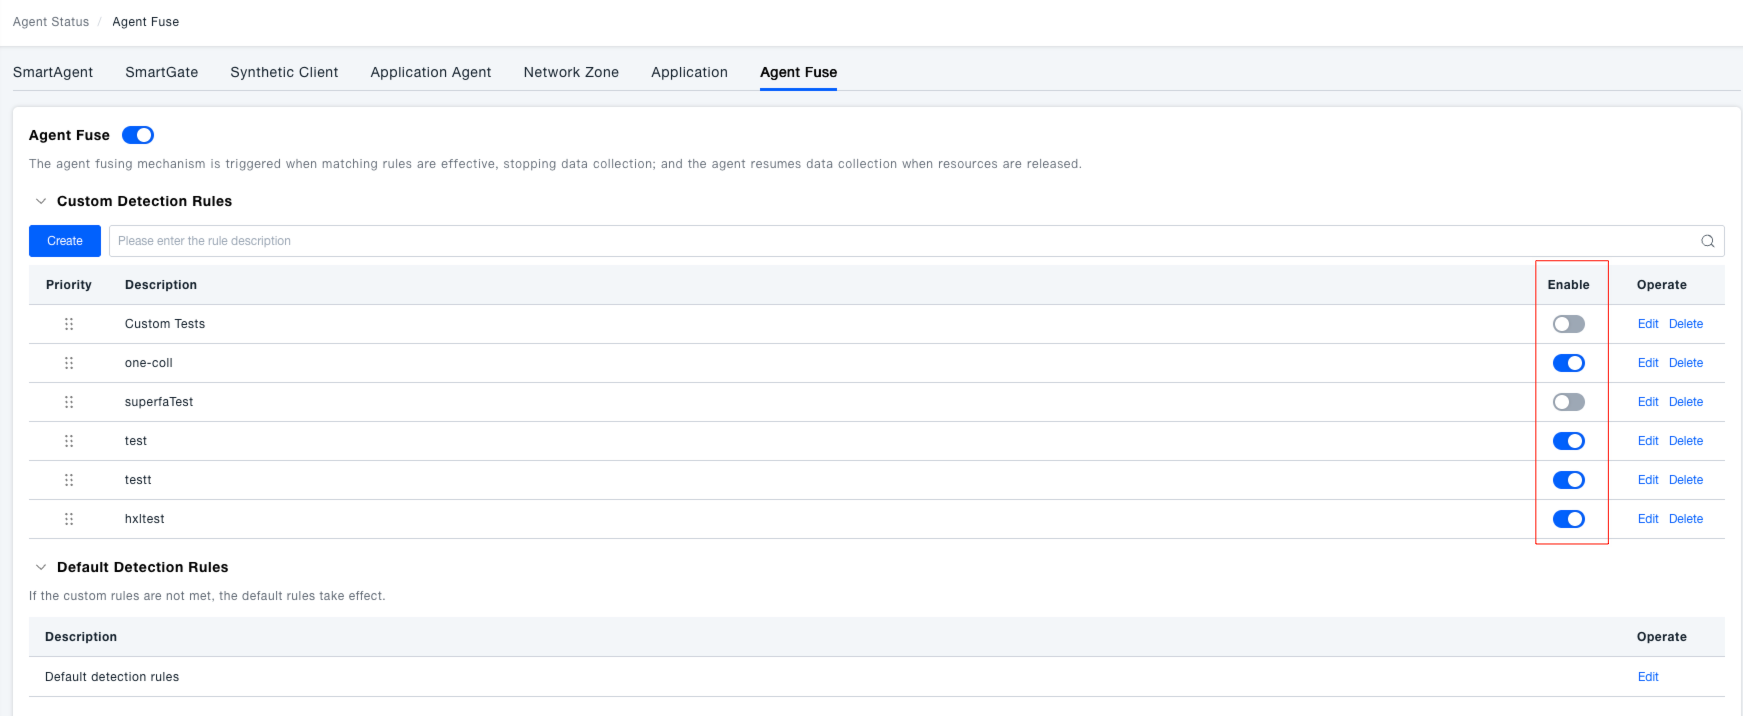
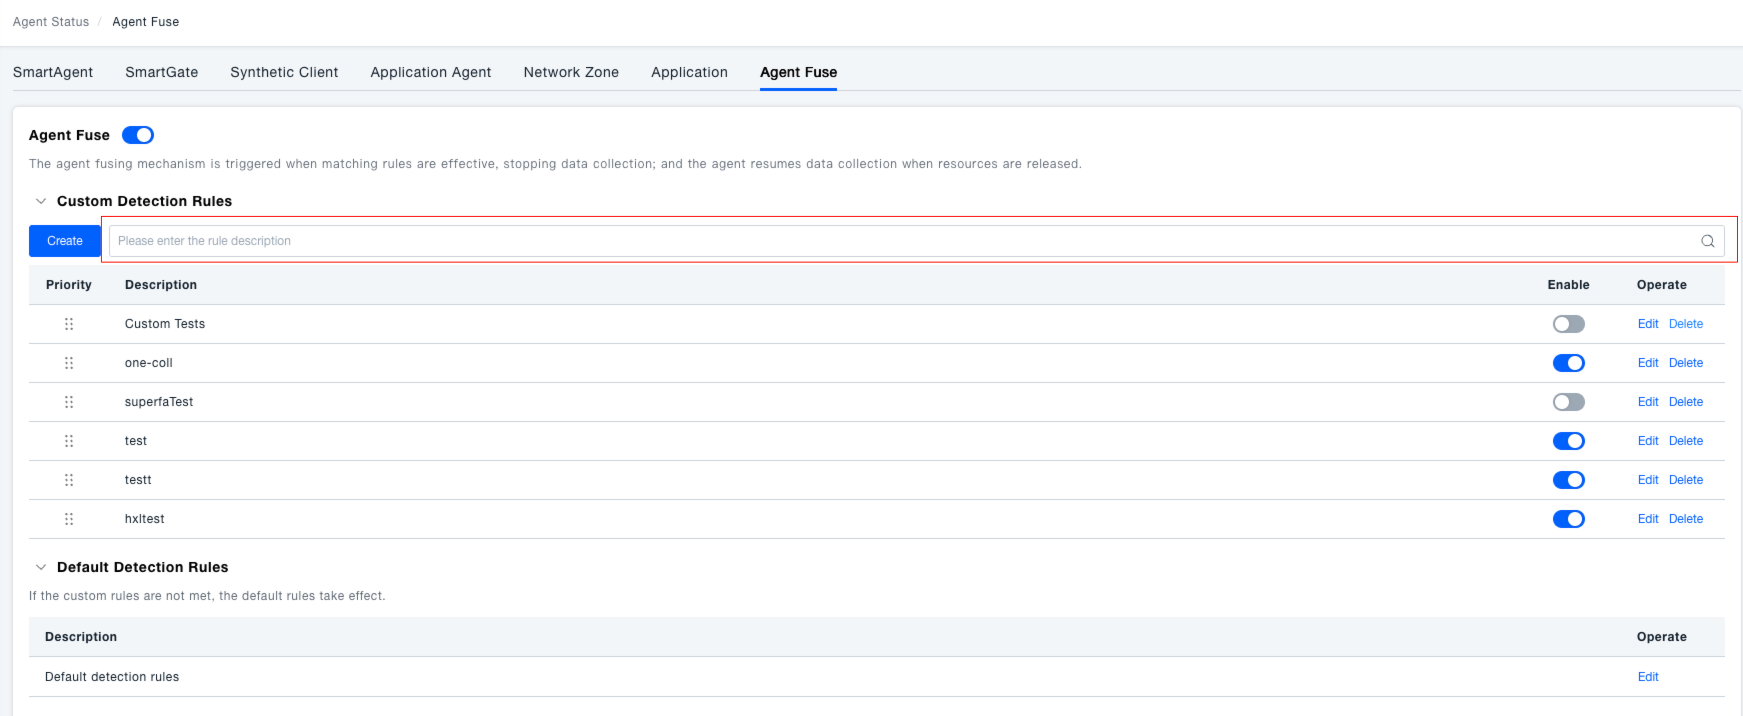
Custom Detection Rules
Create Rule: Click the "Create" button in the "Custom Detection Rules" section to add a new custom detection rule.
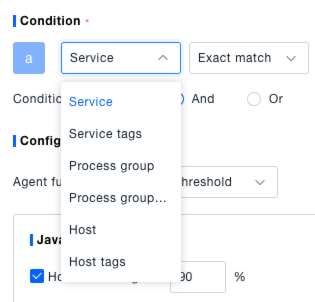
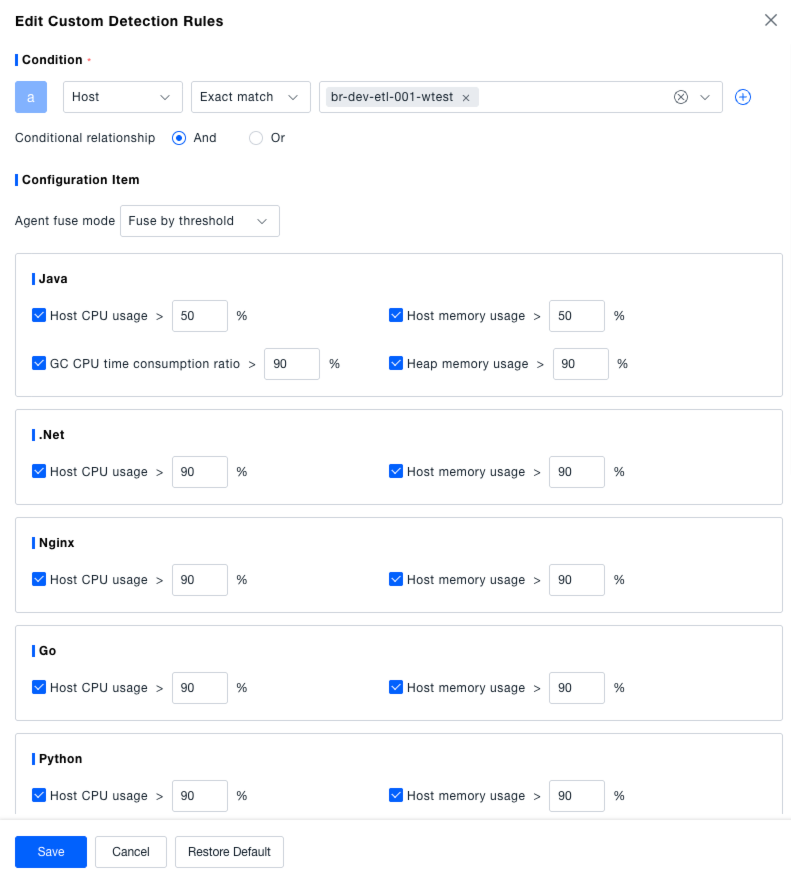
- Set Conditions: In the "Condition" section of the pop-up window, select the condition type, including Service, Service Tag, Process Group, Process Group Tag, Host, Host Tag, etc. After selection, you can set the matching method (e.g., exact match) and specify the target object (e.g., a specific service name, host). Use the "+" button to add multiple conditions. The logical relationship between conditions can be set to "AND" or "OR".
- Configure Fuse Mode: In the "Configuration" section, select the Agent Fuse mode. The options are "Fuse by Threshold" and "Do Not Fuse". If "Fuse by Threshold" is selected, you must set the corresponding resource usage thresholds (e.g., Host CPU Usage, Memory Usage) for different technology stacks such as Java, .Net, Nginx, Go, Python, PHP, Node.js, C/C++, Apache.
- Add Rule Description: Enter a description for the rule in the "Description" field for easy identification later.
- Save Rule: After configuration, click the "Save" button to save the rule. Click "Cancel" to discard changes, or click "Restore Defaults" to revert to default settings.

Edit Rule: In the custom detection rules list, click the "Edit" button in the Actions column for the corresponding rule. This opens the "Edit Custom Detection Rule" window where you can modify conditions, fuse mode, thresholds, description, etc. Click "Save" after making changes.
Enable/Disable Rule: In the custom detection rules list, use the "Enable" toggle switch to activate or deactivate the corresponding rule.
Delete Rule: Click the "Delete" button in the Actions column of a rule to remove the corresponding custom detection rule.

Search Rules: In the search box within the "Custom Detection Rules" section, enter the rule description to quickly search for target custom detection rules.
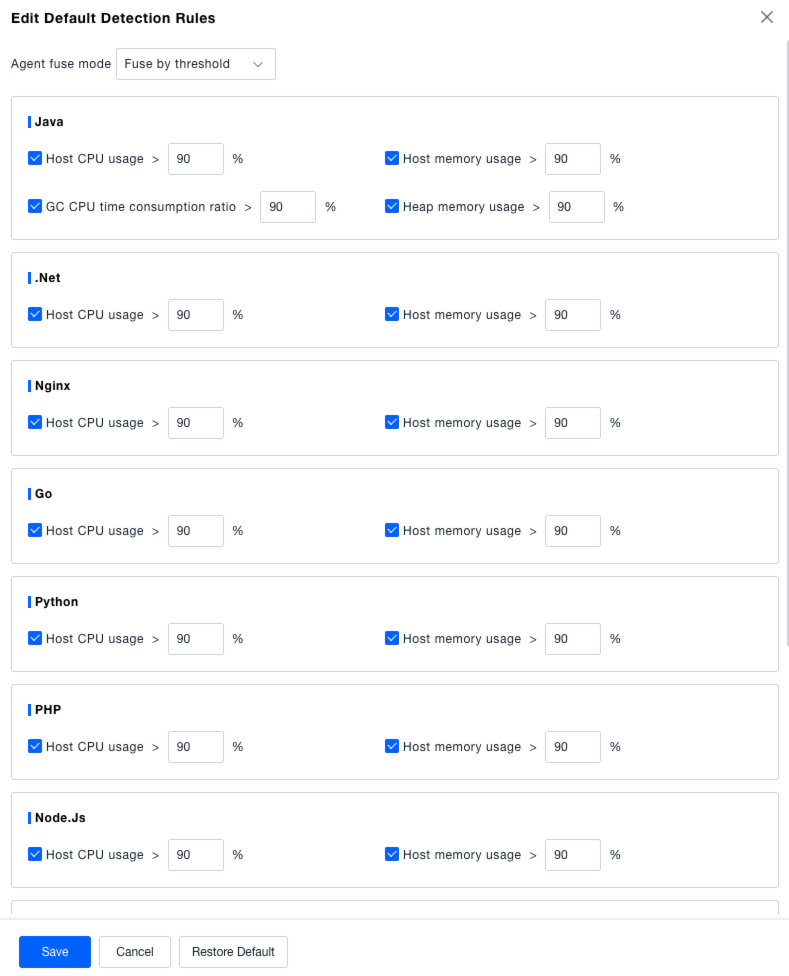
Default Detection Rules
If conditions do not match any custom rules, the default rules will take effect.
Click the "Edit" button in the "Default Detection Rules" section to open the "Edit Default Detection Rule" window. Here, you can select the Agent Fuse mode (e.g., "Fuse by Threshold") and set resource usage thresholds (e.g., Host CPU Usage, Memory Usage) for different technology stacks like Java, .Net, Nginx, Go, Python, PHP, Node.js, etc. After configuration, click the "Save" button. Click "Cancel" to discard changes, or click "Restore Defaults" to revert to default settings.