Container Monitoring Configuration
Configure monitoring and collection strategies for containers and Pods for service identification and deep monitoring at the call chain level. Supports manual creation, batch import, and export to meet efficient rule management needs in large-scale environments.
Core Capabilities
- Deep Monitoring Automatic Injection: Configure APM agent auto-injection for container technologies such as Containerd, CRI-O, Docker, and Podman to achieve process service identification and call chain deep monitoring.
- Pod Monitoring Rules: Precisely control which Pods need to be monitored based on conditions such as Kubernetes Cluster, Namespace, and Pod Name prefix, supporting monitoring of all or a limited number of Pods.
- Container Monitoring Rules: Define container monitoring or non-monitoring strategies based on multi-dimensional conditions such as container name, image name, and Kubernetes attributes.
- Batch Import / Export: Batch import rules through standard Excel templates to solve repeated configuration problems for a large number of rules; existing rules support one-click export for backup or migration.
Use Cases
Scenario 1: New environment initialization configuration. Connecting to a new Kubernetes cluster requires batch configuration of dozens of Pod monitoring rules. Download the template, fill it in, and directly import it to avoid manual creation one by one.
Scenario 2: Refined shielding of system Pods. Infrastructure Pods in system namespaces (such as kube-system and istio-system) do not require business monitoring. Configure container monitoring rules to set them as non-monitoring to reduce invalid data collection.
Scenario 3: Rule migration and backup. Export existing collection rules from the production environment as Excel for quick replication in new environments or as configuration baseline archiving.
Getting Started
Navigate to Deployment Configuration → Rule Configuration → Data Collection → Container to view the container collection rules page.
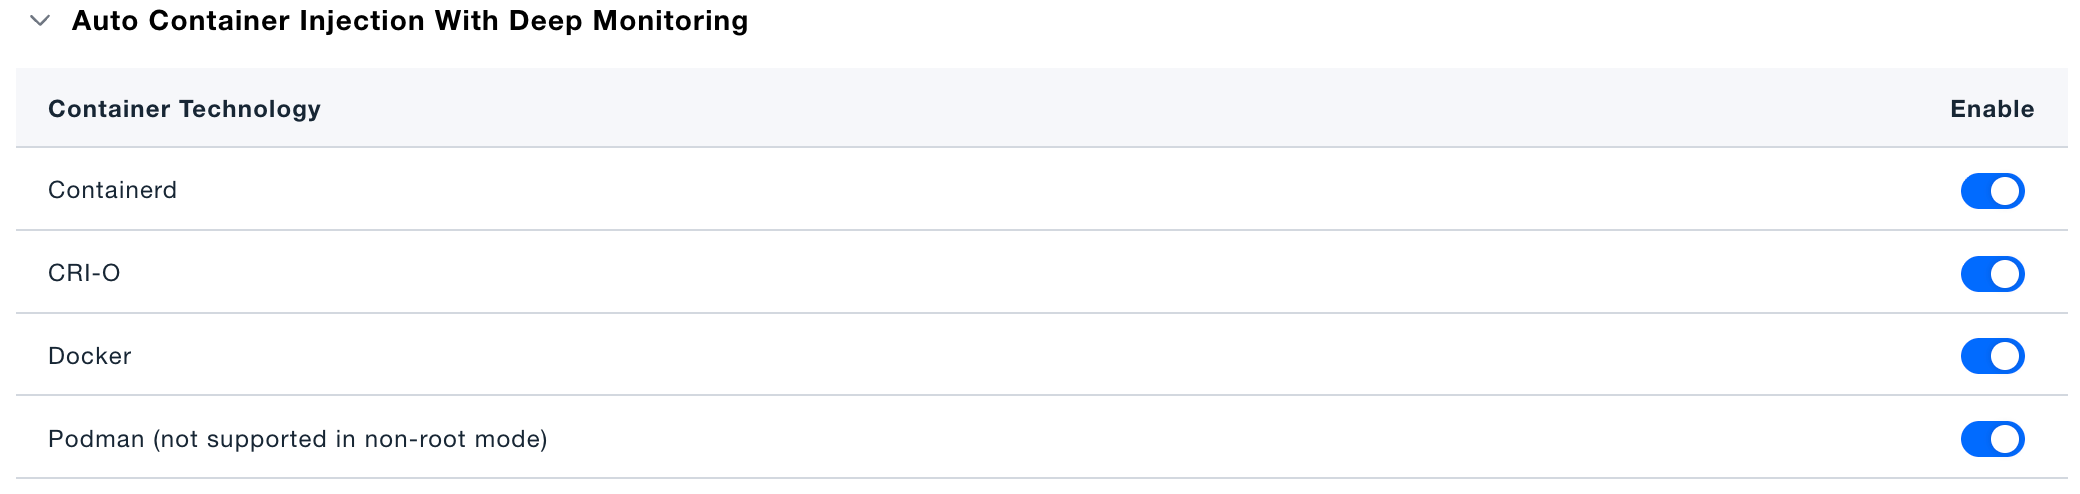
Automatic Container Injection for Deep Monitoring
The top of the page lists supported container technologies (Containerd, CRI-O, Docker, Podman). You can enable or disable APM agent auto-injection for each container technology one by one.
Podman does not support auto-injection in non-root mode.
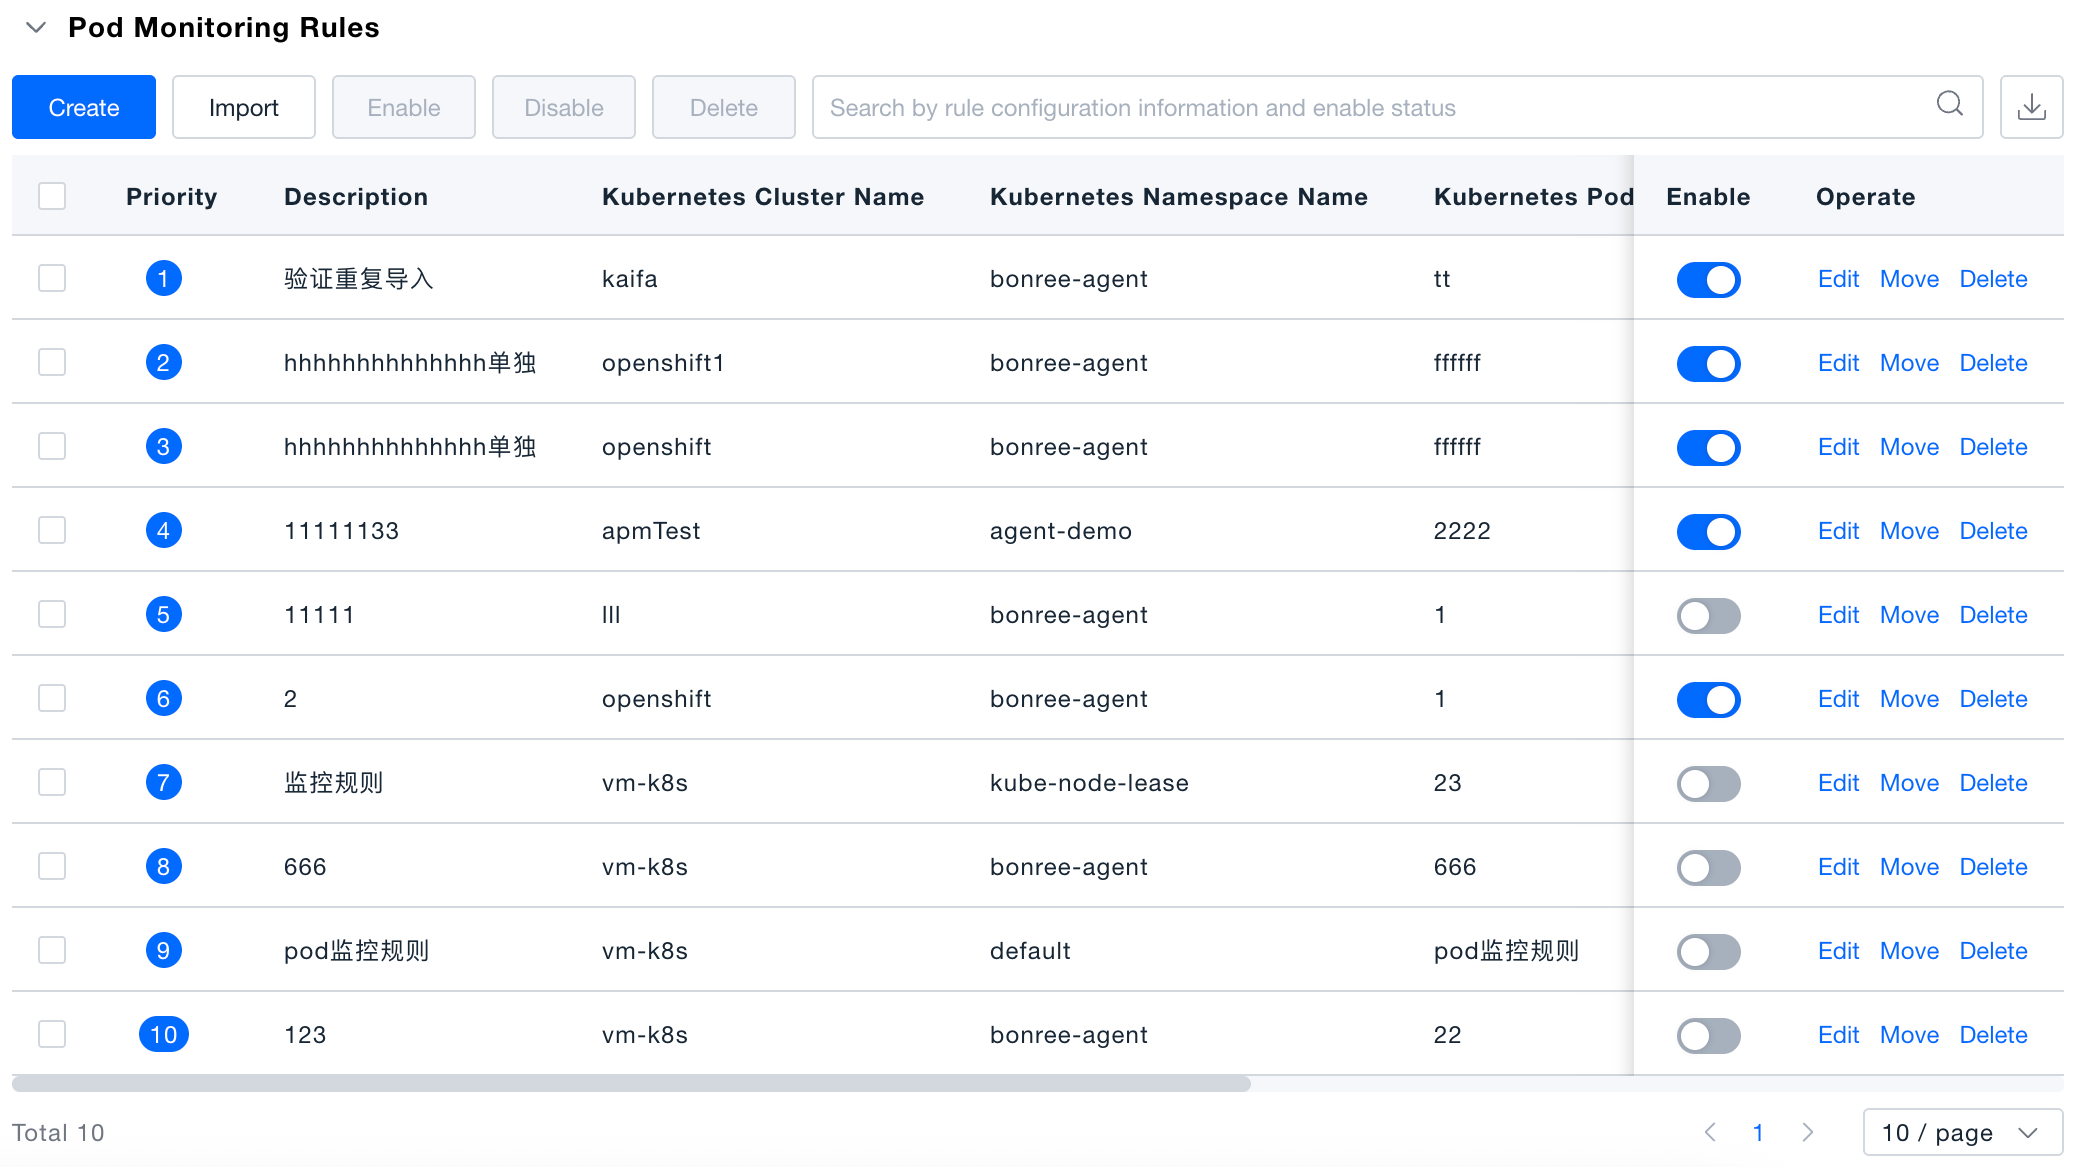
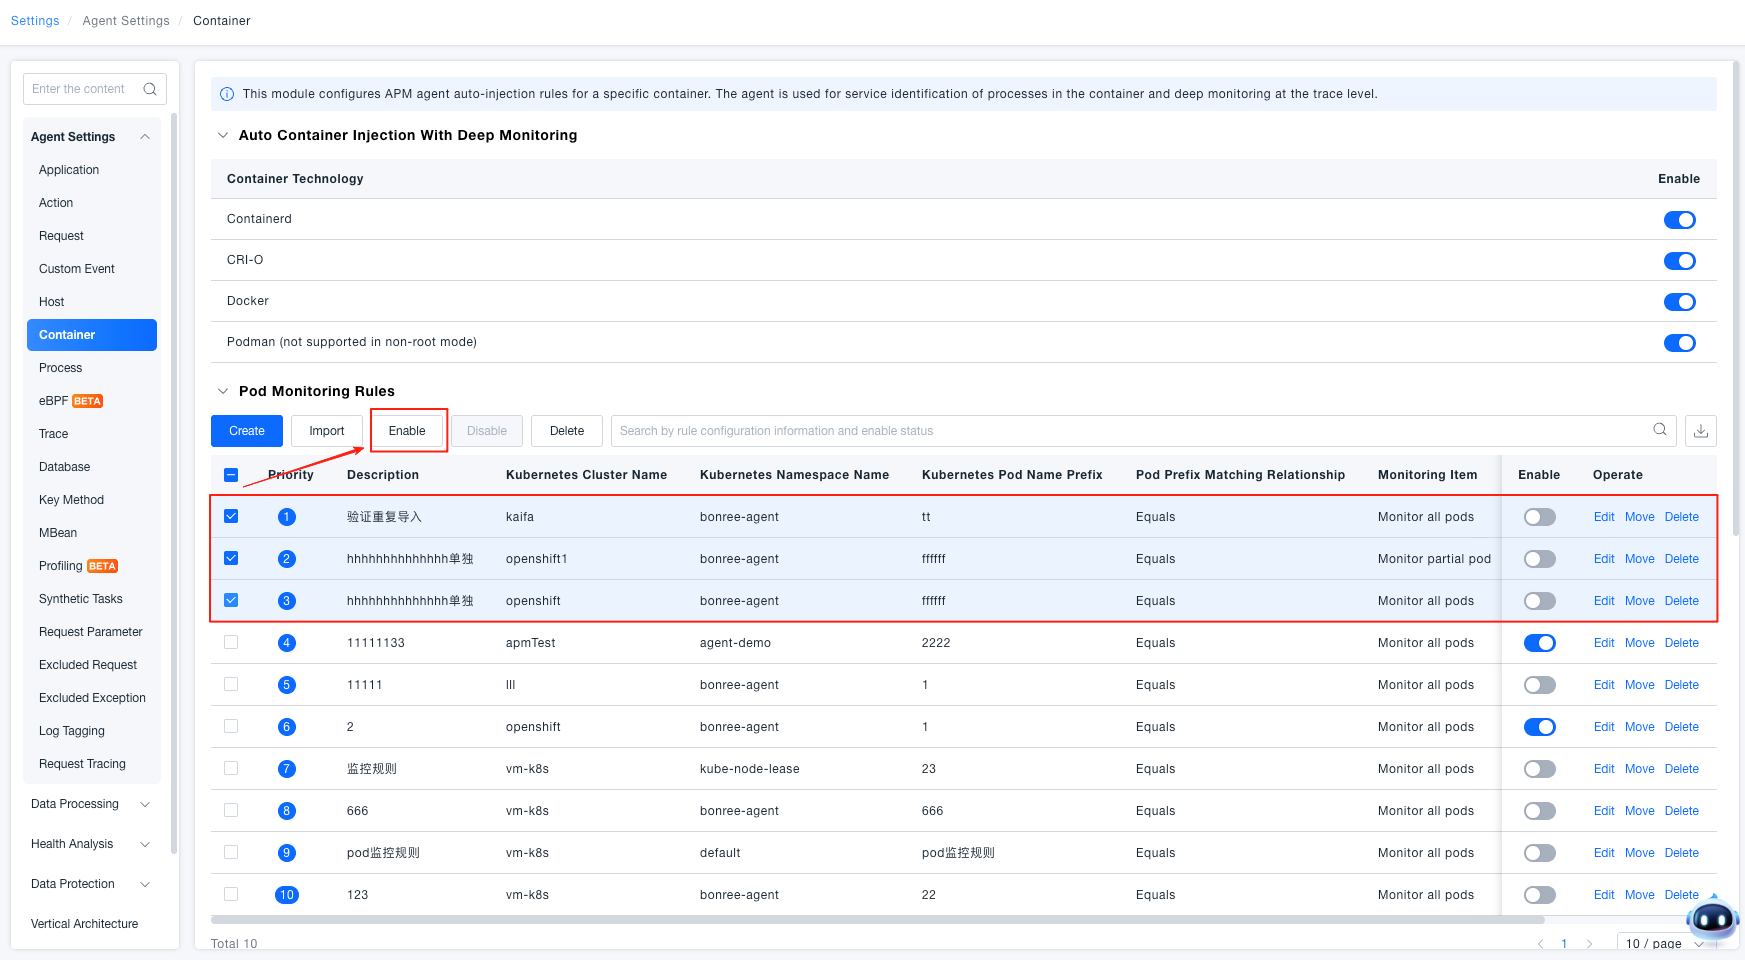
Pod Monitoring Rules
The rule list displays information such as priority, description, data center, Kubernetes Cluster Name, and Namespace Name of all configured rules, supporting search by rule configuration information and enablement status. The list is sorted by priority by default (smaller numbers indicate higher priority).
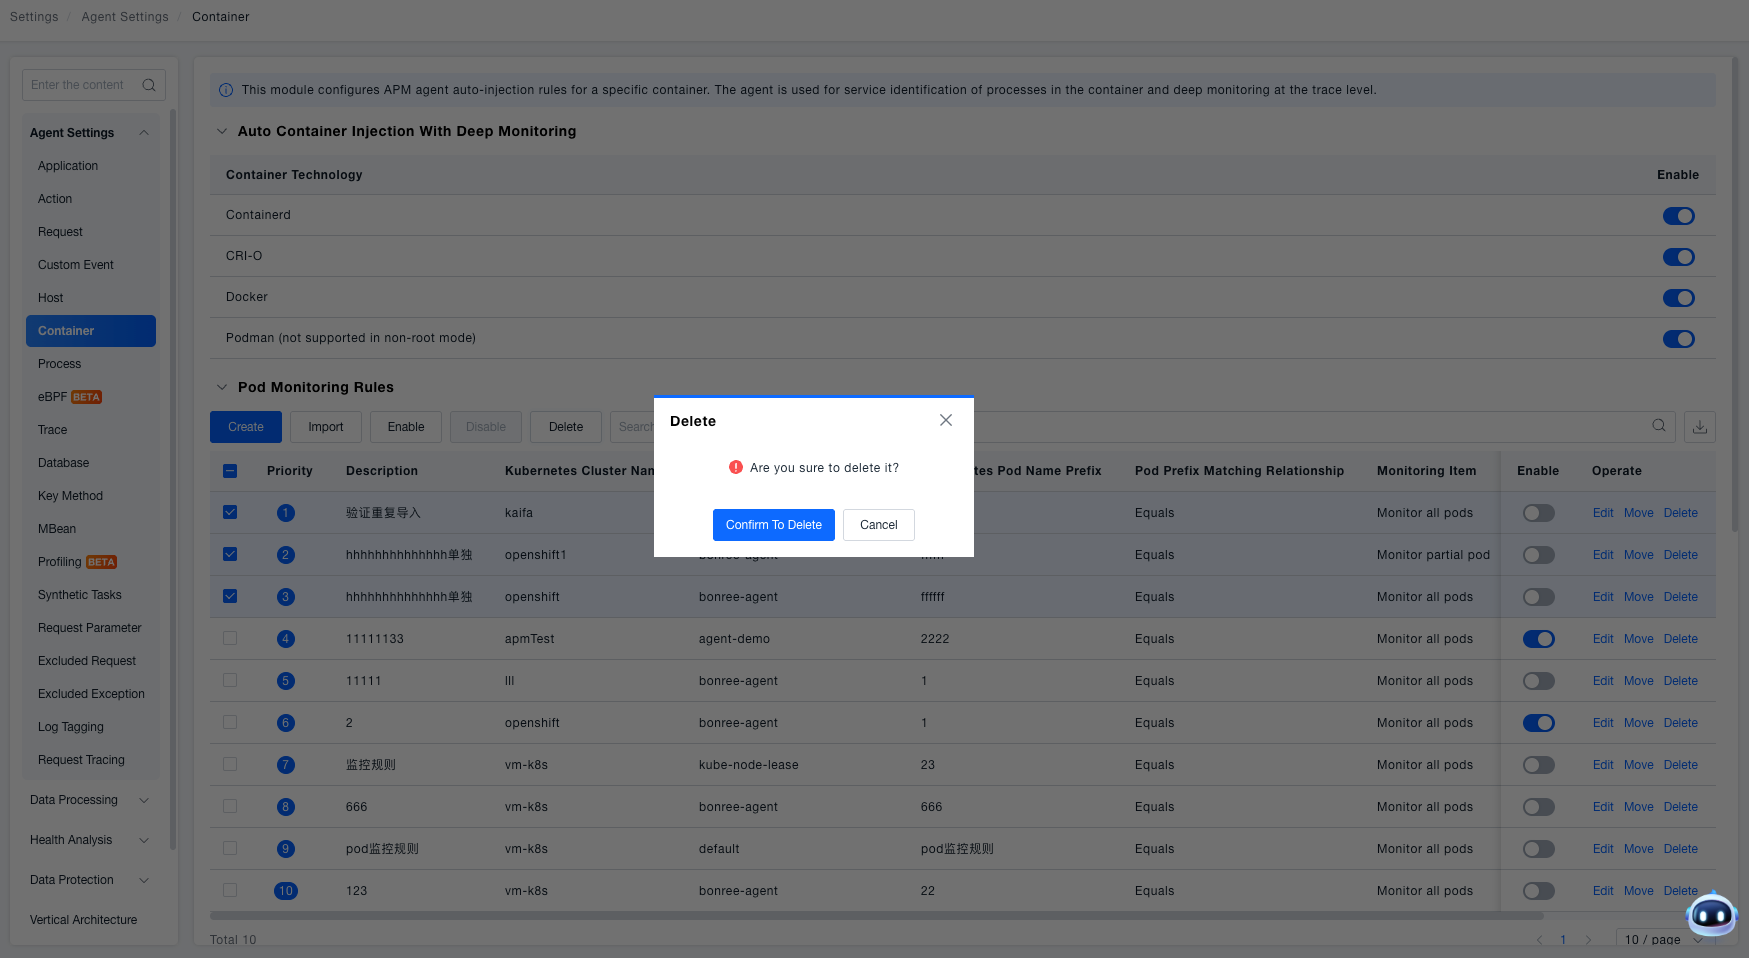
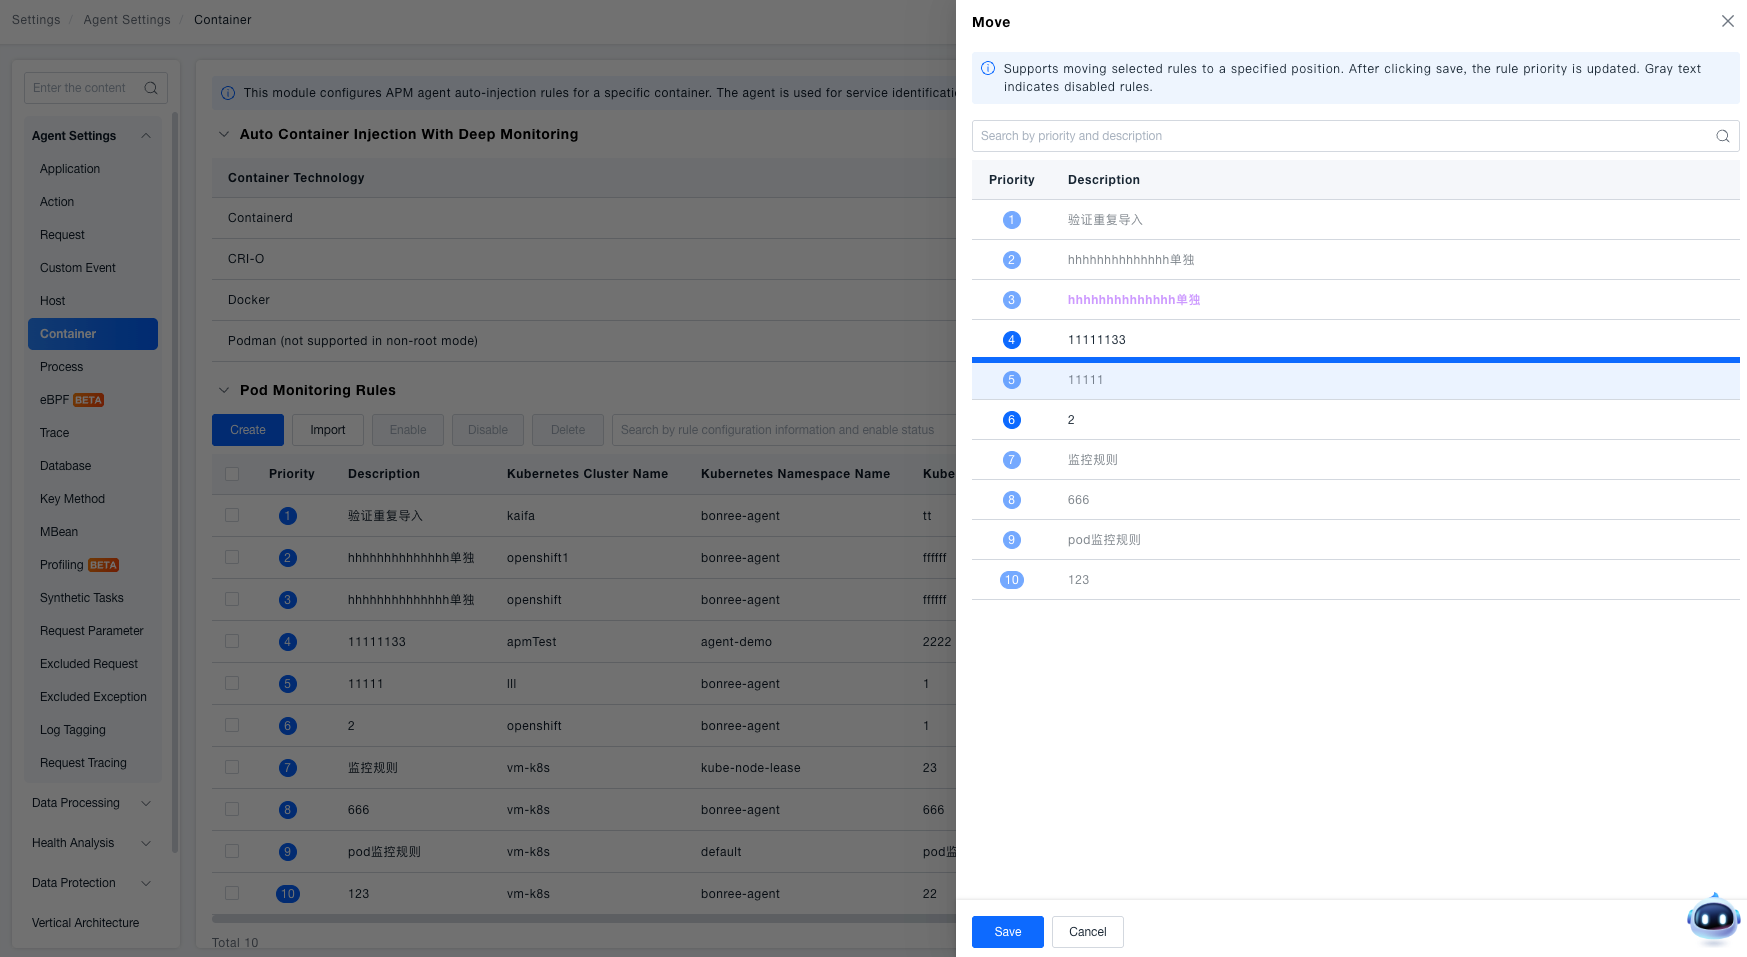
Batch Operations: After selecting multiple rules, you can perform batch enable, disable, and delete operations; you can manually adjust rule priority order through [Move].
Create Rule
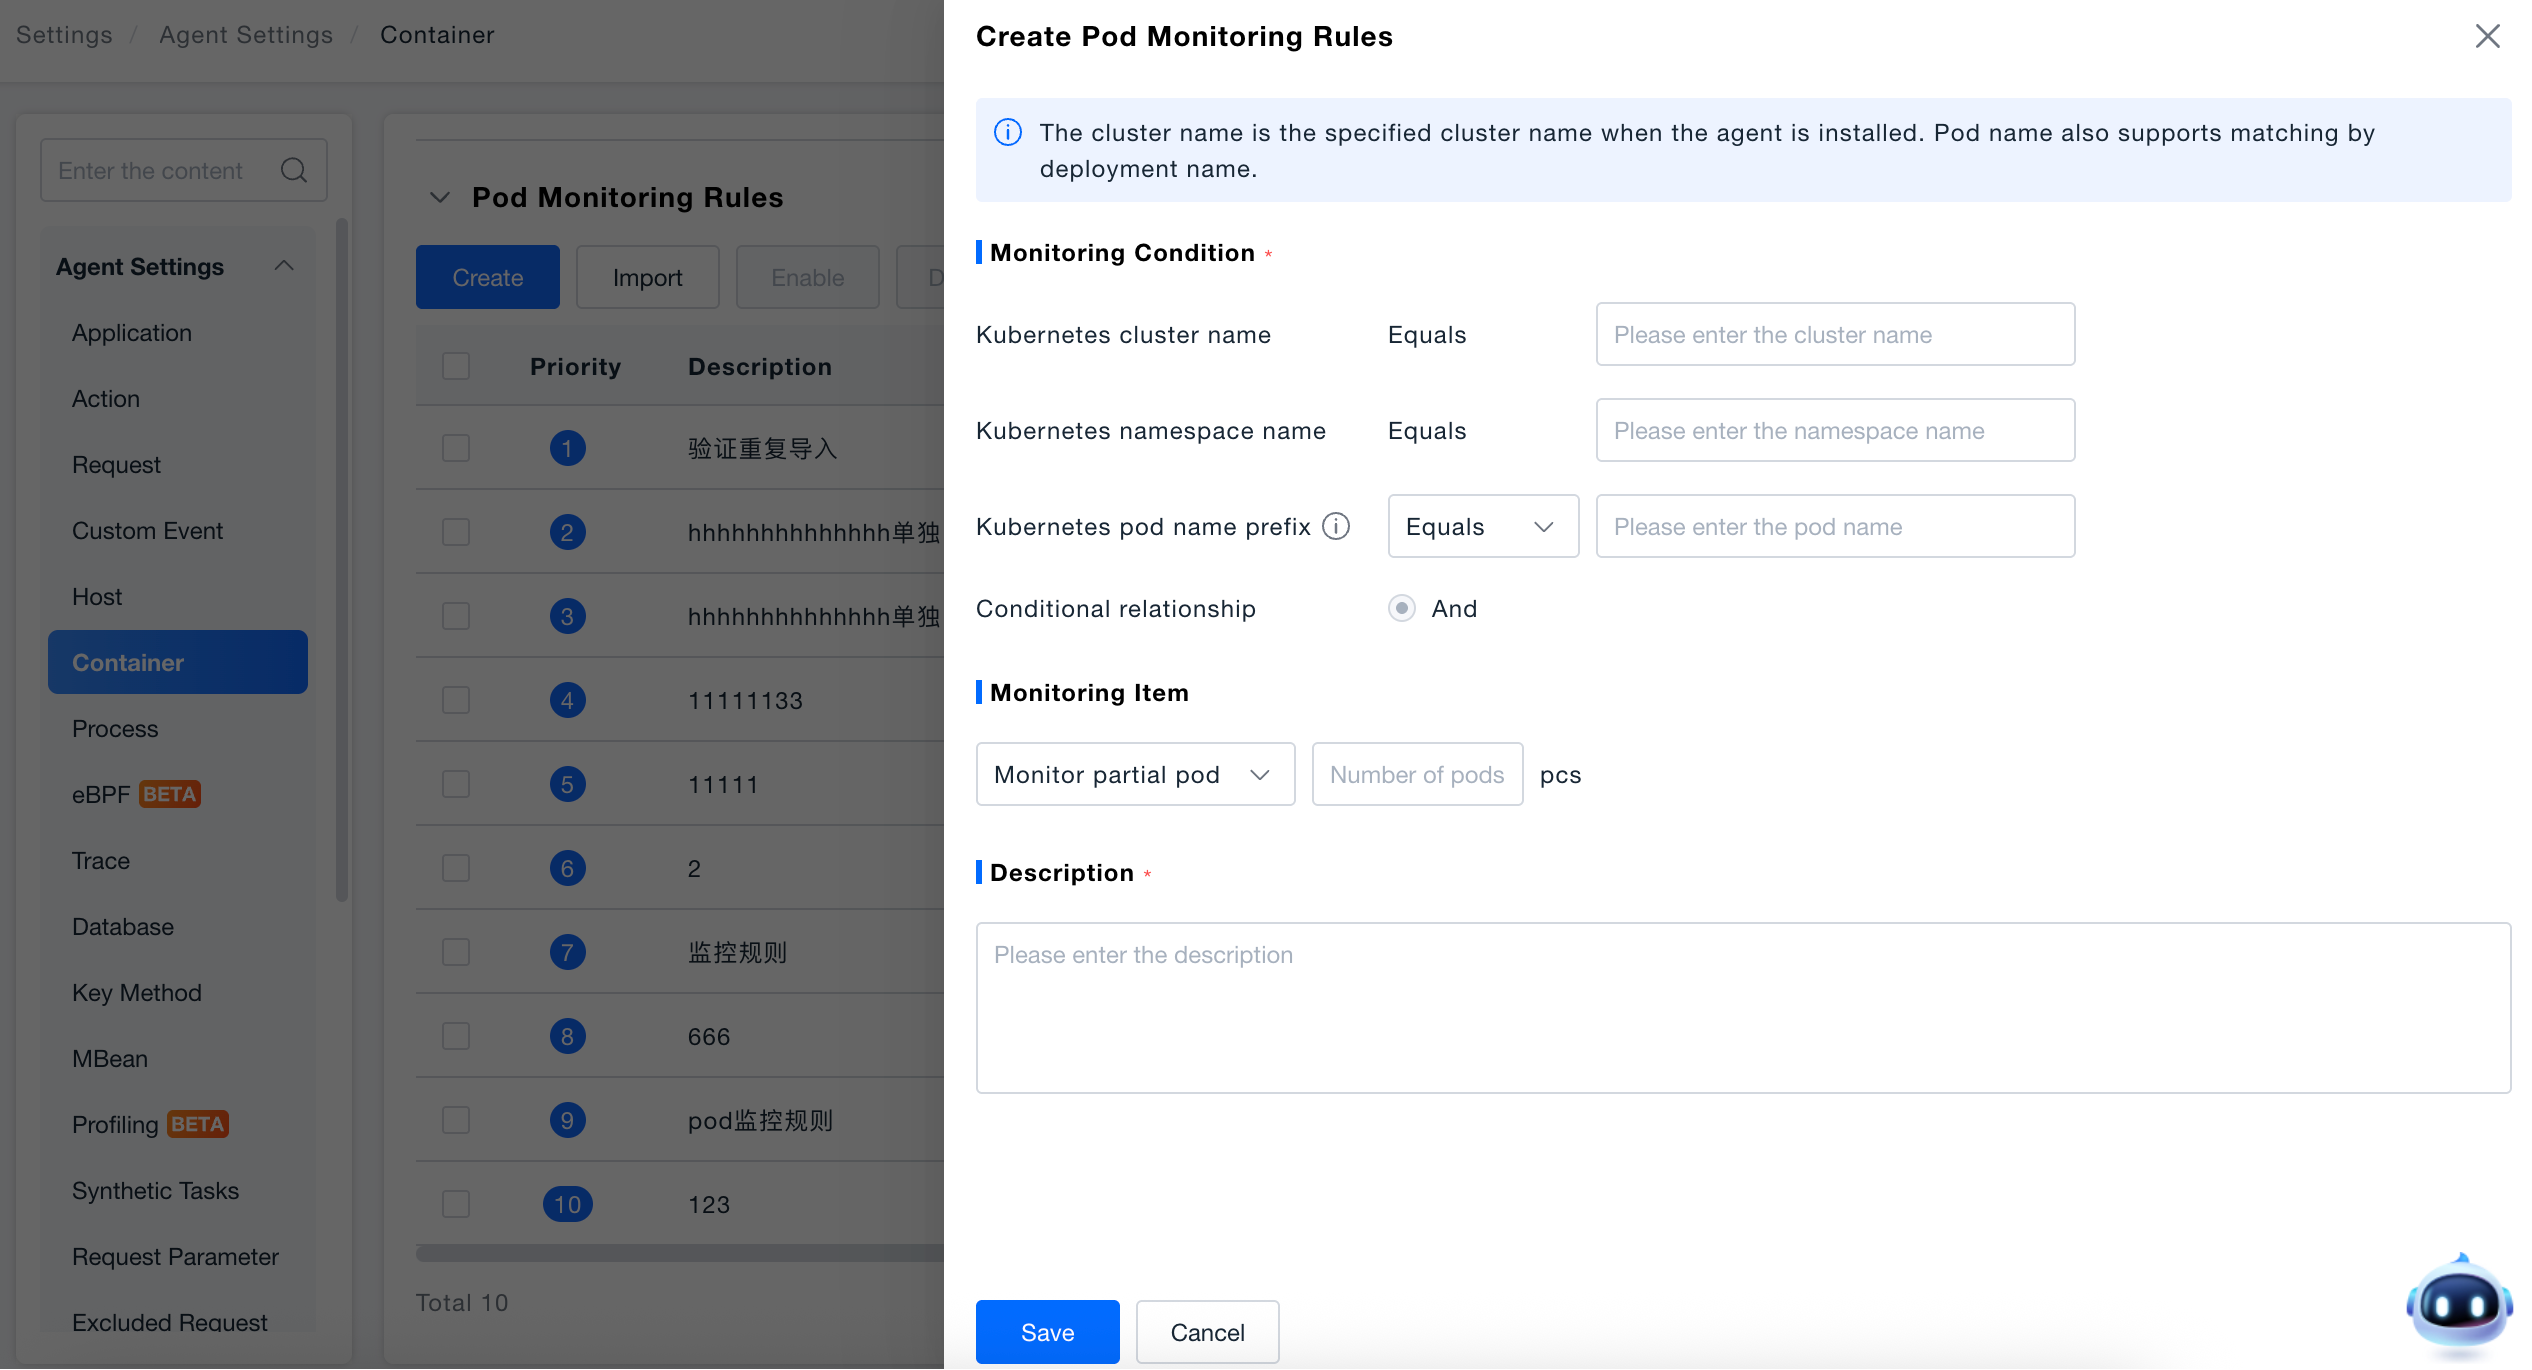
- Click [Create] to open the "Create Pod Monitoring Rule" panel.
- Fill in Monitoring Conditions:
Kubernetes cluster name: Equal to the specified cluster name (cluster name specified during agent installation).Kubernetes namespace name: Equal to the specified namespace.Kubernetes pod name prefix: Supports two matching methods: "Equal" or "Contain"; Pod Name also supports matching by Deployment name.Data Center: Select All, Main Center, or Secondary Center to determine the rule distribution scope.Condition Relationship: Multiple conditions use "AND" relationship.
- Set Monitoring Items: Select "Monitor All Pods" or "Monitor Some Pods" (the latter requires filling in the Pod quantity limit).
- Fill in Description (required) and click [Save].
Container Monitoring Rules
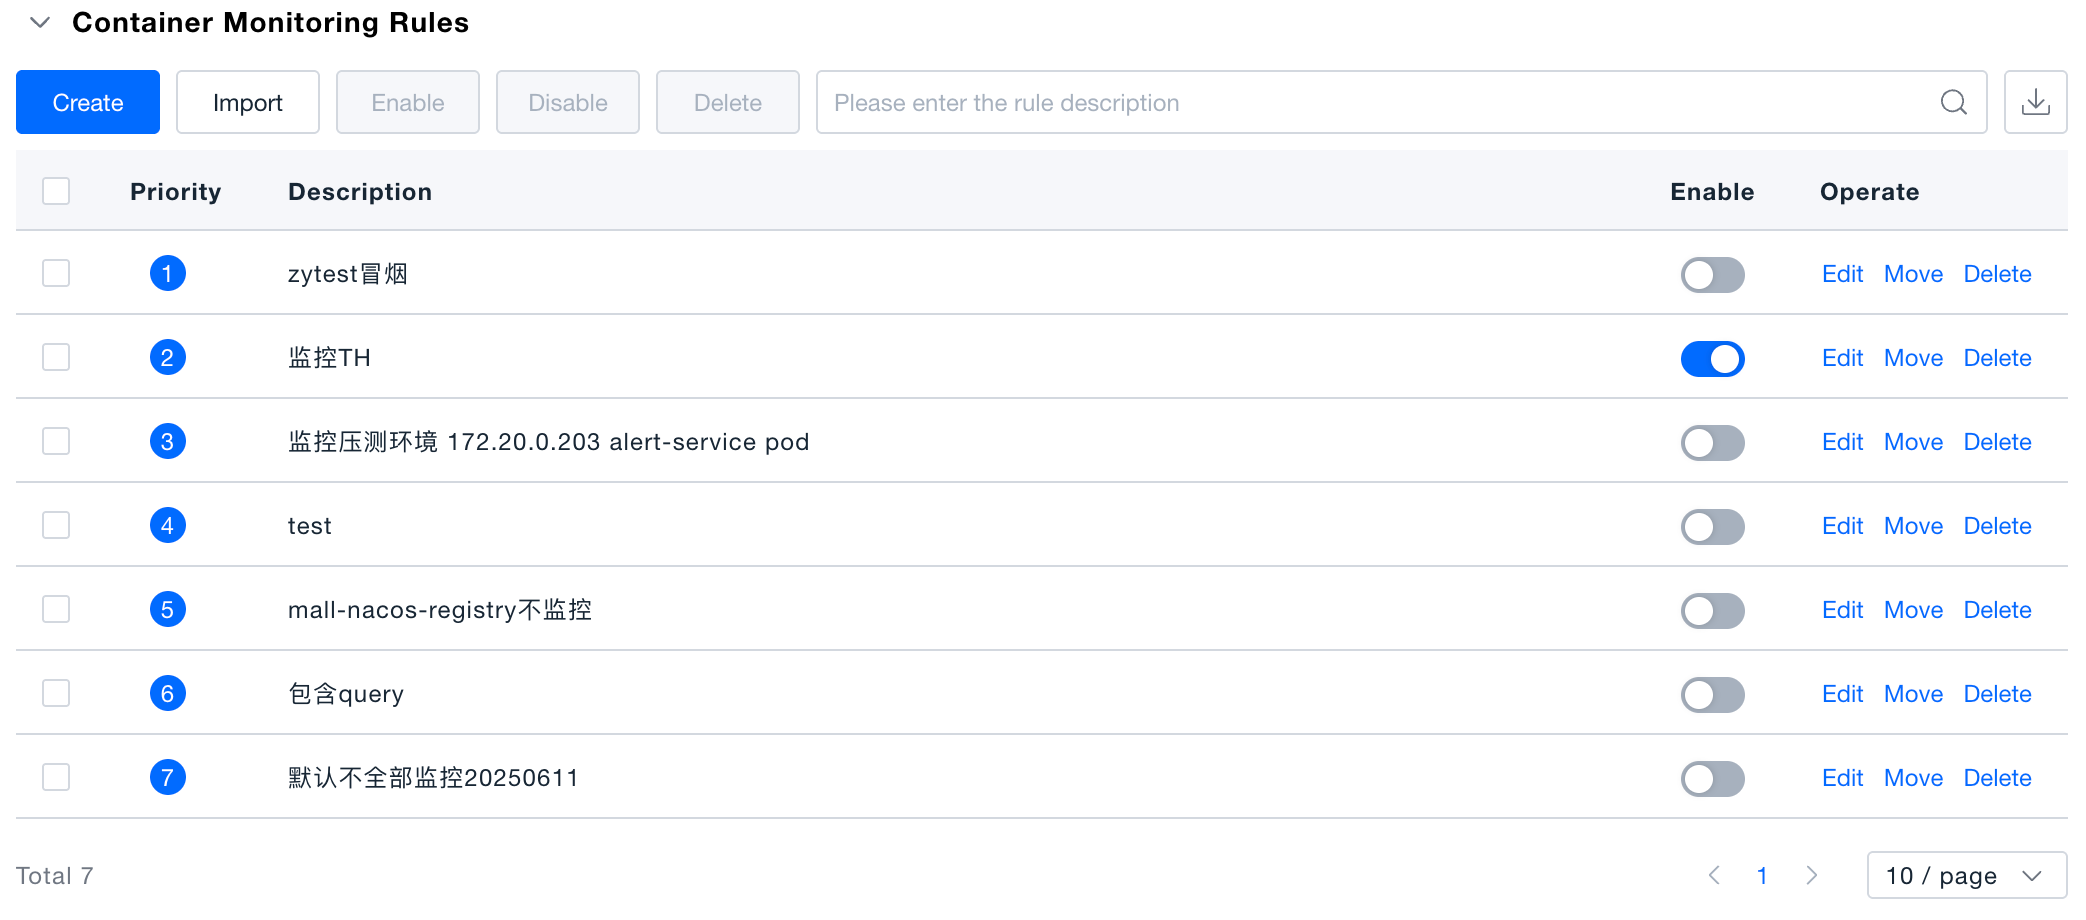
The rule list displays priority and description, supporting search by description keywords. The list is sorted by priority by default (smaller numbers indicate higher priority).
Batch Operations: After selecting multiple rules, you can perform batch enable, disable, and delete operations; you can manually adjust rule priority order through [Move].
Create Rule
-
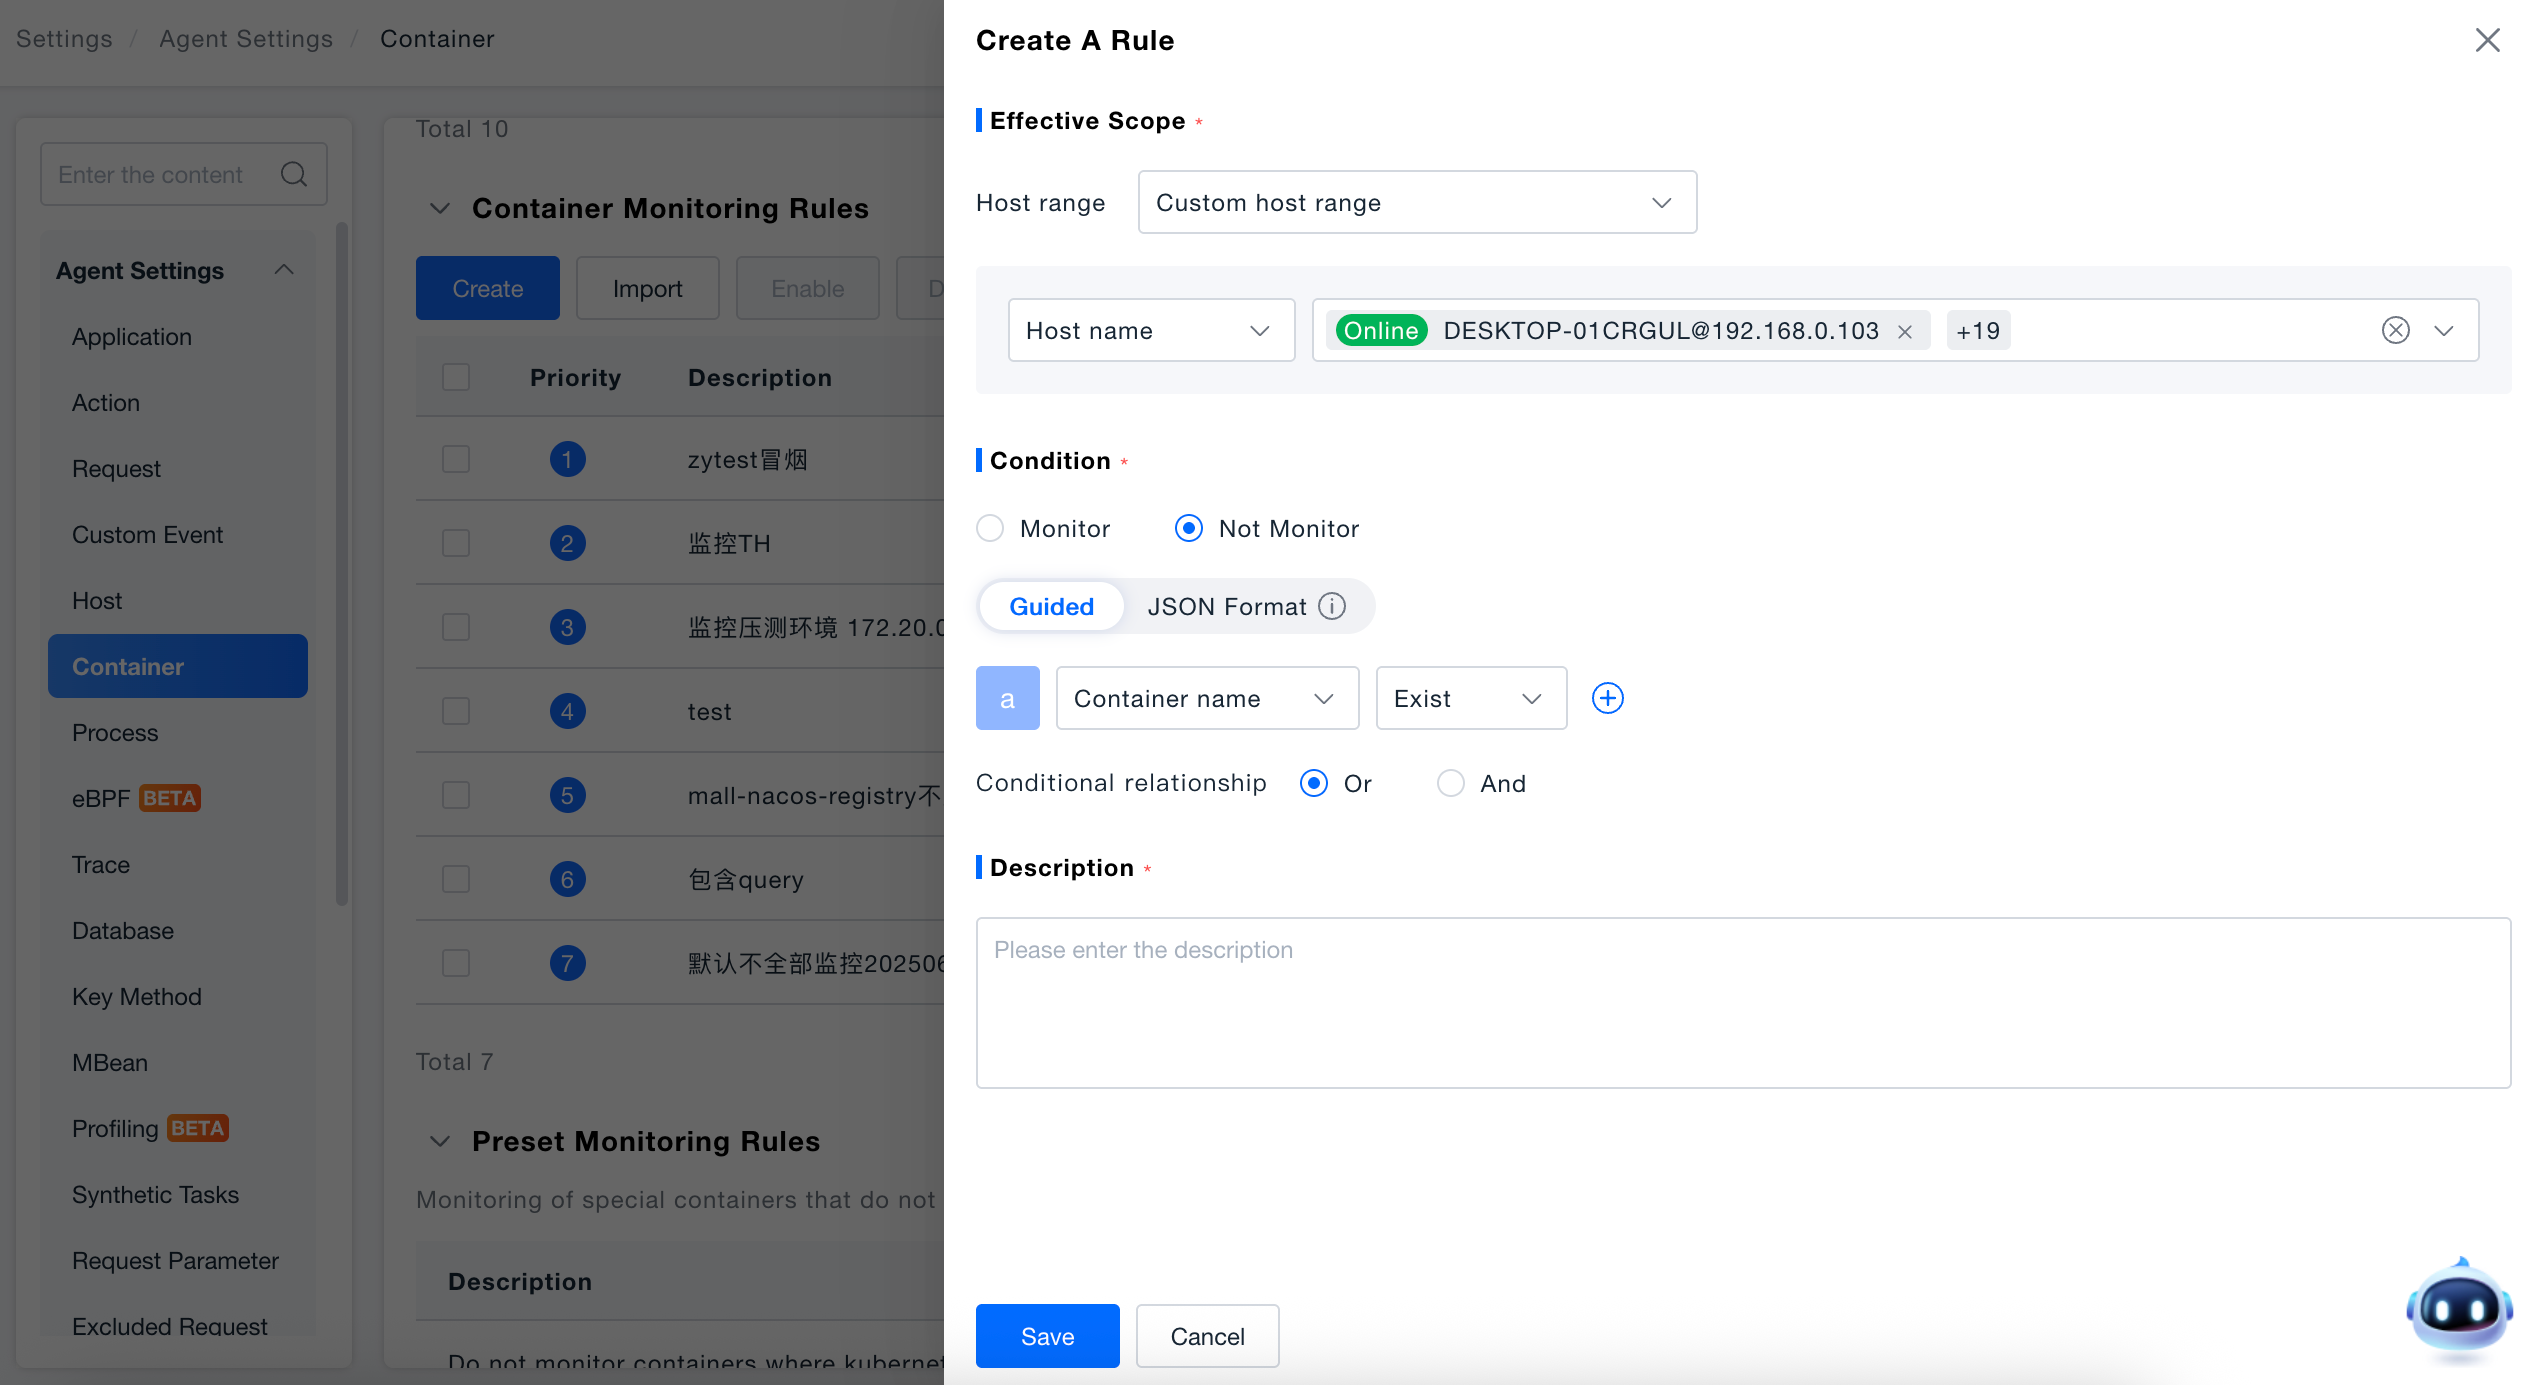
Click [Create] to open the "Create Rule" panel.
-
Set Effective Scope: Host scope select "All Hosts" or "Custom Host Scope" (when customizing, filter by host name or IP).
-
Configure Conditions:
- Select monitoring status: "Monitor" or "Do Not Monitor".
- Condition configuration supports switching between two modes:
- Guided Mode: Visually configure by selecting condition fields (container name, image name, Kubernetes attributes, etc.), operators, and values from dropdown menus.
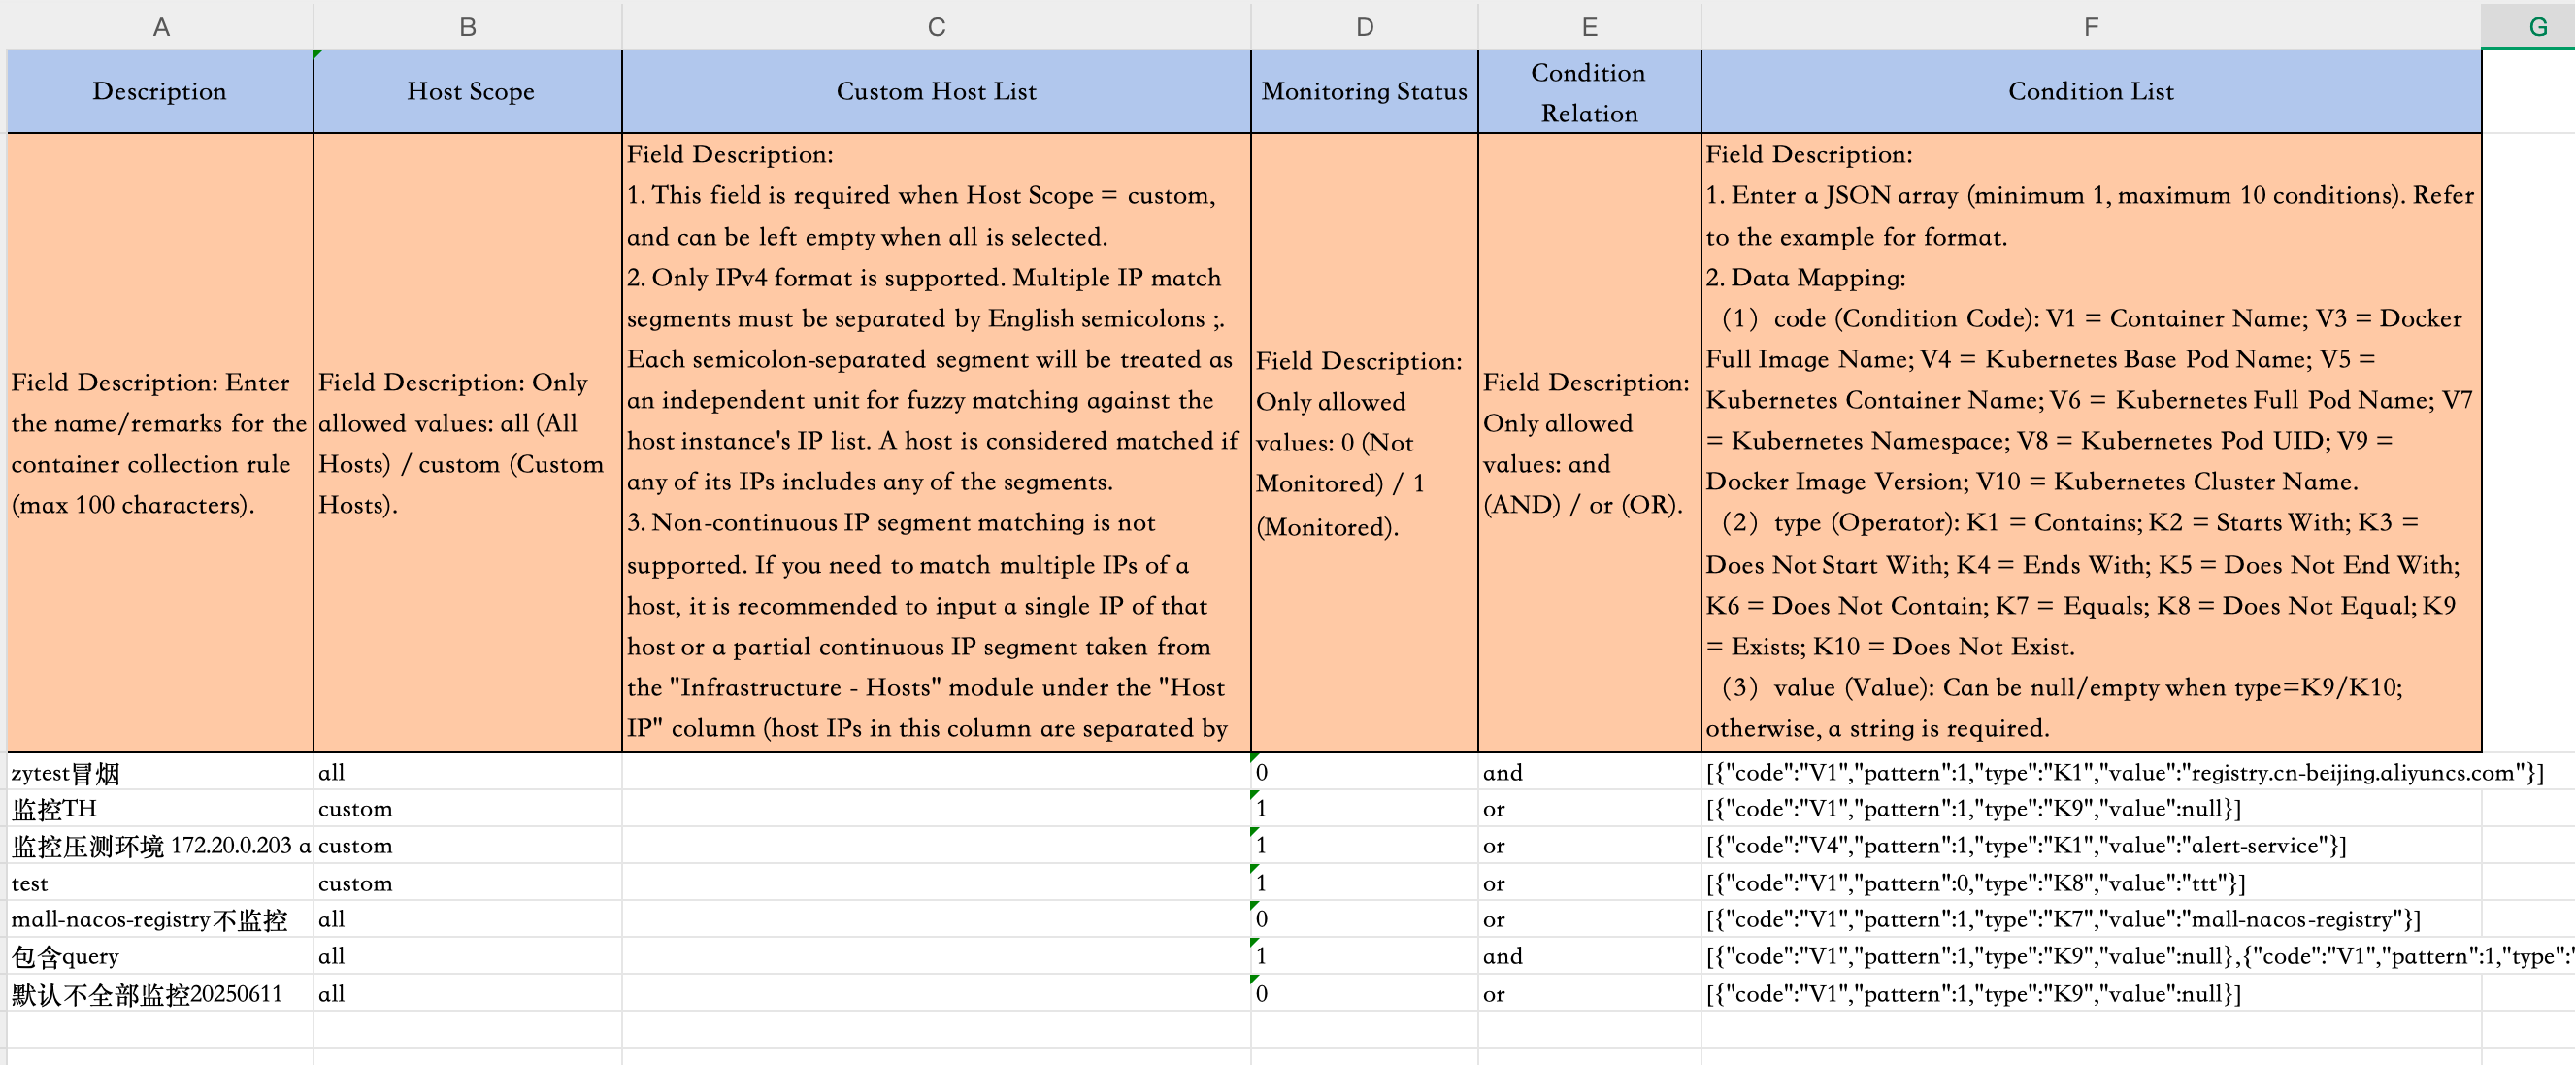
- JSON Format: Directly edit JSON arrays, suitable for batch pasting or copying from Excel templates. The JSON text box provides complete data mapping instructions, and the [Copy] button in the upper right corner can copy the JSON content to the clipboard.
Condition Relationship: Select "OR" or "AND" between multiple conditions.
-
Fill in Description (required) and click [Save].
Batch Import Rules
Applicable to both Pod monitoring rules and container monitoring rules, the operation process is the same for both.Take container monitoring rule import as an example.
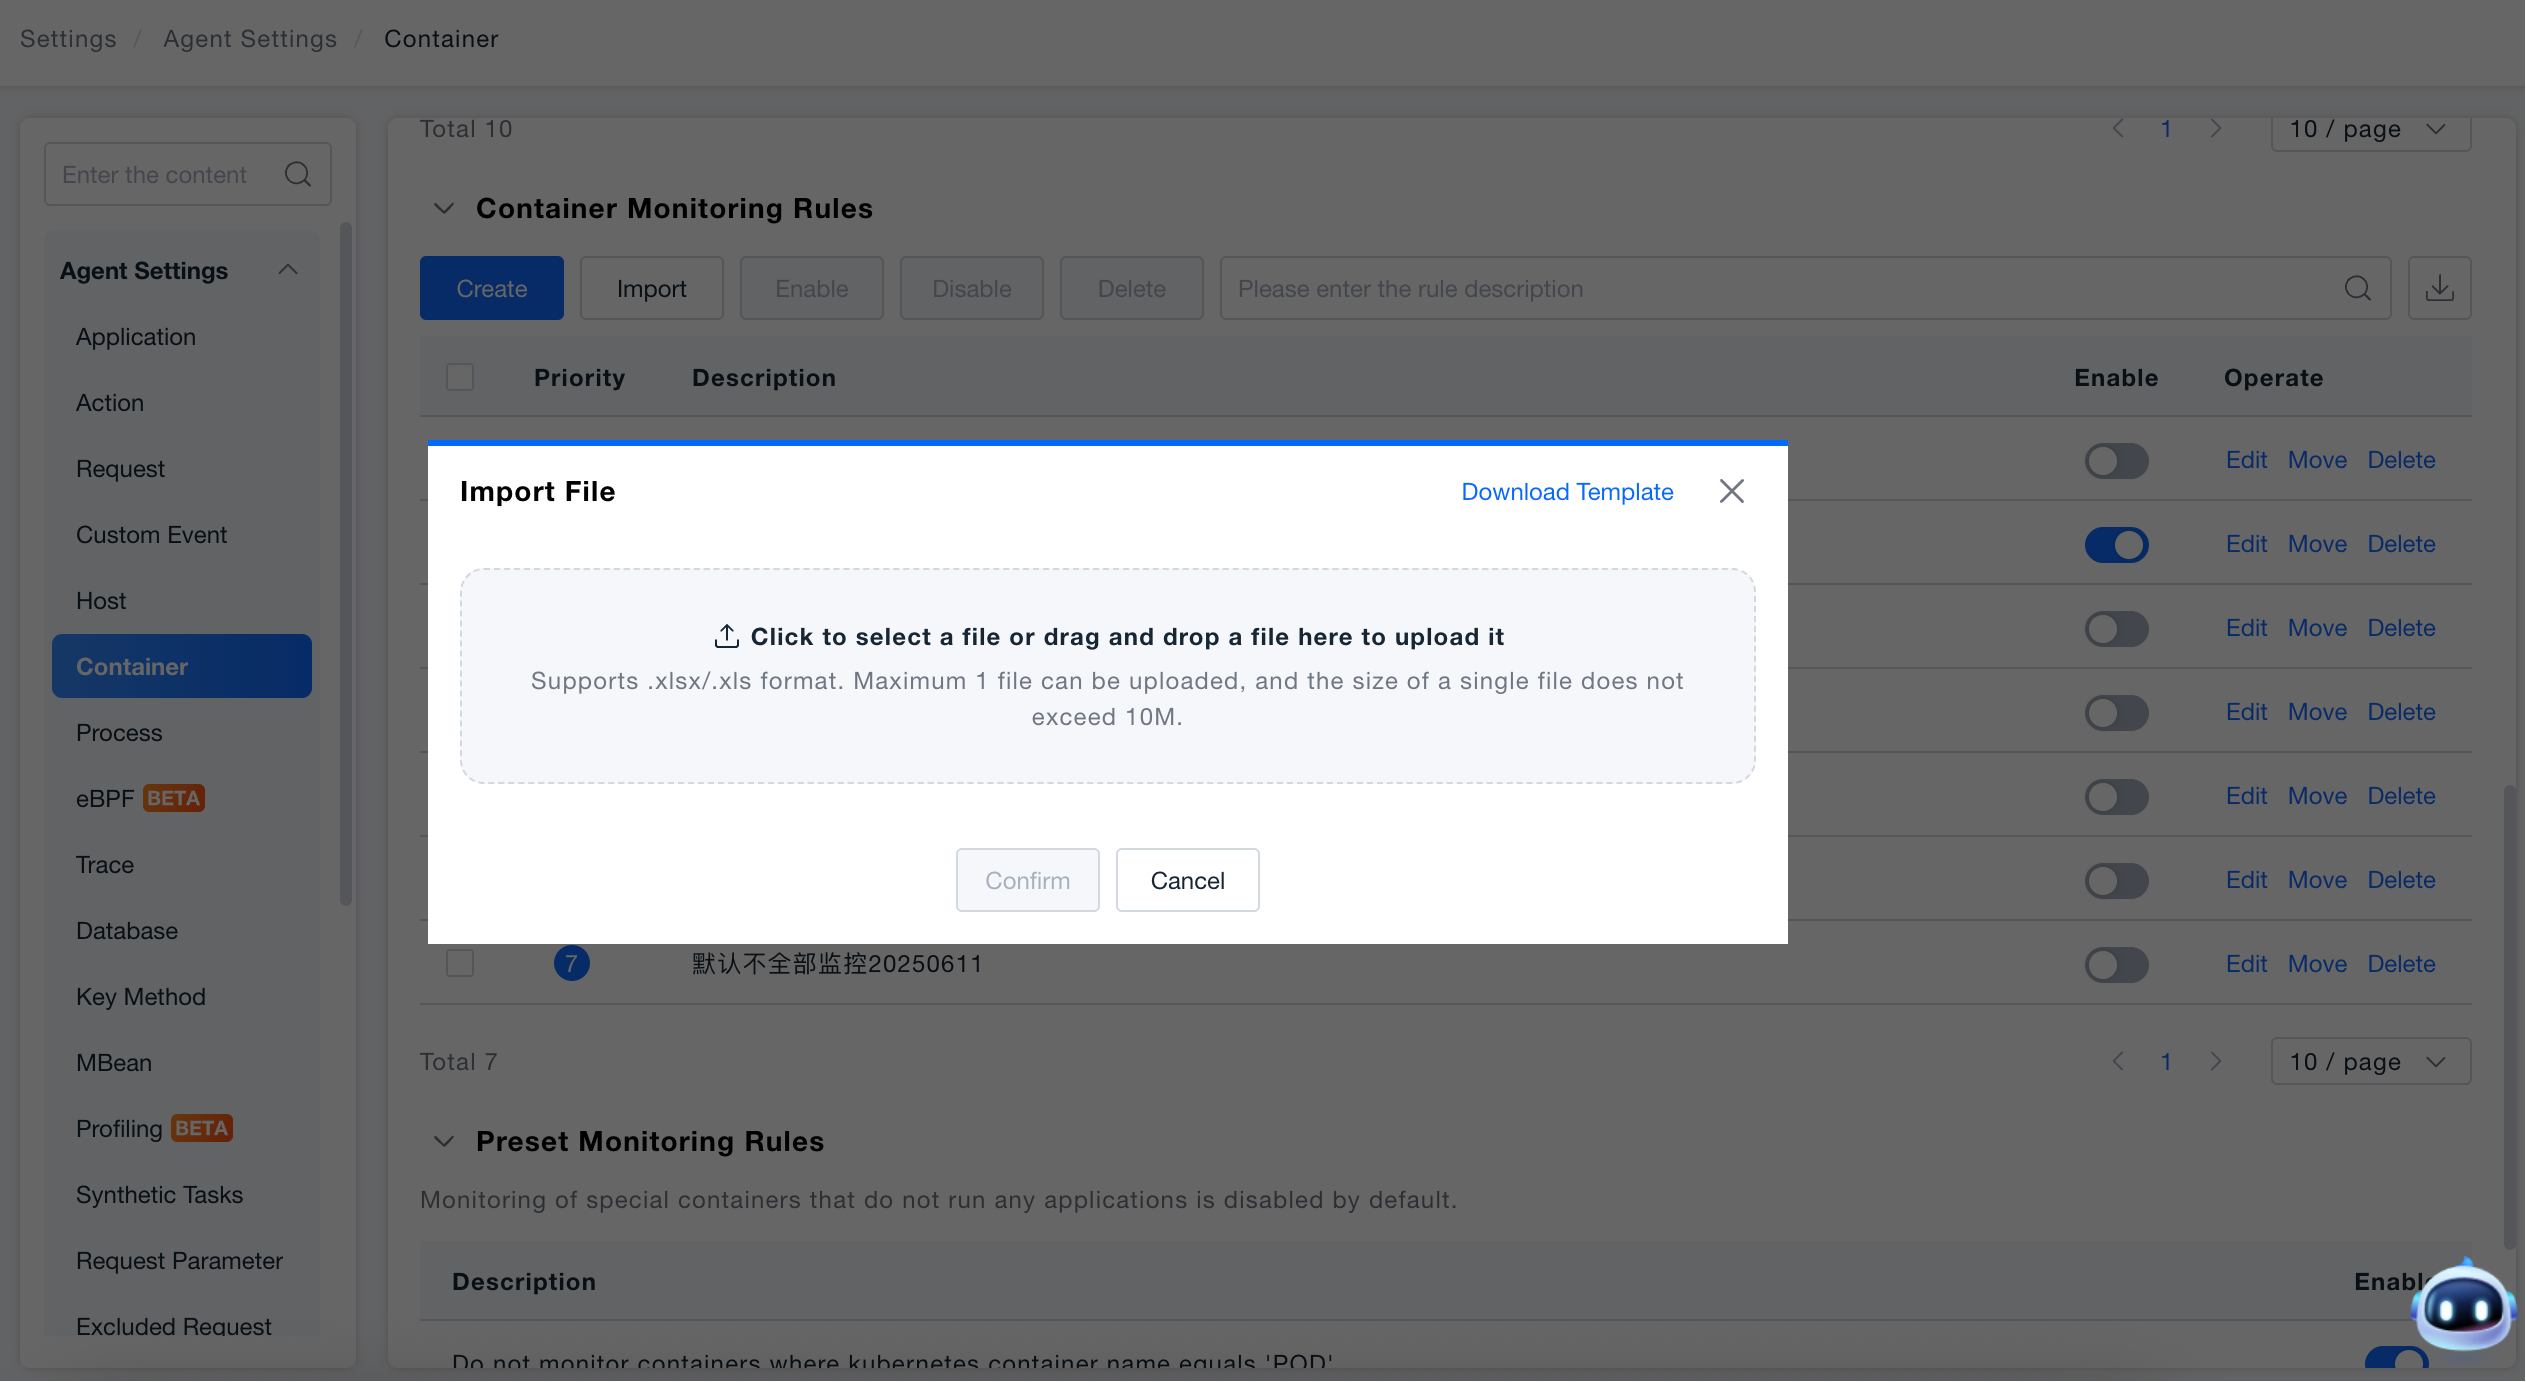
- Click [Import] to open the import popup.
- Click [Download Template] to obtain the standard Excel template (Container:
Container_Collection_Rule_Import_Template.xlsx). - After filling in the rule data according to the template format, drag the file into the upload area or click to select the file (supports
.xlsx/.xls, single file no more than 10M). - Click [Confirm], and the system will validate the data row by row:
- If any row fails validation (format error, duplicate data), the entire file import fails, and the page gives precise line numbers and error reason prompts.
- After all validations pass, batch import is automatically completed.
- After successful import, new rules are sorted in reverse order of import time by default (the higher up, the higher the priority).
Export Rules
Take container monitoring rule import as an example. Click the [Export] icon in the upper right corner of the rule list to export all current rules as an Excel file. The file name format is: Container_Collection_Rules_YYYYMMDDHHMMSS.xlsx. The data format is consistent with the import template and can be directly used for re-import.
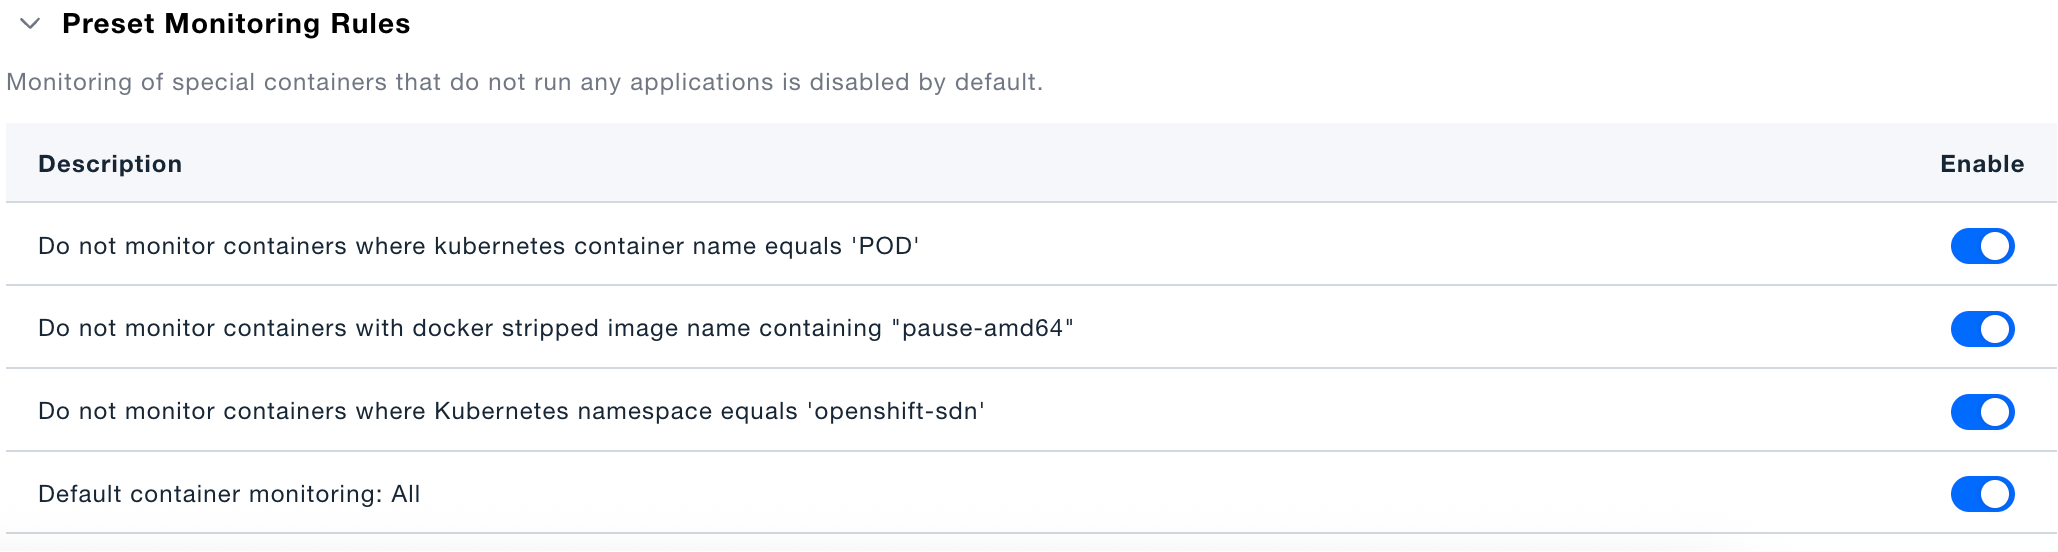
Preset Monitoring Rules
The bottom of the page displays system-built preset rules (by default, monitoring of irrelevant containers is disabled). You can enable or disable them as needed, but they cannot be deleted or edited.
Special Notes
Rule Limit: A maximum of 1000 custom collection rules are supported. Excess rules beyond the limit will fail to import, with rules in the earlier rows being imported first.
Duplicate Detection: The system automatically detects duplicate data (except for the description field) during import. Duplicates between Excel rows or with existing rules will prompt specific line numbers, and only valid data after removing duplicates will be imported successfully.
Pod Name Prefix Version Requirements: The Kubernetes pod name prefix configuration item only supports SmartAgent agent version 8.5.2 and above. This configuration does not take effect for lower version agents.
Multi-Data Center Note: When the rule data center is set to "All", the quantity limit for monitoring some Pods will be synchronized to all data centers.
Guided and JSON Format Conversion: The two condition configuration modes can be switched at any time; when switching from JSON to guided mode, if the JSON format is incorrect or contains invalid data, the system will pop up a confirmation dialog asking whether to clear the abnormal data before continuing to switch.