在 Windows 上以 Administrator 用户安装 SmartAgent
概述
本文介绍如何在 Windows 系统上安装 SmartAgent。
注意
请勿将安装程序放在 C:\Windows\System32下进行安装。否则将报错:Error launching installer。
安装前准备
-
在开始安装 Windows 版本的 SmartAgent 前,请确认以下条件:
- 系统要求
- 查看系统内部版本号
- 6.0.6001 ~ 6.1.7600
- 具备管理员权限
- 自动加载探针支持最低版本为 Win7 SP1 / Server 2008 R2(内部版本号:6.1.7601)
- 如低于该版本,请手工配置探针
- 其中:Windows 7 SP1 / Server 2008 R2 需安装补丁 KB3033929
- KB3033929 for x64
- KB3033929 for x86
C:\Windows\System32> wmic os get version /value
Version=6.1.7601
对于 6.0.6001 ~ 6.1.7600 系统,需要使用旧版驱动实现自动注入,详见 历史 Windows 系统驱动安装说明
安装与升级
-
登录
Bonree ONE平台,进入部署配置 > 安装部署页面,选择 主机模式 作为部署模式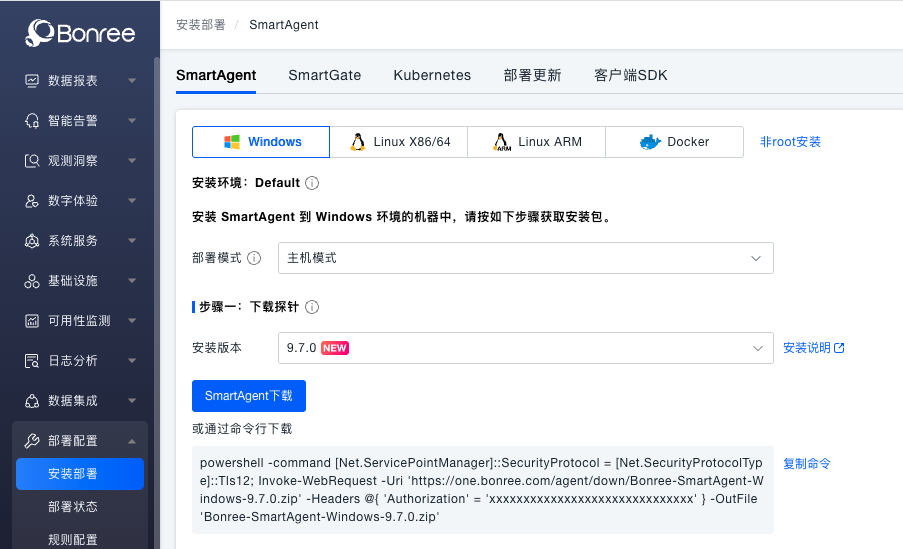
-
下载最新的
SmartAgent-Windows对应 CPU 架构的安装包:powershell -command [Net.ServicePointManager]::SecurityProtocol = [Net.SecurityProtocolType]::Tls12; Invoke-WebRequest -Uri 'https://one.bonree.com/agent/down/Bonree-SmartAgent-Windows-<version>.zip' -Headers @{ 'Authorization' = '<token>' } -OutFile 'Bonree-SmartAgent-Windows-<version>.zip' -
解压压缩包
-
执行安装命令,并根据需要设置参数(详细安装参数):
Bonree-SmartAgent.exe -a "<accountGUID>" -u "https://oneupload.bonree.com/APM" --set-env-id "default"

#如果需要在无人交互模式下静默安装。只需要在开头添加"/S":
Bonree-SmartAgent.exe /S -a "<accountGUID>" -u "https://oneupload.bonree.com/APM" --set-env-id "default"
验证安装结果
-
通过日志确认与平台通信
C:\Program Files (x86)\bonree\apm\logs\machine\machine.log -
确认驱动状态
- 打开 计算机 → 设备管理器
- 找到 smartagentmnt,展开查看 Bonree SmartAgent Device 驱动
- 正在运行:驱动工作正常,可自动注入 APM 探针
- 状态异常:驱动不可用,无法自动注入探针
- 如需禁用,右键点击该驱动,选择 禁用设备
- 重启需监控的应用
服务管理
-
通过开始菜单
- 在 开始菜单 → Bonree SmartAgent 目录,点击对应菜单执行操作
-
通过服务管理器
- 打开 服务 或 任务管理器服务标签页
- 找到 Bonree SmartAgent 服务,右键执行启动/停止/重启
-
通过脚本启停
# 启动
C:\Program Files (x86)\bonree\apm\startService.bat
# 停止
C:\Program Files (x86)\bonree\apm\stopService.bat
# 重启
C:\Program Files (x86)\bonree\apm\restartService.bat
卸载
C:\Program Files (x86)\bonree\apm\uninst.exe
注意
- .NET 探针启用/禁用
- 非
IIS或使用dotnet命令启动的 .NET 应用默认不自动加载探针 - 如需启用,可在平台中显式配置 进程深度监控规则
- 非