mPaaS
SDK集成指南
Cocoapods集成
-
在工程
Podfile文件中添加pod 'BonreeSDK' -
在
Podfile文件所在路径执行pod install
手动集成
-
解压
BonreeSDK_TDEM_iOS.tar.gz,解压后可以看到XCFrameworkDynamic和XCFrameworkStatic两个目录,XCFrameworkDynamic目录下为动态库,XCFrameworkStatic目录下为静态库。根据您的需求,选择其中一种进行集成即可。 -
将
BonreeCore.xcframework,BonreeBusiness.xcframework,BonreeRUM.xcframework加入到项目中,如图所示:
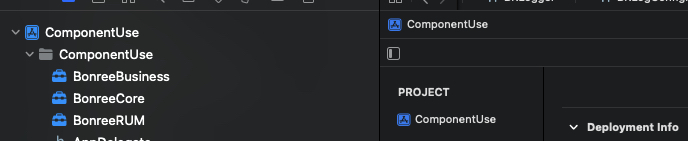
BonreeCore.xcframework,BonreeBusiness.xcframework若已集成过,则无需重复添加.
-
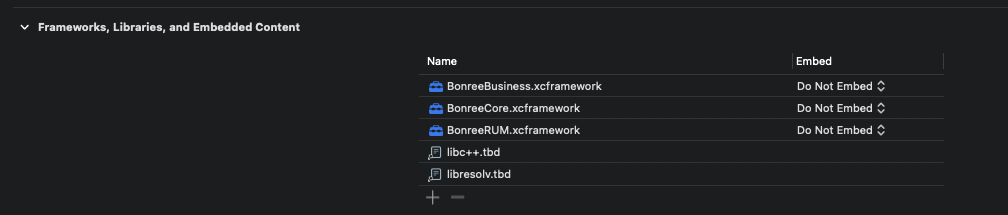
在BuildPhass -> Link Binary With Libraries中添加
BonreeCore.xcframework,BonreeBusiness.xcframework,BonreeRUM.xcframework -
添加以下依赖库:
- libresolv.tbd(必须引入)
- libc++.tbd(必须引入)
- webKit.framework(如果项目支持iOS8之前版本需要添加)
-
修改Embed选项,如果集成的是静态库,选择
Do Not Embed。如果集成的是动态库,选择Embed & Sign。
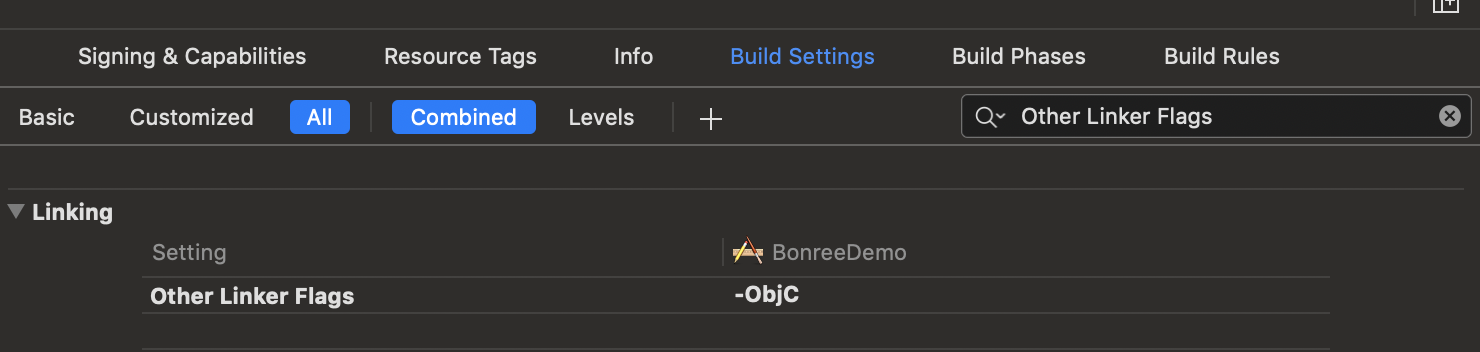
- 在Build Setting中搜索Other Linker Flags, 添加编译标志**-ObjC**。如图所示:
SDK接入
<#Config地址#> 与 <#AppID#> 请于平台上获取,获取方式参见《如何查询AppID和Config地址?》。如有问题请联系技术支持。
在mPaaS框架启动BonreeSDK,需要在DTFrameworkInterface分类中实现- application:beforeDidFinishLaunchingWithOptions:方法,在该方法中调用start。
- 引入头文件:
#import <BonreeRUM/BonreeRUM.h>
- 调用start方法:
- (void)application:(UIApplication *)application beforeDidFinishLaunchingWithOptions:(NSDictionary *)launchOptions {

    [BRSAgent setConfigAddress:@"<#Config地址#>"];
    [BRSAgent startWithAppID:@"<#AppID#>"];
}
运行后控制台输出BonreeSDK config succeeded,即表示嵌码成功.如下所示:
2020-12-03 16:17:21.391 [BonreeSDK] [CONFIG] BonreeSDK Config Succeeded.
移动网关功能支持
1. 网络数据支持
在+ startWithAppID:方法前调用+ useMpaas:方法并传YES。示例如下:
- (void)application:(UIApplication *)application beforeDidFinishLaunchingWithOptions:(NSDictionary *)launchOptions {
    [BRSAgent useMpaas:YES];

    [BRSAgent setConfigAddress:@"<#Config地址#>"];
    [BRSAgent startWithAppID:@"<#AppID#>"];
}
开启mPaaS开关后,网络数据会依据http响应头内的result-status字段的值判断网络请求是否正确,并将错误码等相关信息上报至平台展示。
注:该功能仅支持原生代码发起的请求。
2. 移动网关业务字段捕获
在+ startWithAppID:方法前调用+ setCustomBusinessHeaders:方法并将Operation-Type(以实际请求头传值为准)以字��符串数组的形式传入。示例如下:
- (void)application:(UIApplication *)application beforeDidFinishLaunchingWithOptions:(NSDictionary *)launchOptions {
    [BRSAgent useMpaas:YES];

    [BRSAgent setCustomBusinessHeaders:@[@"Operation-Type"]];

    [BRSAgent setConfigAddress:@"<#Config地址#>"];
    [BRSAgent startWithAppID:@"<#AppID#>"];
}
传入业务头部字段后,网络请求头内与传入字段对应的值会以query的形式拼接在URL内,以便您可以在平台区分不同业务的网络请求数据。
Log集成指南
Cocoapods集成
-
在工程
Podfile文件中添加pod 'BonreeLog' -
在
Podfile文件所在路径执行pod install
手动集成
-
解压
BonreeSDK_TDEM_iOS.tar.gz,解压后可以看到XCFrameworkDynamic和XCFrameworkStatic两个目录,XCFrameworkDynamic目录下为动态库,XCFrameworkStatic目录下为静态库。根据您的需求,选择其中一种进行集成即可。 -
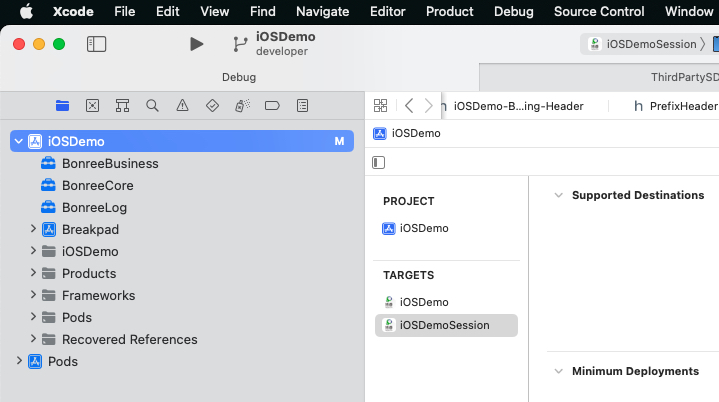
将
BonreeCore.xcframework,BonreeBusiness.xcframework,BonreeLog.xcframework加入到项目中,如图所示:
-
在 BuildPhass -> Link Binary With Libraries中添加
BonreeCore.xcframework,BonreeBusiness.xcframework,BonreeLog.xcframework -
修改Embed选项,如果集成的是静态库,选择
Do Not Embed。如果集成的是动态库,选择Embed & Sign。

- 在Build Setting中搜索Other Linker Flags, 添加编译标志**-ObjC**。如图所示:
Log接入
AppID与LogConfig地址请于平台上获取或联系技术支持。
在mPaaS框架启动BonreeLog,需要在DTFrameworkInterface分类中实现- application:beforeDidFinishLaunchingWithOptions:方法,在该方法中设置Config地址,并自定义配置开启日志Agent:
Objective-C
- 引入头文件:
#import <BonreeLog/BonreeLog.h>
- 设置日志远端配置地址:
[BRLogAgent setConfigAddress:@"<#LogConfig地址#>"];
- �远端配置地址设置完成后,开启日志探针:
//生成自定义配置
BRLogConfiguration *config = [[BRLogConfiguration alloc] init];
config.isTrackingData = YES;//是否上报数据
config.appID = @"<#AppID#>";//应用appID,可在平台查看

[BRLogAgent startWithConfiguration:config];
BRLogConfiguration类参数详细说明可参考日志API说明文档。
示例如下:
- (void)application:(UIApplication *)application beforeDidFinishLaunchingWithOptions:(NSDictionary *)launchOptions {

    [BRLogAgent setConfigAddress:@"<#LogConfig地址#>"];

    // 生成自定义配置
    BRLogConfiguration *config = [[BRLogConfiguration alloc] init];
    config.isTrackingData = YES;
    config.appID = @"<#AppID#>";//应用appID,可在平台查看

    [BRLogAgent startWithConfiguration:config];
}
Swift
- 引入头文件:
import BonreeLog
- 设置日志远端配置地址:
BRLogAgent.setConfigAddress("<#LogConfig地址#>")
- 远端配置地址设置完成后,开启日志探针:
//生成自定义配置
let config = BRLogConfiguration()
config.isTrackingData = true //是否上报日志数据
config.appID = "<#AppID#>" //应用appID,可在平台查看

BRLogAgent.start(with: config)
BRLogConfiguration类参数详细说明可参考日志API说明文档。
示例如下:
func application(_ application: UIApplication, beforeDidFinishLaunchingWithOptions launchOptions: [UIApplication.LaunchOptionsKey : Any]?) {

    BRLogAgent.setConfigAddress("<#LogConfig地址#>")

    // 生成自定义配置
    let config = BRLogConfiguration()
    config.isTrackingData = true
    config.appID = "<#AppID#>" //应用appID,可在平台查看

    BRLogAgent.start(with: config)
}
运行后控制台输出BRLogAgent config succeeded,即表示嵌码成功.如下所示:
2023-04-12 19:48:21.391 [BRLogAgent] [CONFIG] Config Succeeded.
Log使用
- 使用BRLogger类日志输出,允许自定义Logger对象以应对不同业务场景。
Objective-C
- 引入头文件:
#import <BonreeLog/BonreeLog.h>
- 自定义配置类
BRLoggerBuilder,用于生成个性化日志对象:
//自定义logger配置
BRLoggerBuilder *builder = [[BRLoggerBuilder alloc] init];
builder.levelThreshold = BRLogLevelDebug;//日志级别阈值
builder.loggerName = @"Home Logger";//logger自定义名称
builder.printConsole = YES;//是否在控制台打印
builder.prefix = @"[Bonree]";//日志信息前缀
BRLoggerBuilder类参数详细说明可参考日志API说明文档。
- 使用上文的配置创建
BRLogger对象,并调用日志输出方法:
//生成logger传入配置
BRLogger *logger = [BRLogger loggerWithBuilder:builder];

//日志输出
[logger debug:@"调试日志"];
[logger error:@"错误日志"];
BRLogger支持多种日志级别输出,详细说明可参考日志API��说明文档。
示例如下:
- (void)viewDidLoad {
    [super viewDidLoad];

    // 自定义logger配置
    BRLoggerBuilder *builder = [[BRLoggerBuilder alloc] init];
    builder.levelThreshold = BRLogLevelDebug; // 日志级别阈值
    builder.loggerName = @"Home Logger"; // logger自定义名称
    builder.printConsole = YES; // 是否在控制台打印
    builder.prefix = @"[Bonree]"; // 日志信息前缀

    // 生成logger传入配置
    BRLogger *logger = [BRLogger loggerWithBuilder:builder];

    // 日志输出
    [logger debug:@"调试日志"];
    [logger error:@"错误日志"];
}
Swift
- 引入头文件:
import BonreeLog
- 自定义配置类
BRLoggerBuilder,用于生成个性化日志对象:
//自定义logger配置
let builder = BRLoggerBuilder()
builder.levelThreshold = .debug //日志级别阈值
builder.loggerName = "Home Logger" //logger自定义名称
builder.printConsole = true //是否在控制台打印
builder.prefix = "[Bonree]" //日志信息前缀
BRLoggerBuilder类参数详细说明可参考日志API说明文档。
- 使用上文的配置创建
BRLogger对象,并调用日志输出方法:
//生成logger传入配置
let logger = BRLogger(builder: builder)

//日志输出
logger.debug("调试日志")
logger.error("错误日志")
BRLogger支持多种日志级别输出,详细说明可参考日志API说明文档。
示例如下:
override func viewDidLoad() {
    super.viewDidLoad()

    // 自定义logger配置
    let builder = BRLoggerBuilder()
    builder.levelThreshold = .debug // 日志级别阈值
    builder.loggerName = "Home Logger" // logger自定义名称
    builder.printConsole = true // 是否在控制台打印
    builder.prefix = "[Bonree]" // 日志信息前缀

    // 生成logger传入配置
    let logger = BRLogger(builder: builder)
    // 日志输出
    logger.debug("调试日志")
    logger.error("错误日志")
}