Weex Plugin Integration Guide
Plugin Import
-
Unzip
BonreeWeexPlugin.zipand copy the entire@bonreefolder to thenode_modulesdirectory of your project. -
For iOS projects, navigate to the
platforms/iosdirectory in your project and modify the Podfile to add:
pod 'BonreeWeexPlugin', :path => '../../node_modules/@bonree'
Here, the path parameter should be configured with the relative path to the @bonree directory.
Then execute pod install to install.
- For Android projects, navigate to the
platforms/androiddirectory in your project and refer to the Android-Native Deployment Document for Android agent deployment. (Only the deployment configuration is needed; there is no need to call the initialization interface natively, as the plugin supports agent initialization within the Weex project.)
Plugin Configuration
<#Config Address#> and <#AppID#> can be obtained from the platform. For the method to obtain them, please refer to How to Query AppID and Config Address?. If you have any questions, please contact technical support.
- Import the JS plugin in the entry file (usually
entry.js):
const { Bonree } = require("../node_modules/@bonree/BonreeWeexPlugin");
- Configure the Config address:
Bonree.setConfigAddress("<#Config Address#>");
- Start the SDK
Bonree.start("<#AppID#>", Vue);
// The Vue parameter is the Vue instance of the current environment.
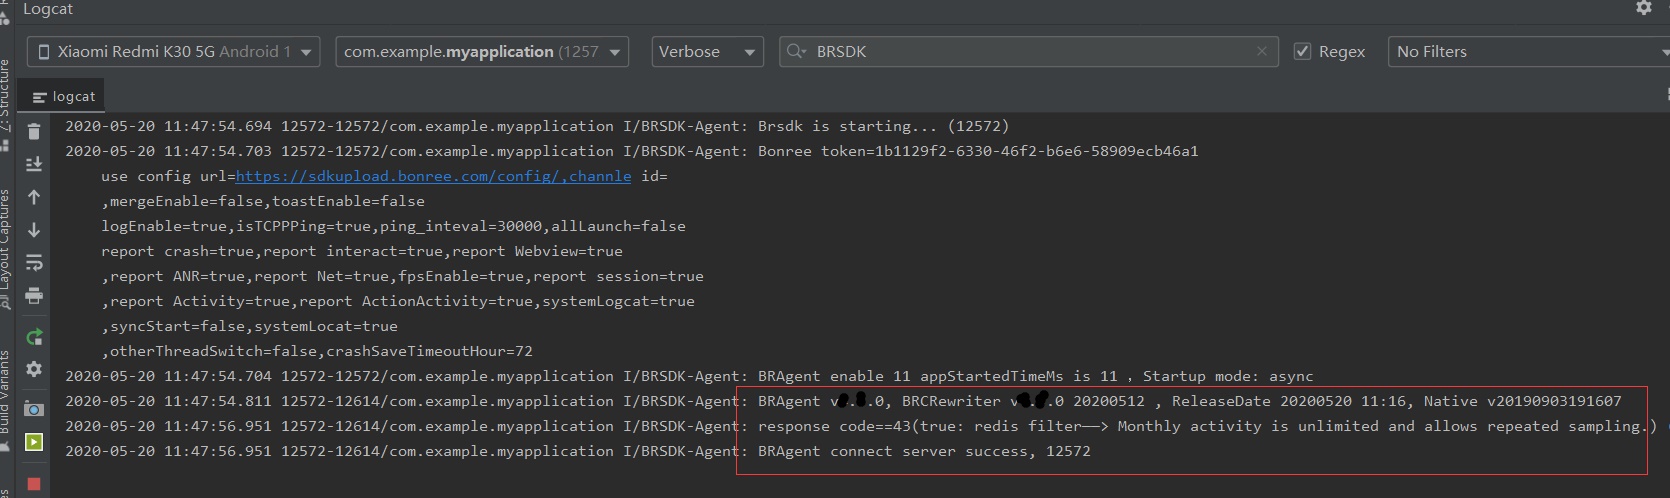
If you see the agent Success message in the console, it indicates successful integration:
iOS:
2020-12-03 16:17:21.391 [BonreeSDK] [CONFIG] BonreeSDK Config Succeeded.
Android: