Discover and handle business trace topology changes
After an application release or dependency change, use topology change notifications to review added or removed nodes and call relationships, then synchronize the confirmed scan result to the current business trace so that monitoring does not continue against an outdated structure.
Enable daily topology scanning
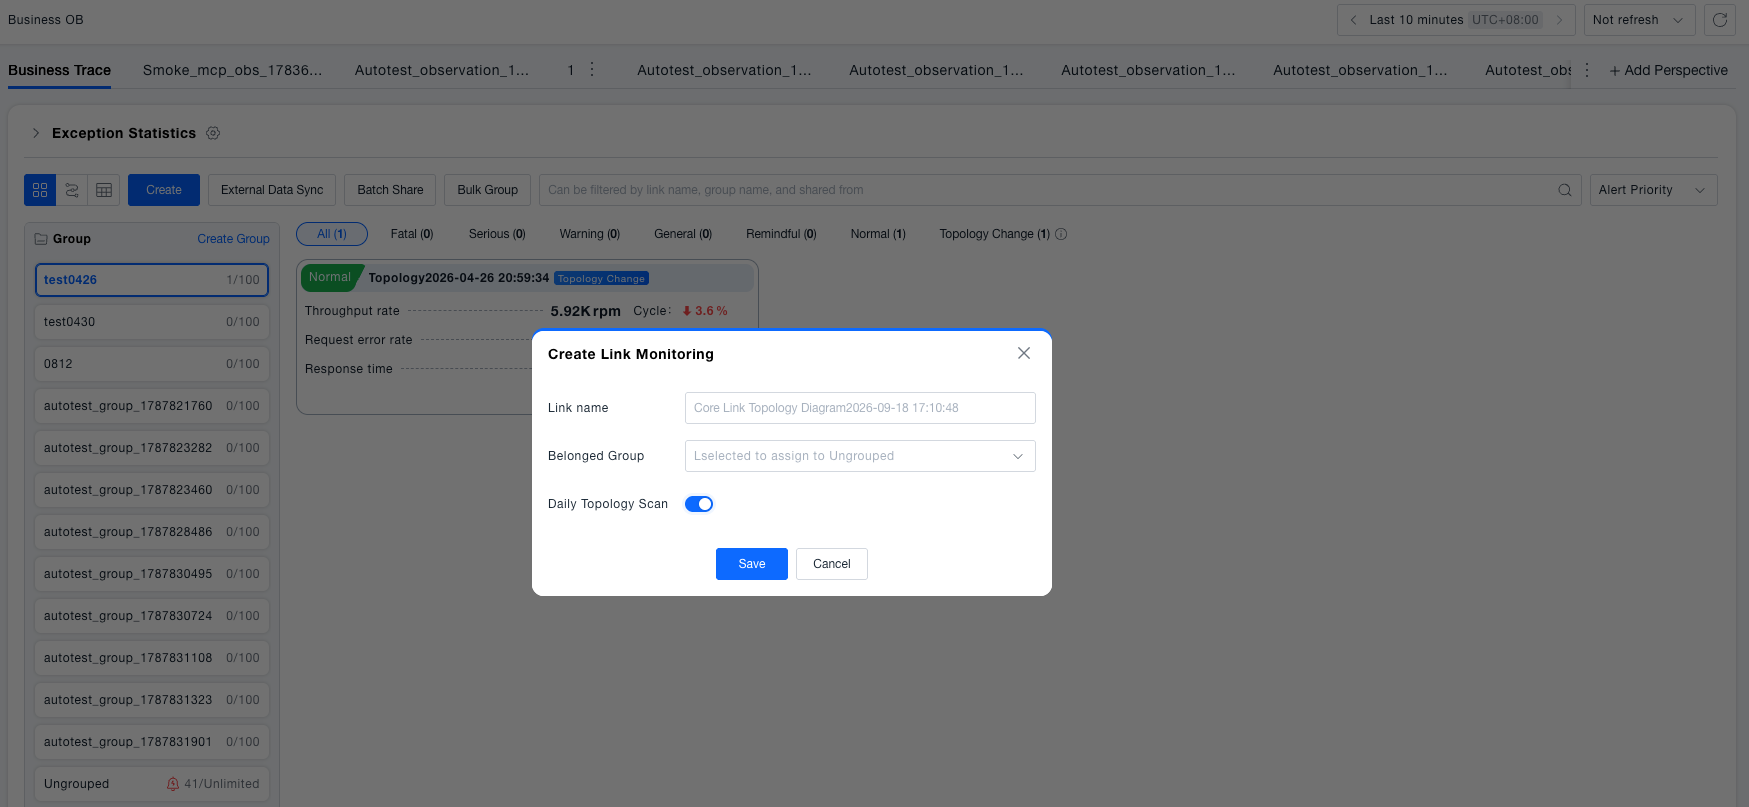
Daily topology scanning determines whether a business trace participates in topology change detection. Only internal traces with scanning enabled can generate topology change notifications.
Enable Scan topology changes daily when creating a business trace, or open the trace details and enable it in the basic information area. The option is disabled by default.
The configured entry node determines the scan scope:
| Entry configuration | Scan scope |
|---|---|
| Entry node configured | Discover the call topology from the interfaces associated with the entry node. |
| No entry node configured | Discover from the interfaces of all nodes in the saved trace. This may produce a broader result. |
Bonree ONE extracts nodes and call relationships from Trace data each day and compares the latest scan with the saved topology. Business traces synchronized from external data sources do not participate in daily scanning.
Find business traces with changes
After a scan completes, first identify the traces that need review, and then open the details to locate each change.
- Go to Observability Insights → Business Observability → Business Traces.
- Select the Topology Changes filter to display internal traces with pending changes.
- Review the added and removed node or relationship counts and the scan date on each card or list row.
- Open the target trace. When pending changes exist, topology highlighting is enabled by default.
The + and - values in the summary represent added and removed items. For example, Nodes +1/-1 means that one new node was found and one node in the saved topology was not found in the latest scan. It does not mean that no structural change occurred.


Review node and relationship changes
In the details, determine whether each change matches the expected release, configuration, or dependency adjustment before synchronizing it.
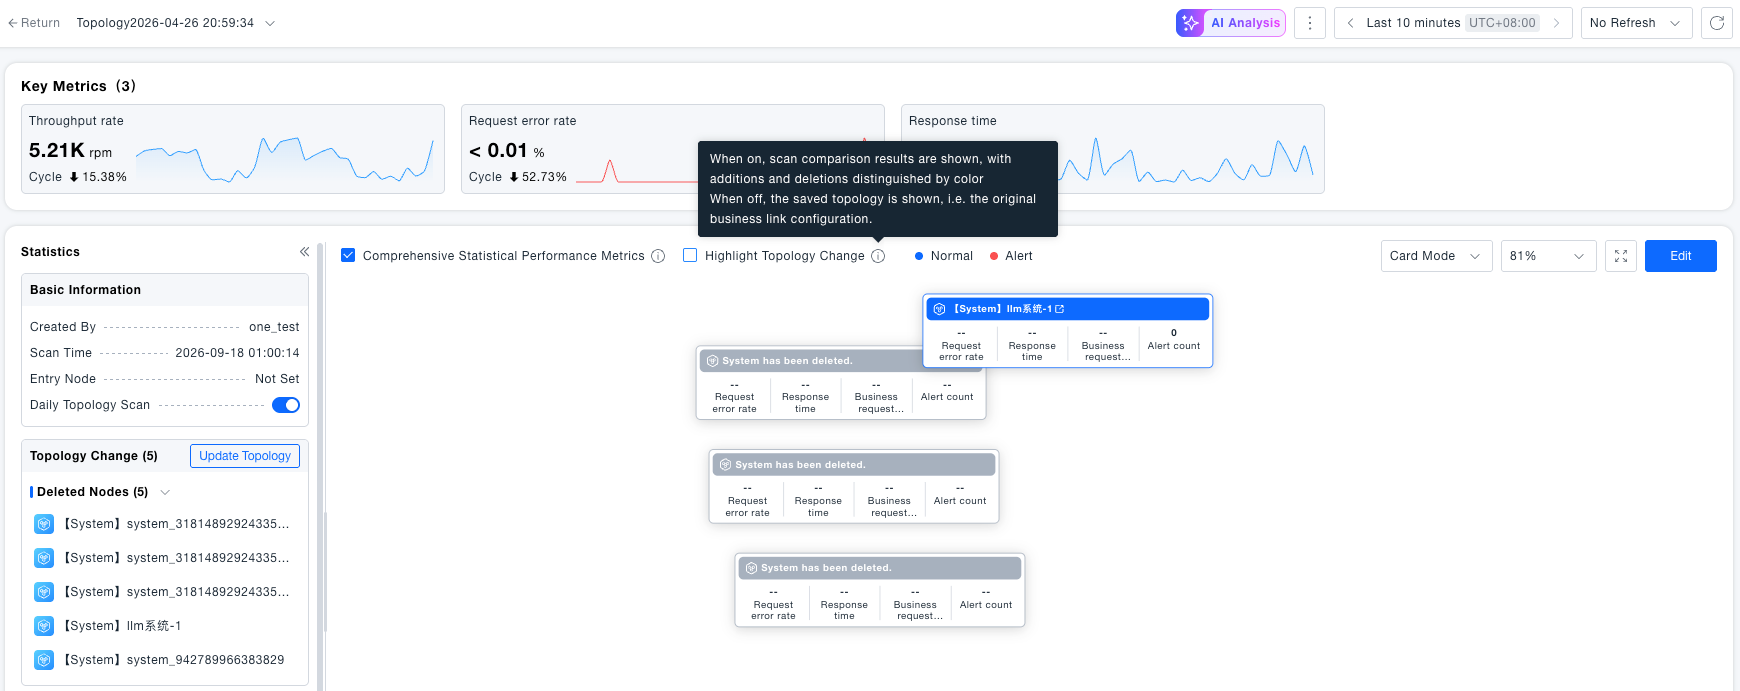
- In Topology Changes, review the added and removed node and relationship counts.
- Click a change item to locate the corresponding node or relationship in the topology.
- Keep Highlight Topology Changes enabled to view the comparison. Added and removed items use distinct change styles.
- Disable Highlight Topology Changes to return to the currently saved topology.
The highlight option only changes the view and never updates the saved topology. The time range at the top of the page controls metric data only; topology changes always come from the latest scan compared with the current trace.
Synchronize confirmed changes
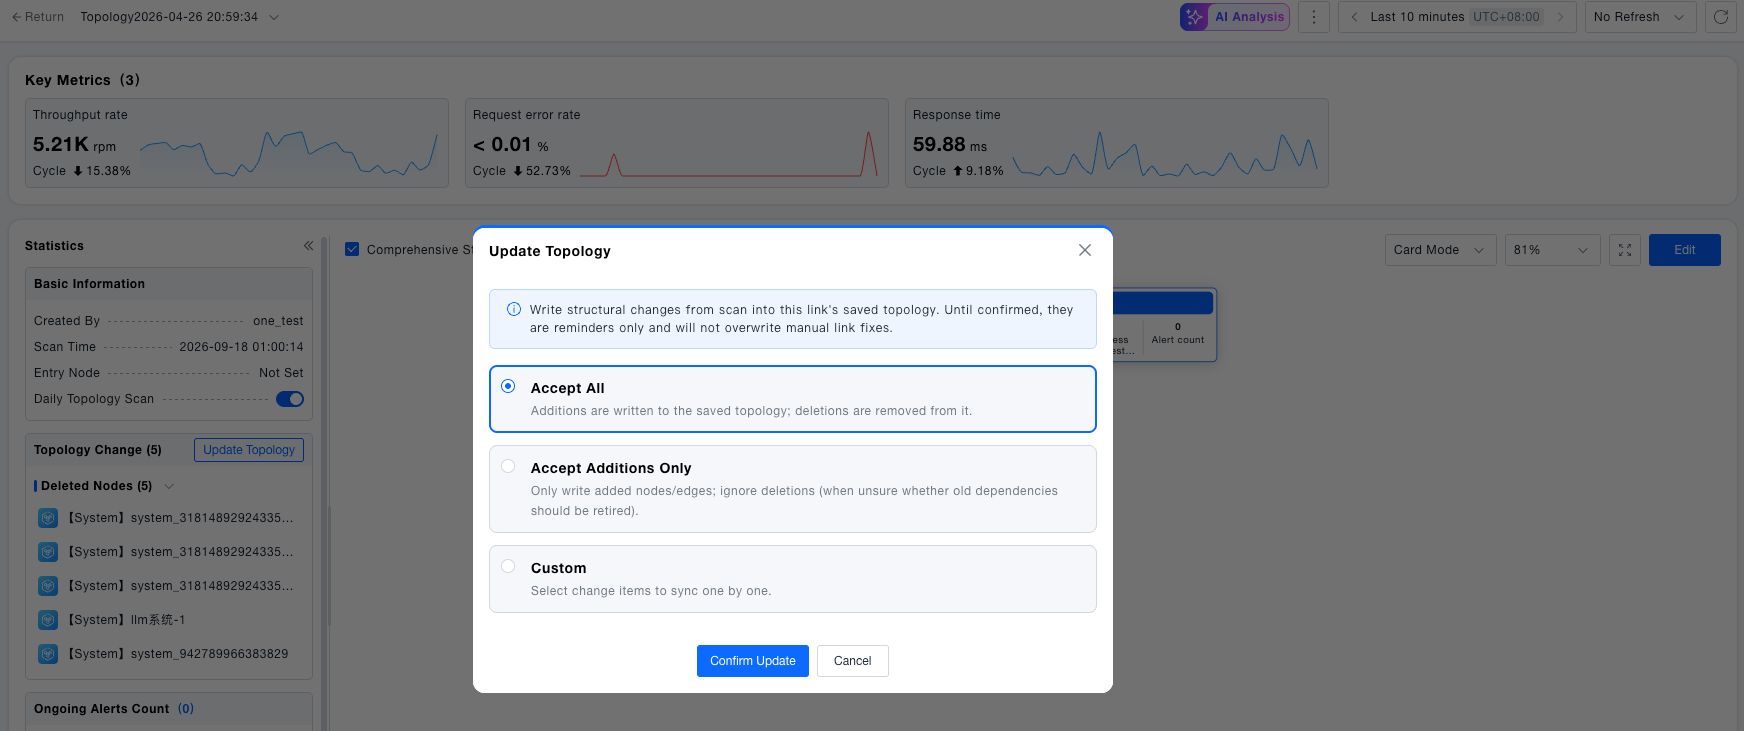
After confirming that the changes are expected, synchronize the latest scan result to the current business trace.
- Click Synchronize Latest Topology.
- Select a synchronization method:
Method When to use it Result Accept all All additions and removals are expected. Apply all changes and clear the notification when processing finishes. Accept additions only Keep the current nodes or relationships and add only newly discovered items. Apply additions while unaccepted removals remain pending. Custom Apply only selected changes. Update selected items while unaccepted items remain pending. - Confirm the synchronization, and verify that the current topology matches the expected structure.
You can also use Update Topology on an individual change item. After a partial synchronization, select Do Not Remind This Time if the remaining changes do not need to be handled now. A later scan will notify you again if the differences still exist.
Verify the result
Return to the business trace list and confirm the result:
- When all changes are accepted, the topology change indicator is no longer displayed.
- When unaccepted items remain, the indicator and change details remain available.
- In the details, disable highlighting and verify that the saved topology matches the synchronization result.
After a release, review new dependencies before processing removals. A node or relationship may be absent when no calls occurred during the scan period, so compare removal candidates with release records and actual traffic before accepting them.