Create a Data Task with a Custom Integration
To ingest data from a cloud service or external system, select a custom integration and enter its collection settings to create a data task. Then check the data flow and collected data to confirm that ingestion works as expected.
Confirm the Collection Requirements
Prepare the account permissions, collection environment, and connection details before configuration so that the required parameters are available when you fill in the form.
- Confirm that your account has the Data Integration Management permission and an available license entitlement for data ingestion.
- For integrations that collect data through SmartGate, prepare a deployed SmartGate that can communicate with Bonree ONE.
- Follow the target integration's instructions to prepare the data source address, authentication details, and other ingestion parameters. Check the minimum Agent version and network access requirements.
Collection methods and parameters vary by integration. Follow the corresponding Integration Description and Ingestion Guide for the specific requirements.
Select the Target Integration
Find an ingestion method and confirm that its collection scope matches your requirements.
- Go to Data Framework → Integrations and select the Custom Integrations tab.
- Enter keywords from the integration name in the search box, or use category tags to find the target integration.
- Click Create Integration on the target card to open the integration details drawer.
- Read the Integration Description. If an Ingestion Guide link is available, open it for the corresponding instructions.
- Review the available metrics and monitoring resources to confirm their coverage. If you need to install resources, follow Manage Custom Integration Resources, then continue configuring the task.
Configure the Task and Components
Specify the data center, task identity, and collection targets for this ingestion task.
- Open the Configuration tab in the integration details.
- Select a Data Center. The task is dispatched to data processing nodes in the selected data center.
- Enter a Task Name. Select or enter Data Tags as needed for data access control.
- Click Add Component and enter the connection and collection parameters required by the selected integration. For collection through SmartGate, follow the integration's instructions to configure the SmartGate used for collection.
- Complete the component configuration and check the component list. Then click Save at the bottom of the configuration page.
Confirm the Task and Check Its Data Flow
After saving, locate the corresponding task and confirm which flow will process its incoming data.
- Go to Data Framework → Data Processing and find the newly created task in the data task list. Check its name and whether it is started or stopped.
- Click the task name to open its details, then open the data flow tab and review the existing flows.
- If the processing logic needs to change, edit an existing flow, or create or copy a data flow as needed.
- Check the execution order of the input, processing, and output components. Publish the required version and confirm that it is deployed.
A task can retain multiple data flow versions, but only one version can be deployed at a time. Incoming data is processed in the component order defined by that version, then output and stored accordingly.
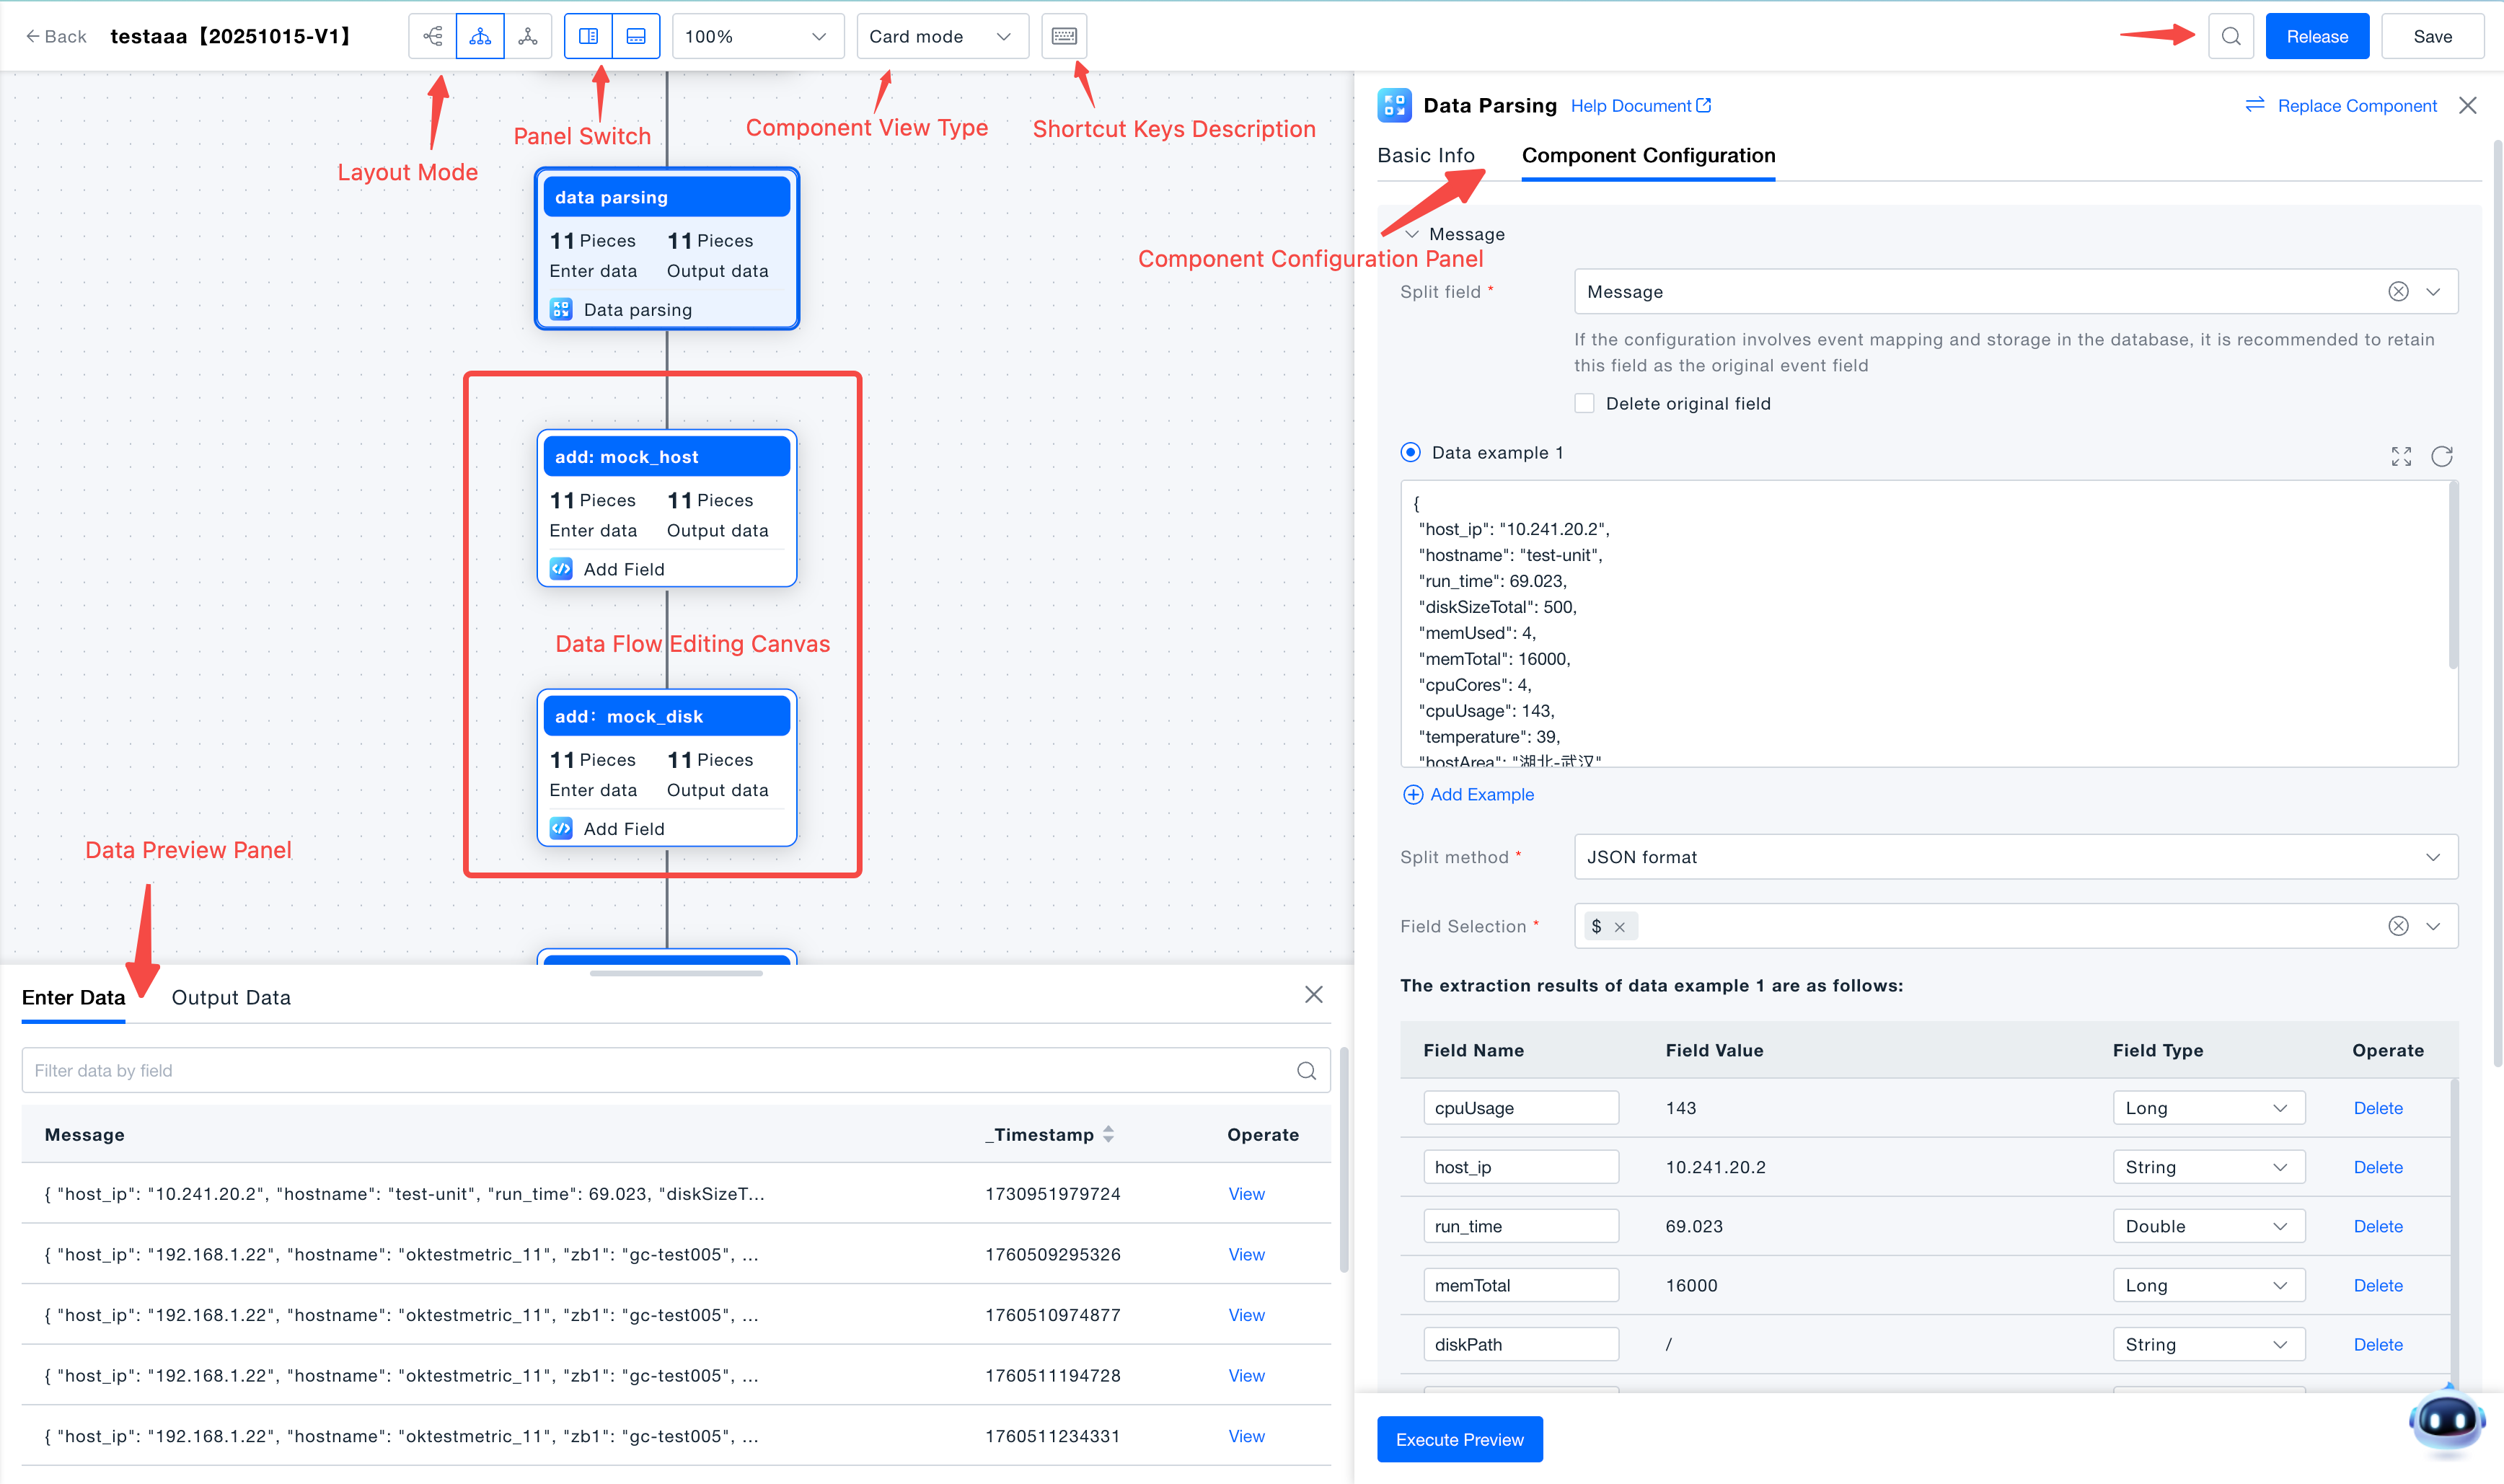
For details on creating, editing, and publishing data flows, see Task Management.
Verify the Collected Data
After locating the task and metric definitions, check the actual data to determine whether ingestion is complete.
- Check whether the task is started or stopped. If it has not started, check the configuration before starting it.
- For SmartGate collection components, check the configuration synchronization status and the time it was last updated.
- Query the collected data as described in the integration's ingestion guide. Check that the target objects, metrics, or fields match your expectations.
If task creation or data flow changes do not produce the expected results, follow the FAQ. To inspect raw exception data and locate the processing component involved, see Exception Data.