User Guide
Prerequisites
- Menu access: AI Studio > Workspace is required.
- Permissions: Read-Write access for create, edit, publish, list, delist, and delete; Read-Only for view-only.
- Data scope: At least one resource domain in the current environment; confirm environment/domain in the top-right corner.
- Model configuration: Agent orchestration requires an LLM—configure under Security Operations > Model Management first.
- Review rules (listing/delisting): An active Review Rules configuration is required before submitting requests.
Overview
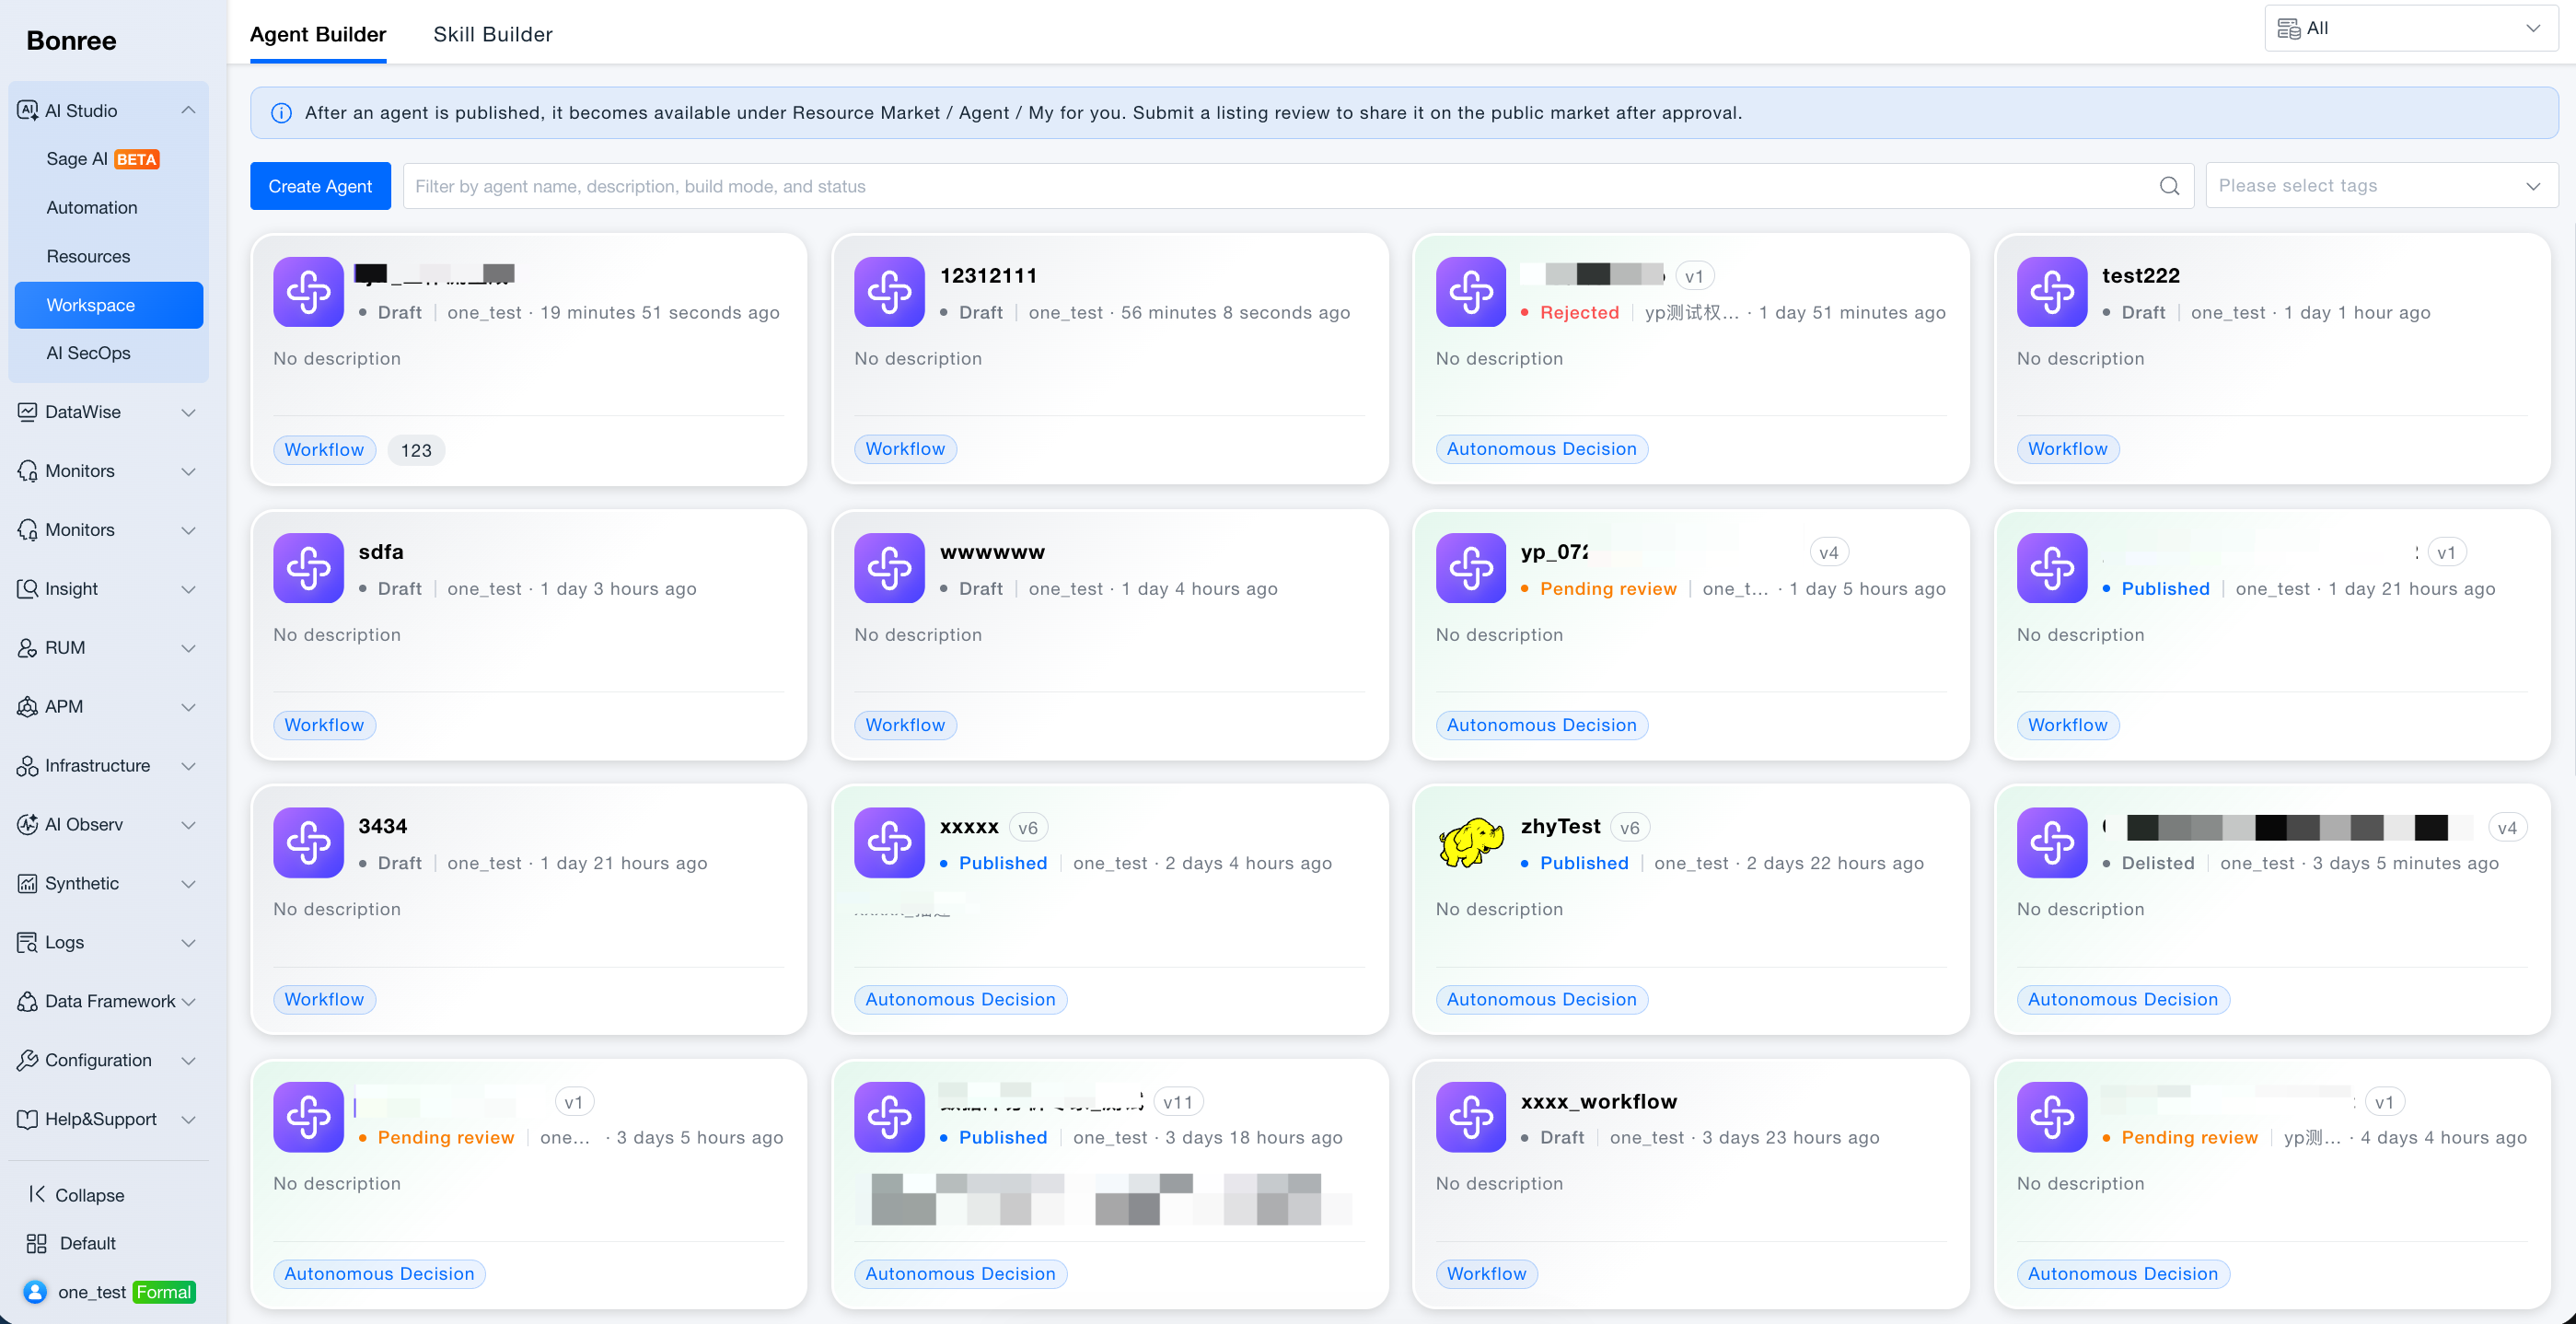
Workspace is the production-side entry point of AI Studio, where creators build, debug, and publish Skills and Agents, and submit listing/delisting requests to the Resource Marketplace.
The page has two tabs, each mapped to a dedicated document:
| Tab | Documentation | Description |
|---|---|---|
| Skill Creation | Skill Creation | Generate via conversation or import OpenClaw packages; edit files and debug before publish |
| Agent Creation | Agent Creation | Two-step creation (basic info + orchestration); Autonomous Decision or Workflow |
After publish, resources appear under Resources > My for Sage AI and Automation. To share via Public, submit a listing review processed in Security Operations > Review Queue.
Why Workspace?
The AI Studio flow is produce → distribute → consume. Without a dedicated production entry:
- Editing, debugging, and publishing Skills/Agents become fragmented with unclear versions and states
- Creators cannot validate in their own domain before deciding to share team-wide
- Custom assets on Public lack a clear draft → publish → review → list governance path
- The relationship between referenced tools/knowledge/Skills and listable domains is opaque
Workspace provides tab-based production, debug preview, versioned publish, and listing/delisting requests so custom Skills and Agents are buildable, testable, releasable, and shareable under control.
What Workspace Offers
Skill Creation tab
- Skill Creation: Describe requirements in natural language; Sage AI generates a Skill package and file tree.
- Import Skill: Upload OpenClaw-compliant packages; edit, debug, and publish in-platform.
- Lists only Skills you created or imported; built-in Skills are under Resources > Public.
- See Skill Creation.
Agent Creation tab
- Create Agent: Step 1 basic info and build mode; Step 2 orchestration (Autonomous Decision or Workflow).
- Debug preview: Simulate conversations before publish.
- Versions and states: Save draft, publish, version history, listing/delisting/withdraw flows.
- See Agent Creation.
Shared: publish and share
| Action | Effect |
|---|---|
| Publish | Syncs to Resources > My; creates version and change notes |
| Request listing | Pending review; after approval, visible under Public |
| Request delisting | Removes from Public after review (listed resources) |
| Withdraw | Cancel pending review; revert to Published |
| Reapply after rejection | Revise, publish, request listing again |
Relationship with Other Modules
Resources (tools/knowledge/Skills) ──reference──► Workspace
                                                      │
                                                      ├── Publish ──► Resources > My
                                                      └── Listing ──► SecOps · Review Queue
                                                                          └── Approved ──► Public
Sage AI, Automation ◄── invoke ── Resources (My / added Public)
Typical Workflows
Path 1: Creator — new Agent for self-use
- Confirm Model Management has an available LLM.
- Workspace > Agent Creation → Create Agent.
- Complete Step 1 and Step 2; test in debug preview.
- Publish Agent with change notes.
- Open Resources > Agent > My → Use or @ in Sage AI.
Path 2: Creator — conversational Skill
- Workspace > Skill Creation → Skill Creation.
- Describe the scenario; review generated files; debug preview.
- Publish with version and notes.
- Reference the Skill in Agent orchestration.
Path 3: Creator — request Public listing
- Status Published; no unpublished drafts.
- Review Rules configured.
- Request listing → select domains → submit.
- Reviewer processes in Review Queue; Withdraw while pending if needed.
- After approval, resource appears under Public.
Path 4: Creator — after rejection
- Read rejection banner and comments in Review Queue.
- Revise → publish new version → Request listing again.
Path 5: Creator — delist listed resource
- Request delisting with required notes → wait for approval → hidden from Public.
Path 6: Administrator — governance alignment
- Security Management keywords.
- Review Rules reviewers.
- Review Queue approvals; Audit Logs for traceability.
Operation Overview
- AI Studio > Workspace; switch Skill Creation / Agent Creation tabs; confirm environment/domain.
- Search and filter by status (Draft / Published / Pending review / Listed / Delisted / Rejected).
- Create/edit via Skill or Agent flows; Publish with version and notes.
- Listing/delisting/withdraw from card menus—details in Skill Creation and Agent Creation.
State Quick Reference
| State | Meaning | Common actions |
|---|---|---|
| Draft | Not published | Edit, publish |
| Published | In My only | Edit, publish, request listing |
| Pending review | Listing/delisting in review | Withdraw |
| Listed | Visible in Public | Request delisting |
| Rejected | Review failed | Revise, publish, reapply |
| Delisted | Removed from Public | Publish, request listing again |
Notes
- Save draft ≠ Publish: Only publish writes versions and syncs Resources.
- Listing version: Uses last published version; publish drafts first.
- Security: Security Management checks Skill/Agent text (prompts, summaries, etc.).
- Automation: New publishes auto-upgrade referenced Automation tasks.
- Built-in assets: Not maintained in Workspace lists—add from Resources > Public.