Feishu Integration Guide
Connect Sage AI to a Feishu enterprise self-built app (bot) so teammates can chat in Feishu DMs or groups.
In this release, the Feishu config form provides URL callback (Webhook) only. On Feishu Open Platform, event subscription must use Send events to developer server, and you must paste the Webhook generated by the platform.
Configure an IM channel to bring Sage AI into team IM for instant Q&A and collaboration. The bot binds to the current resource domain and follows permission controls. To access all-domain data, configure under All Resource Domains. Do not bind the same IM credentials across accounts, environments, or resource domains—doing so may cause lost messages or interrupted conversations.
Prerequisites
| Requirement | Description |
|---|---|
| Menu | AI Studio / Security Operations / IM Channel |
| Permissions | Read-Write to configure or unbind |
| Feishu account | Permission to create enterprise self-built apps and bots |
| Network | Public HTTPS Webhook required |
| Model | At least one inference model; IM defaults to Auto |
Feishu supports URL callback only in this release. WeCom and DingTalk still support both long connection and URL callback—see their guides.
End-to-end flow
1. Create an enterprise self-built app and enable the bot capability
        ↓
2. Batch-enable message, card, and related permissions
        ↓
3. Get App ID / App Secret / Encrypt Key (Verification Token optional)
        ↓
4. Fill in AI Studio, save, and copy the Webhook
        ↓
5. Feishu event subscription: Send events to developer server; paste Webhook
        ↓
6. Add Receive message event; configure Card interaction callback
        ↓
7. Create a version and publish → test in DM / group
1. Create a Feishu app
1. Sign in and create
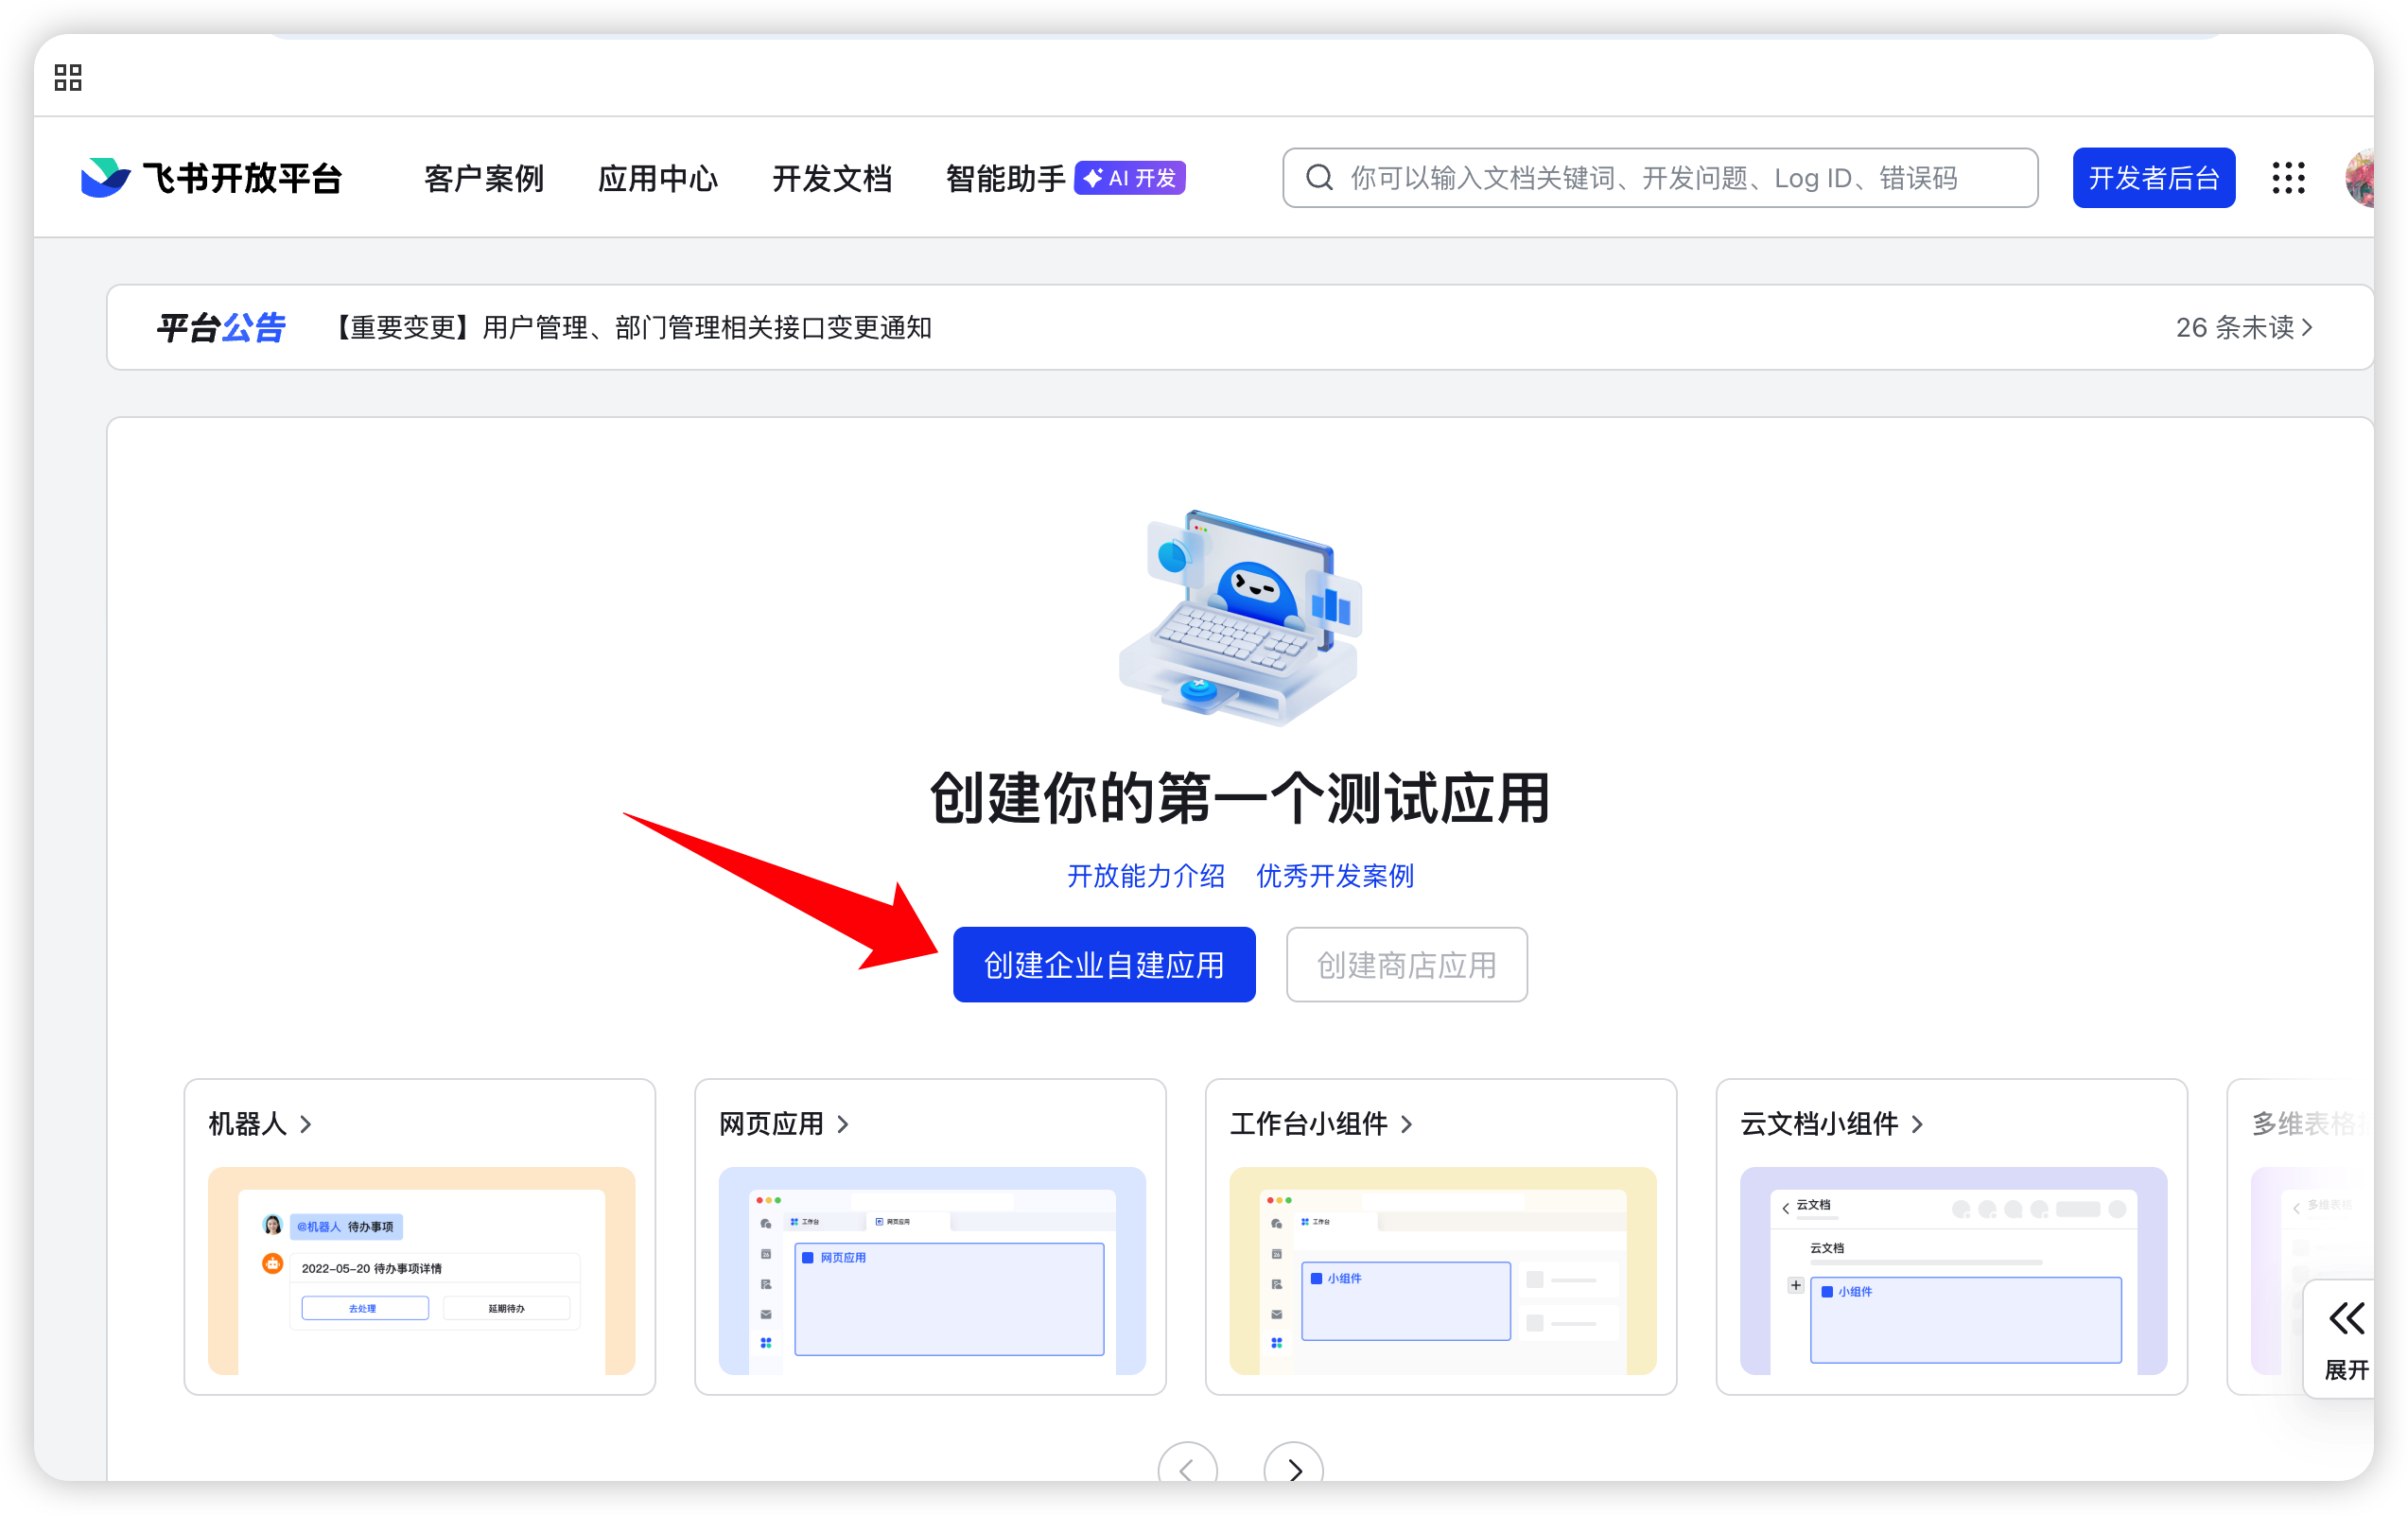
Open Feishu Open Platform and click Create enterprise self-built app:
2. App info
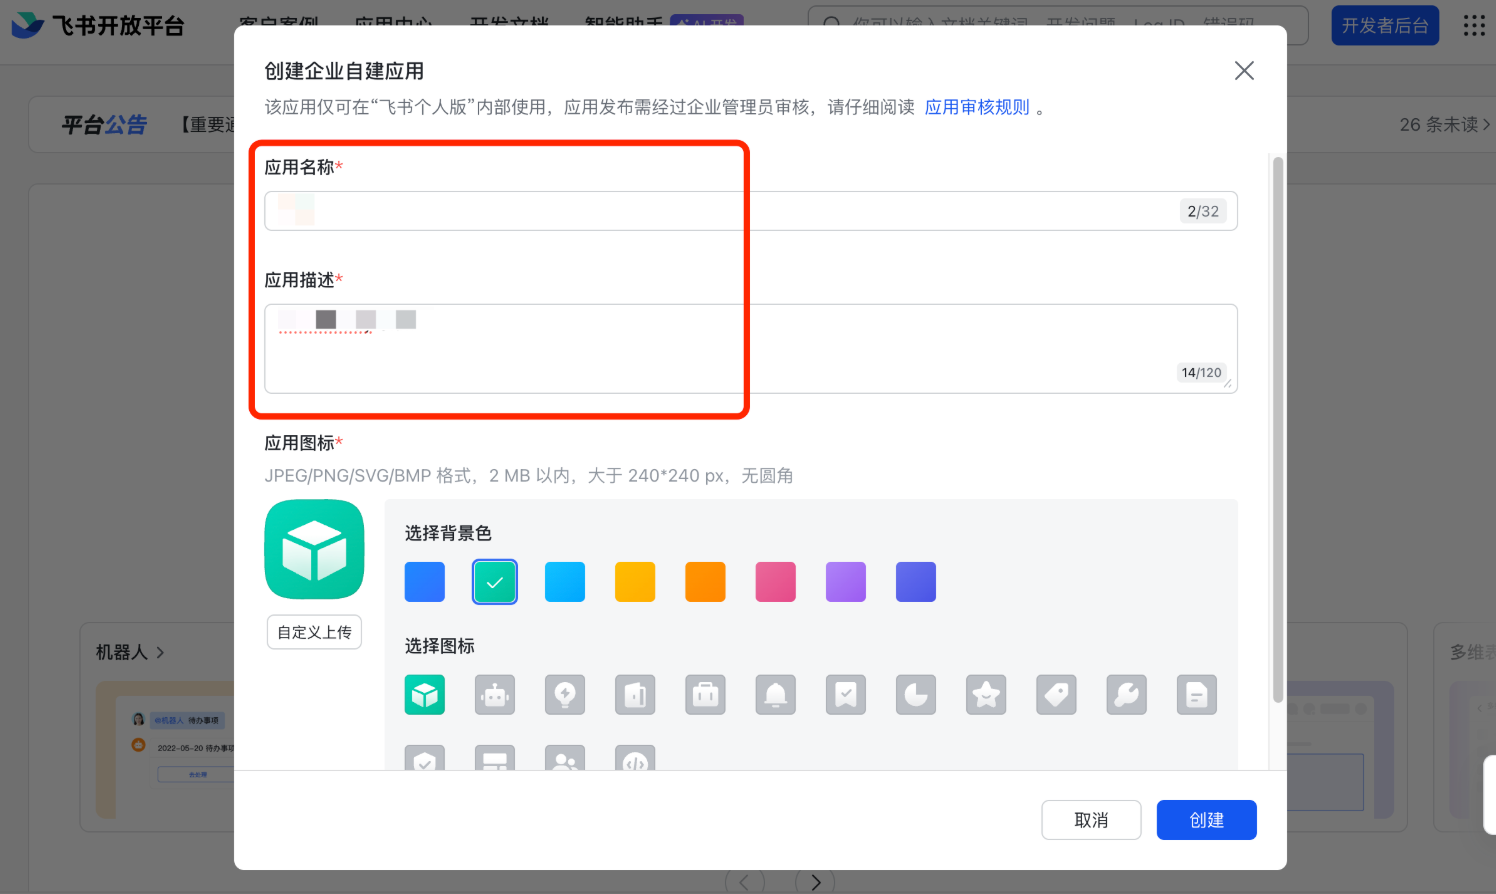
| Field | Description |
|---|---|
| App name | e.g. “Sage AI Assistant” |
| Description | Brief purpose |
| Icon | Upload an icon |
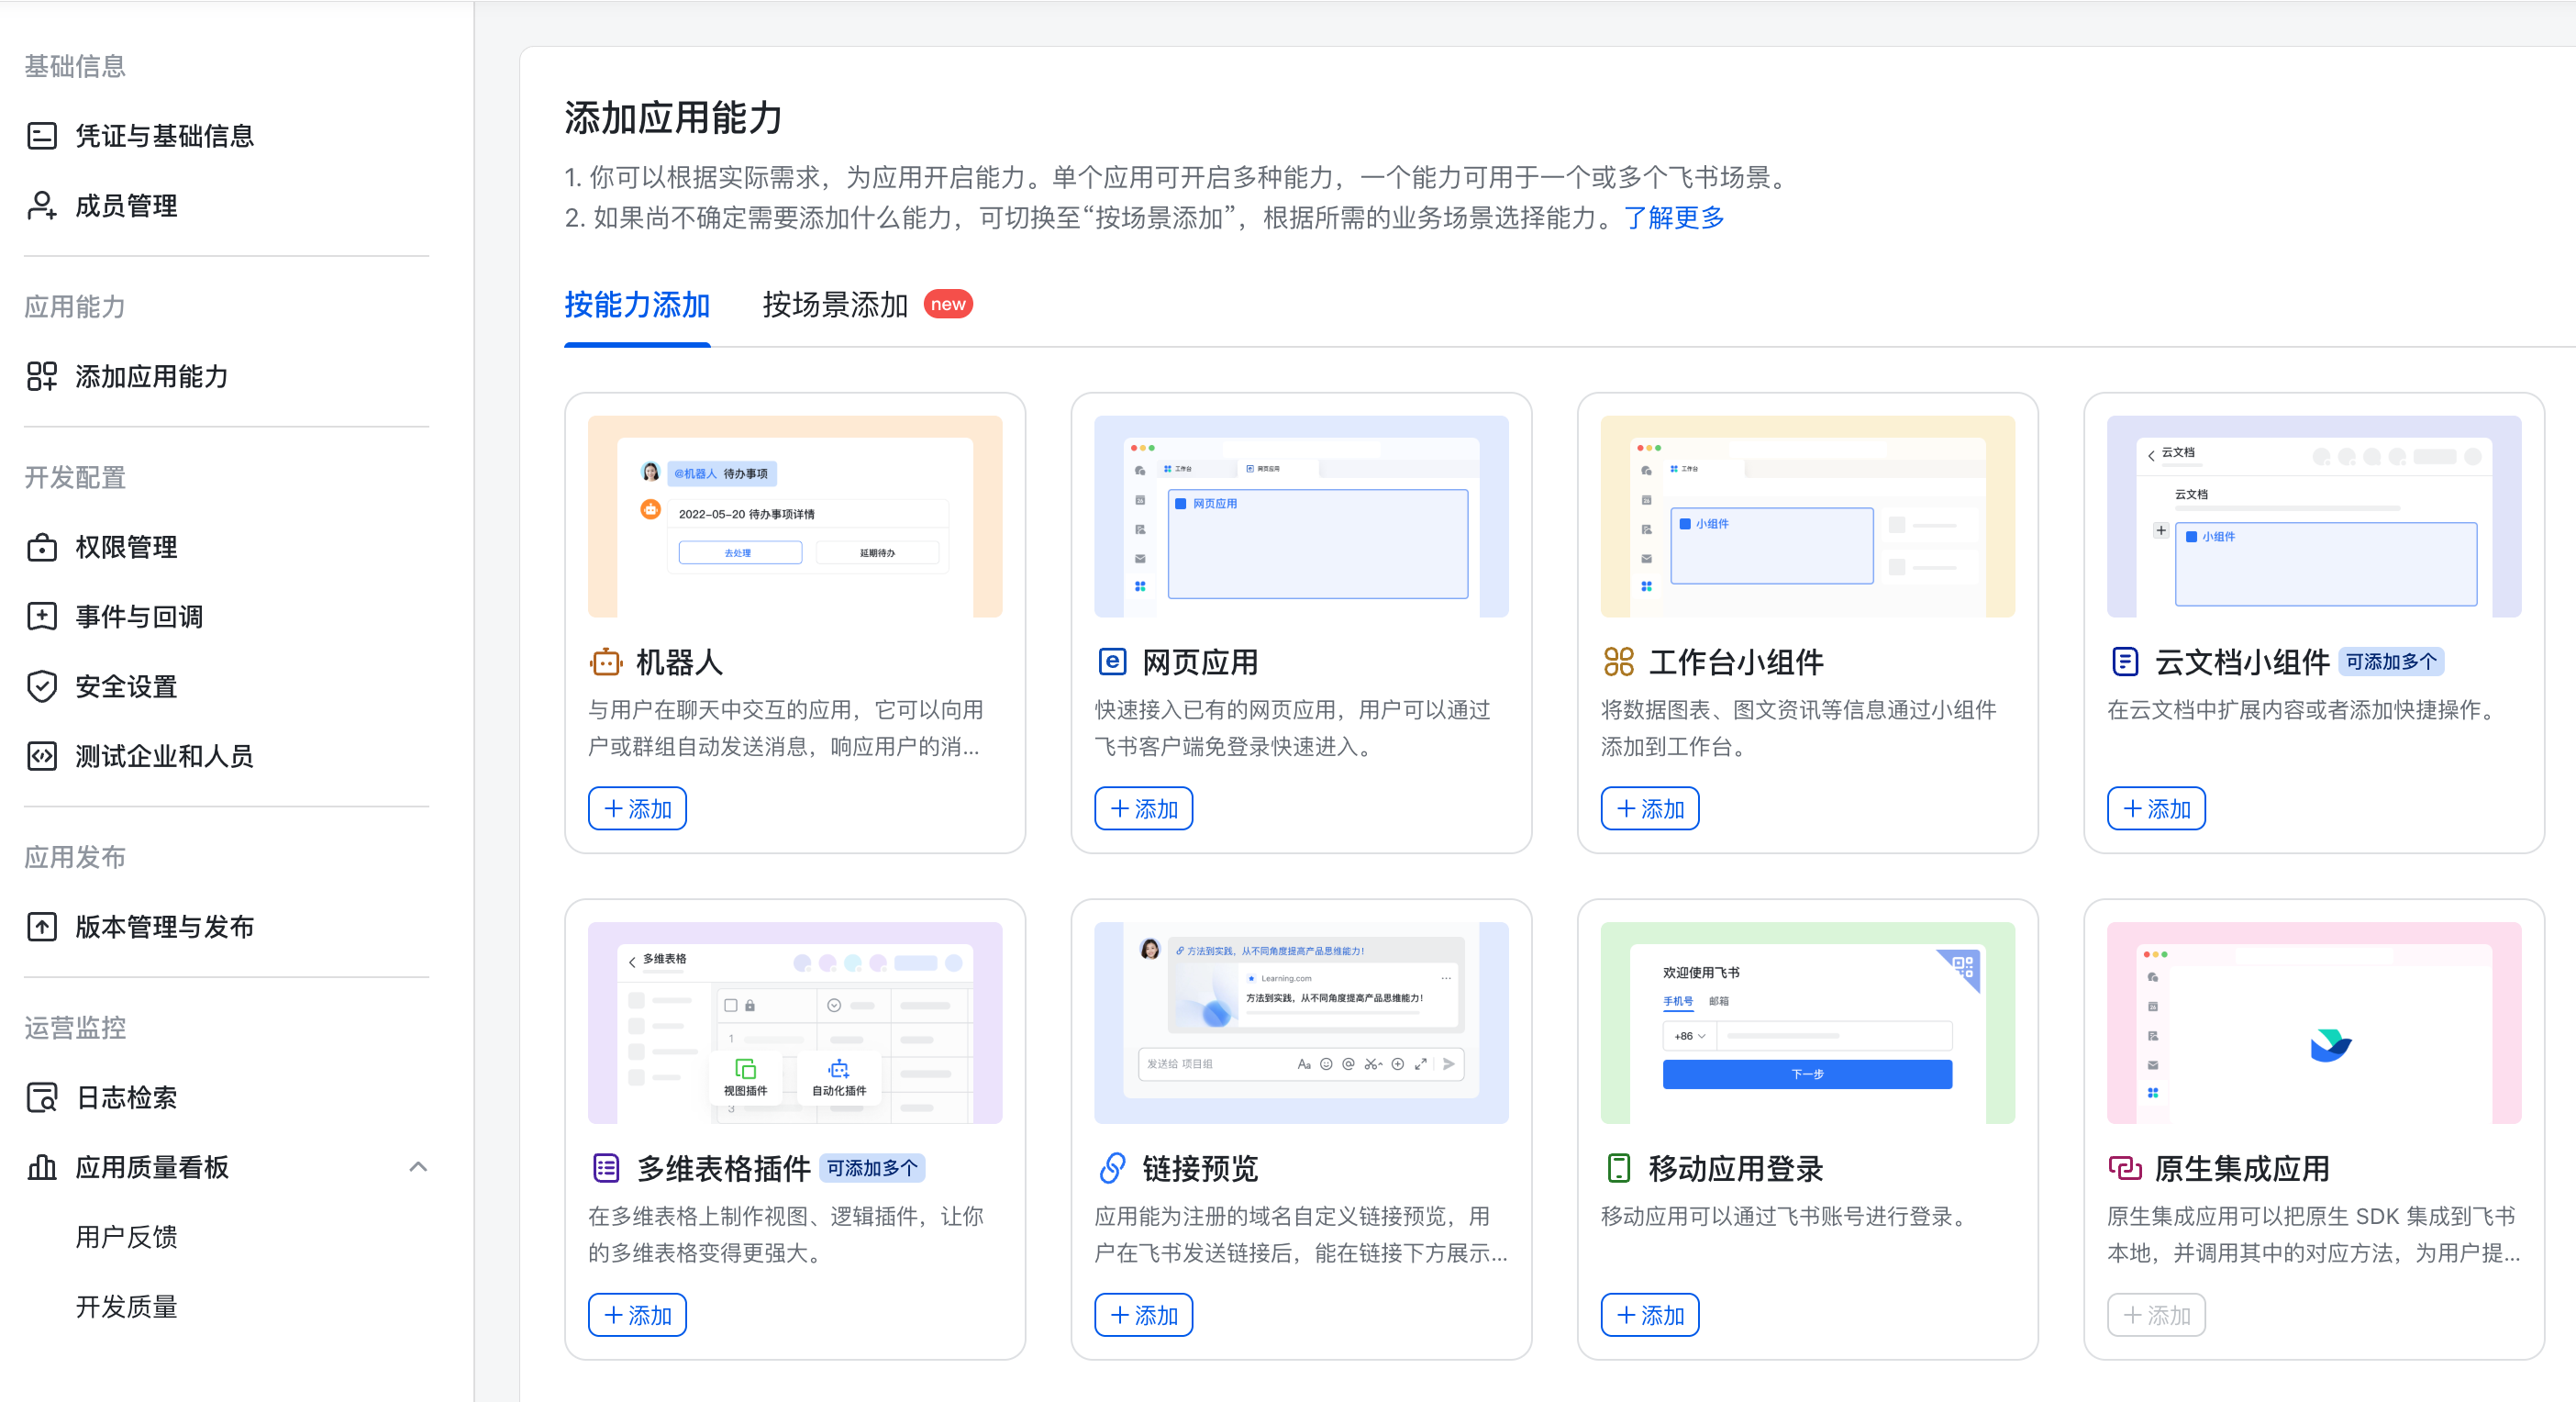
After creation, open the app details page:
3. Add bot capability
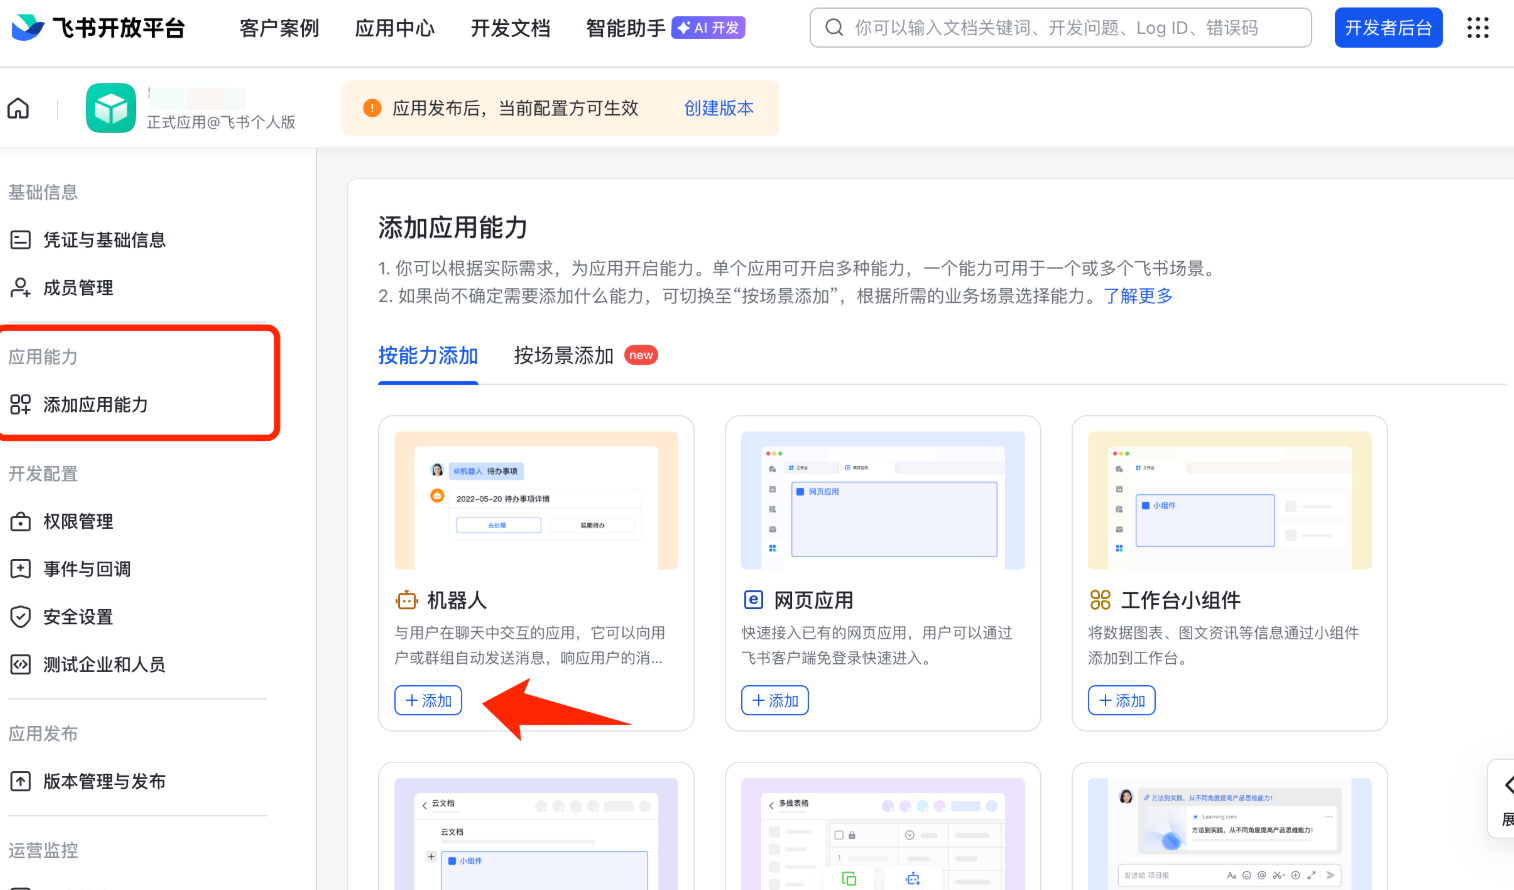
Under Add app capabilities, find Bot and click Add:
2. Configure app permissions
Go to Permissions → Batch import / export:
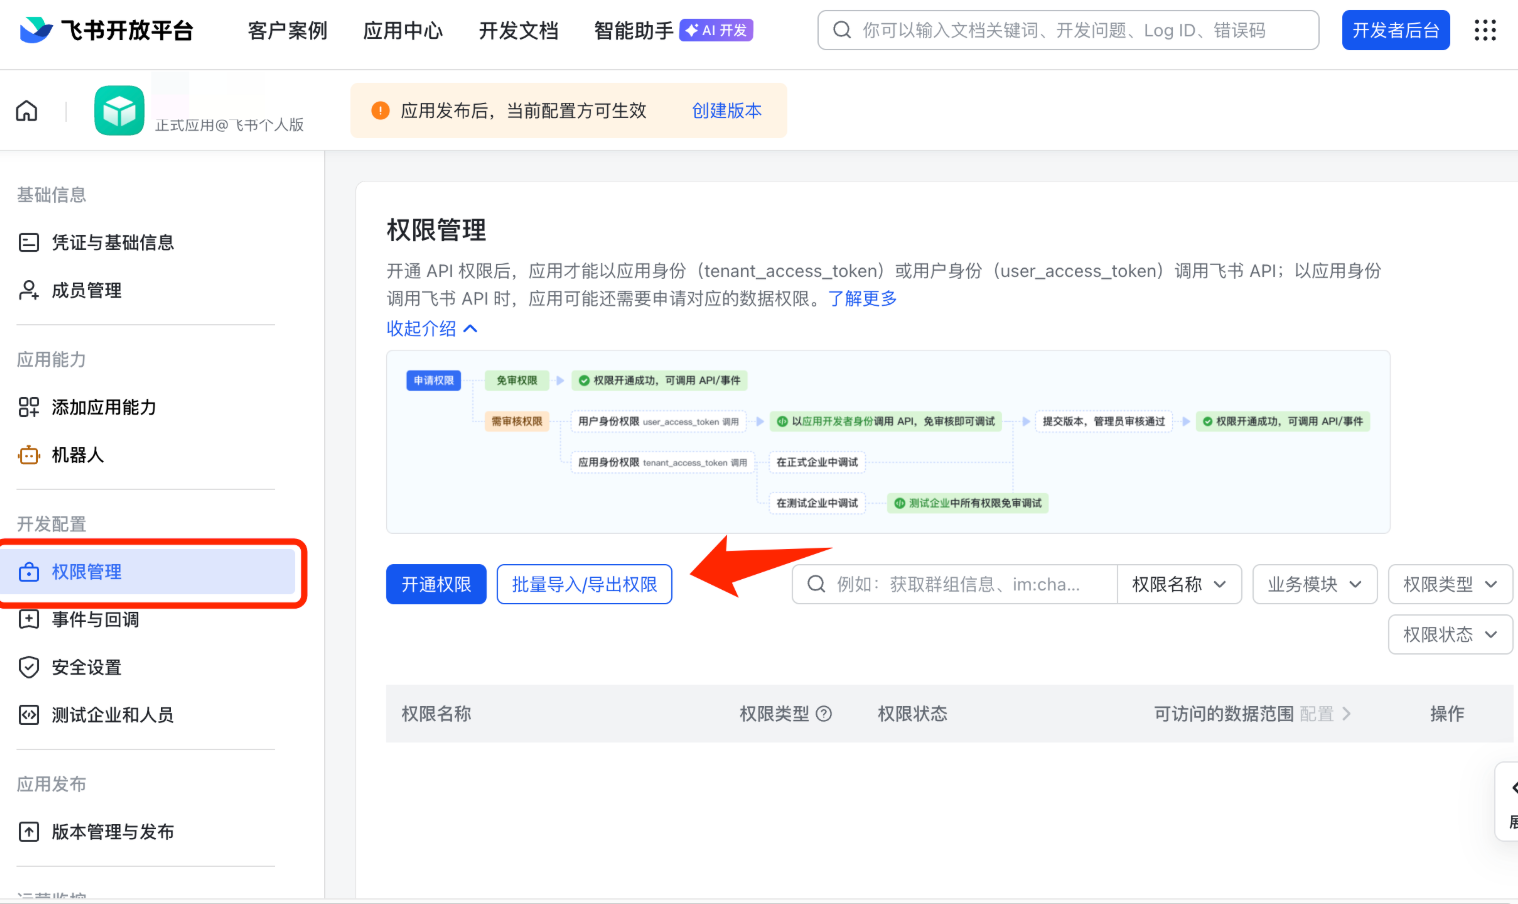
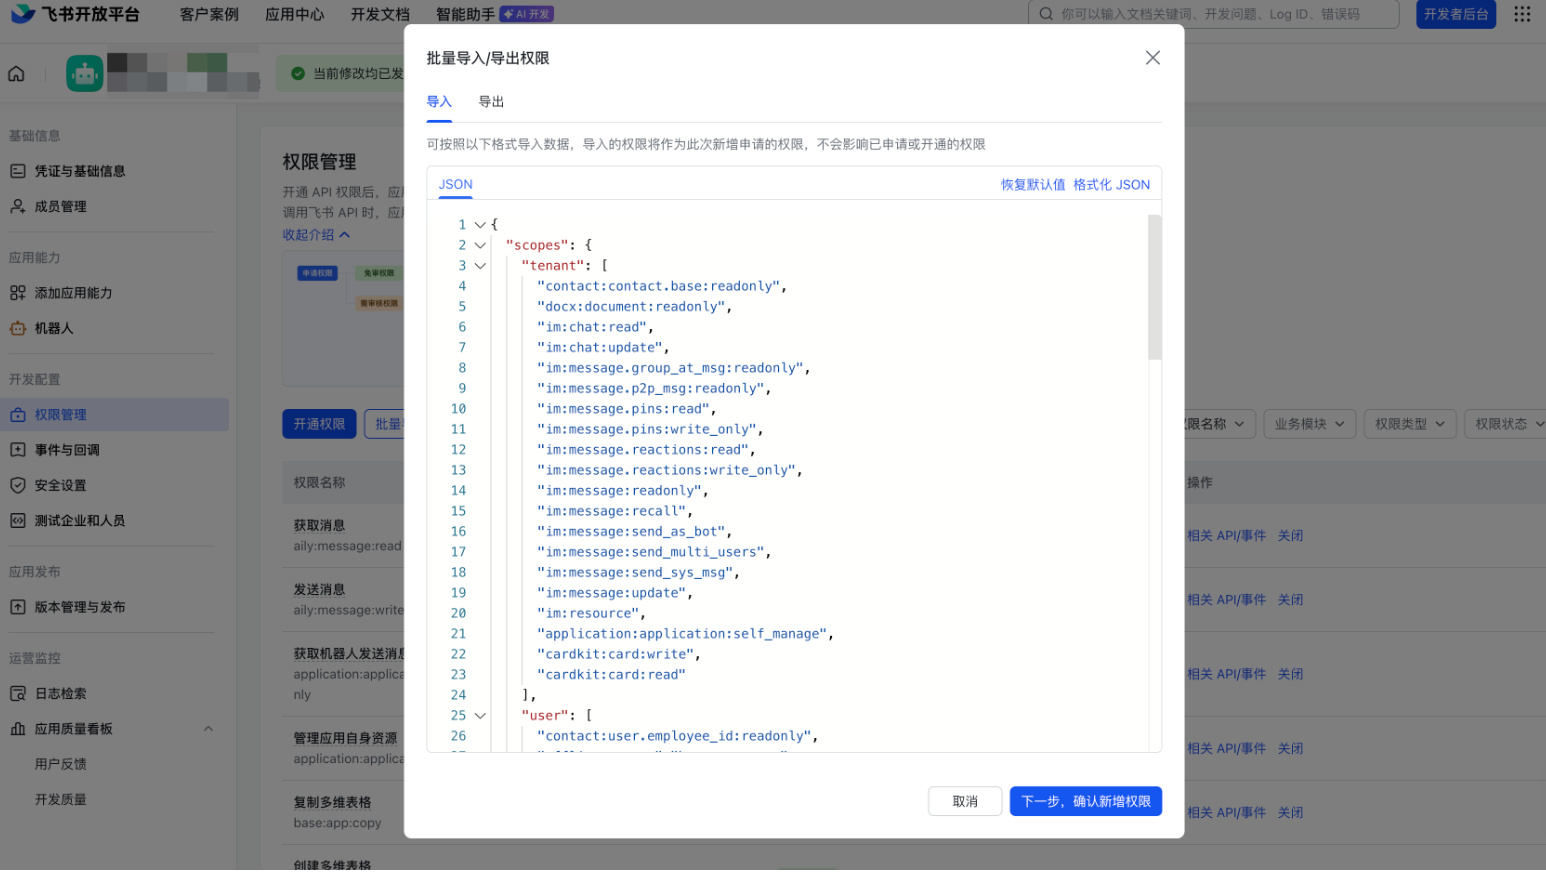
- Clear the input box.
- Paste the JSON below (trim per company policy, but keep message send/receive and card scopes).
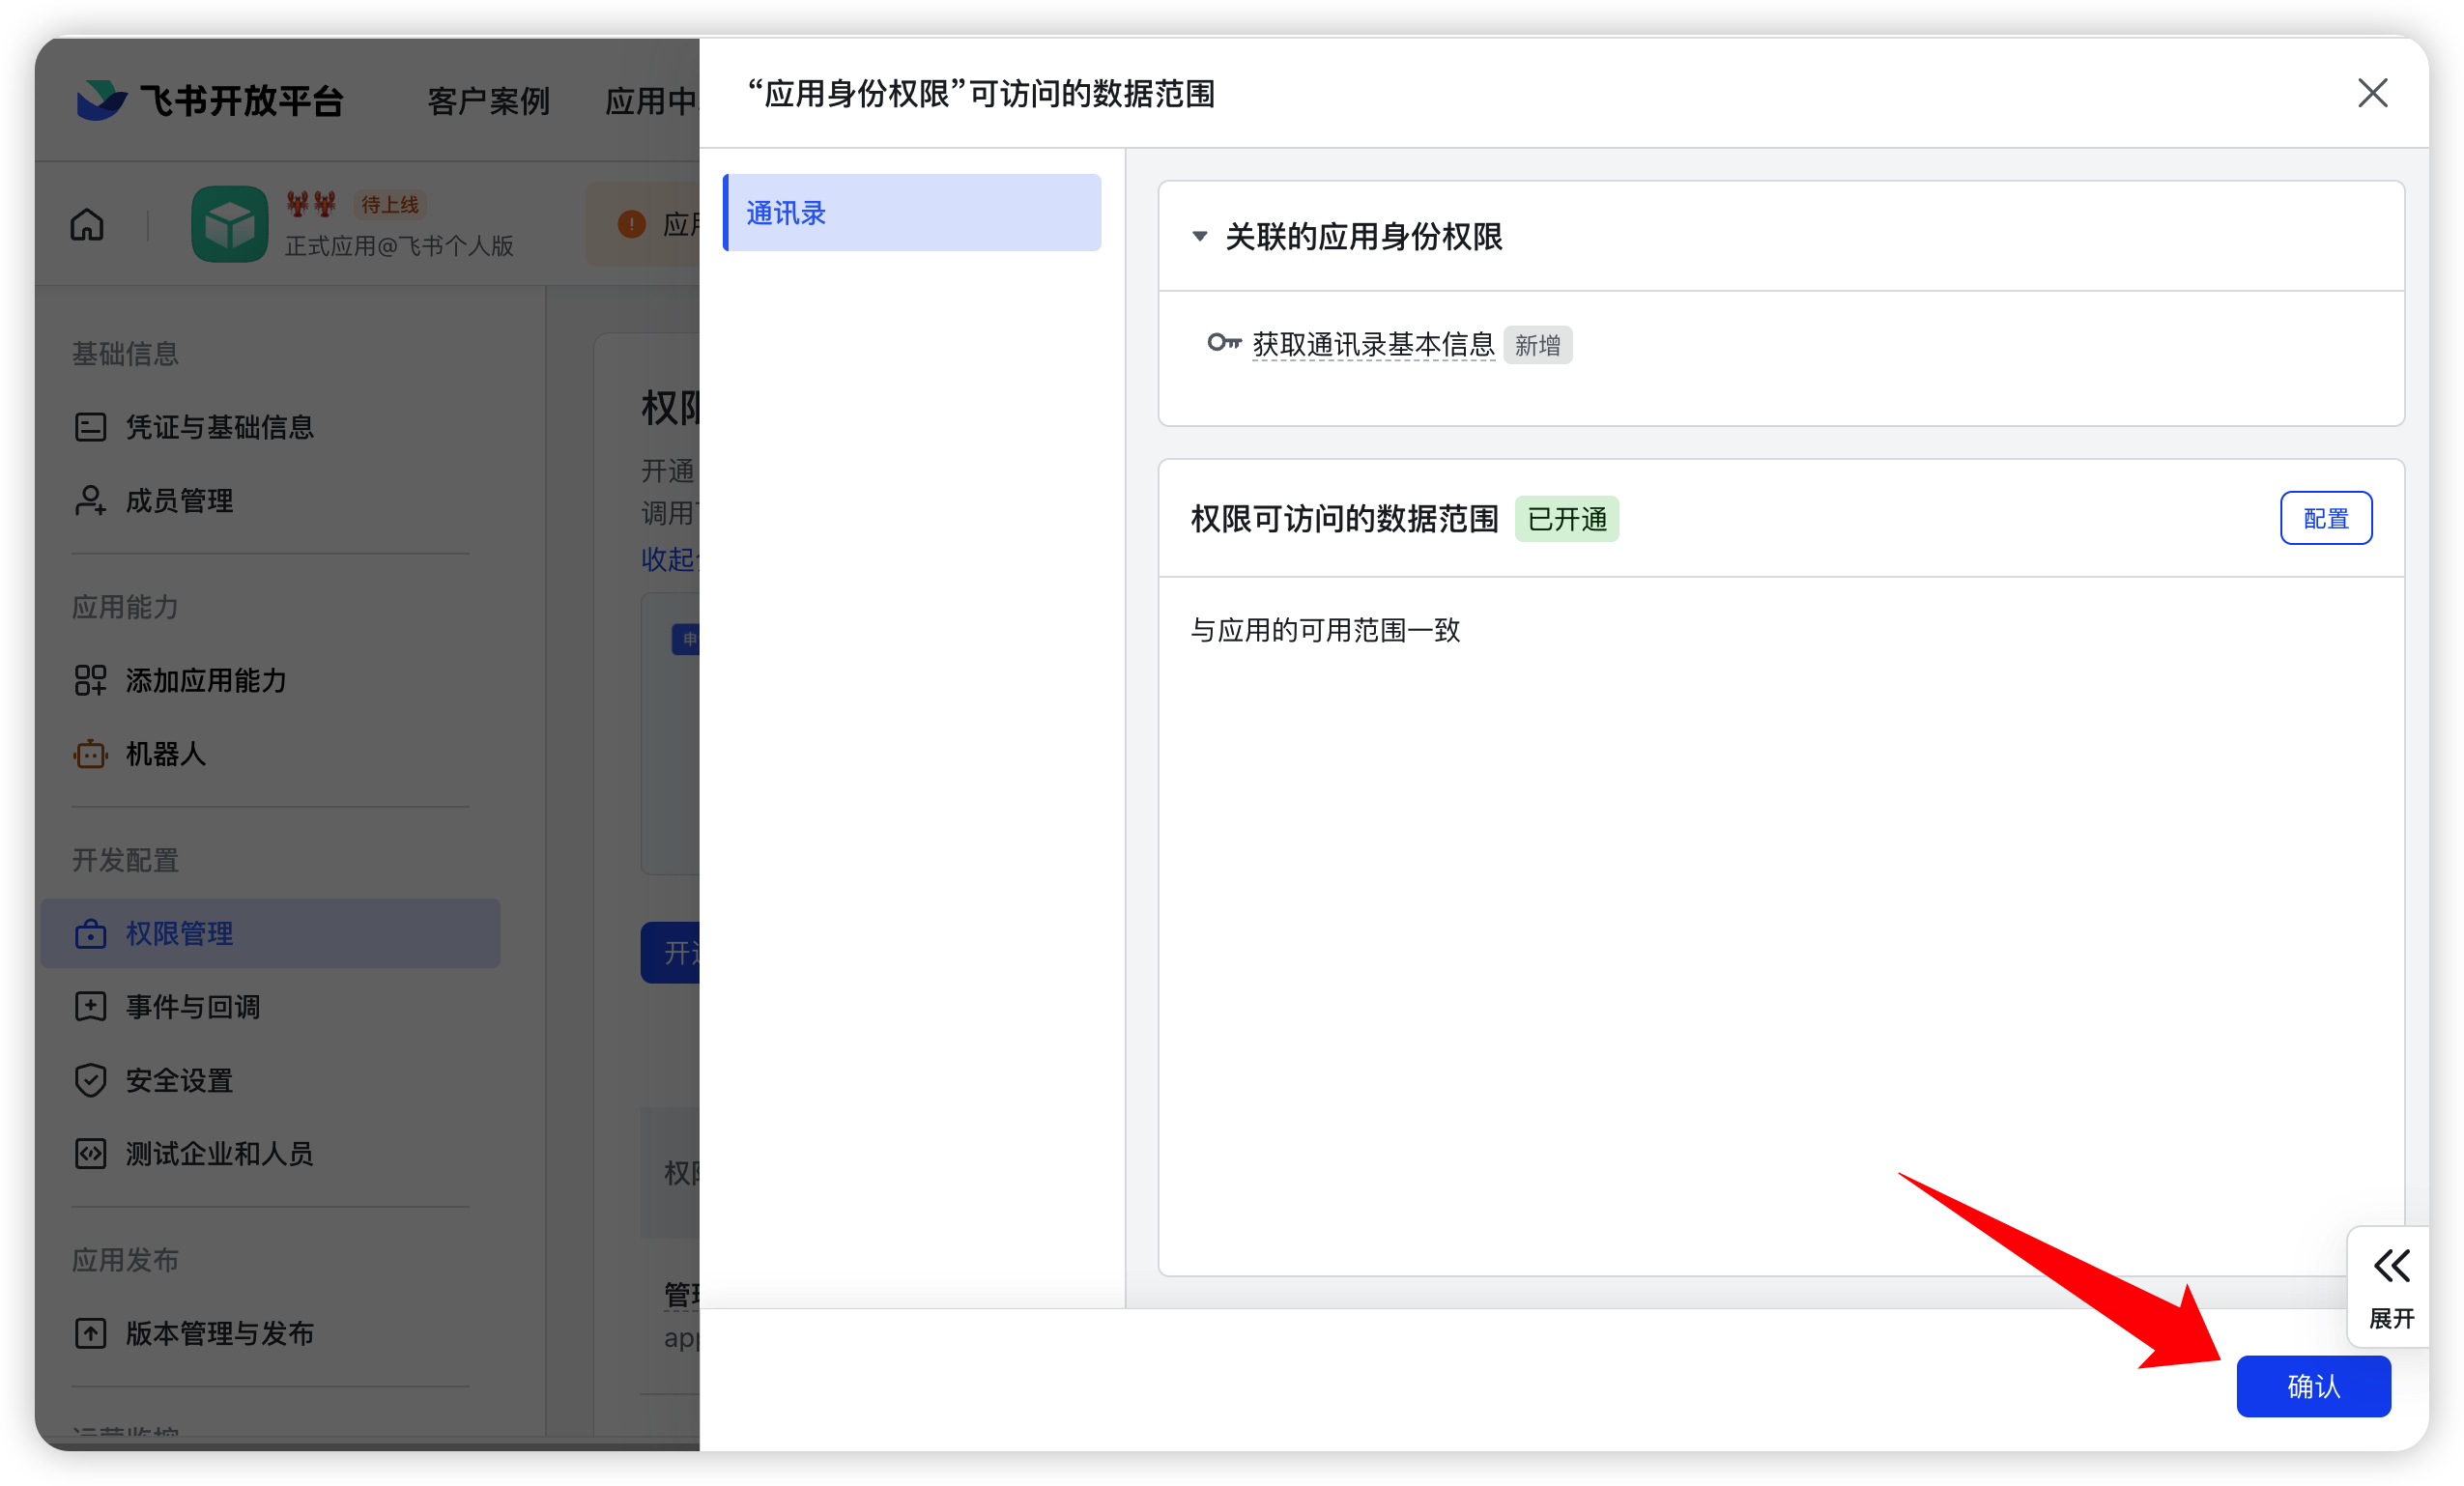
- Click Confirm to add permissions.
{
  "scopes": {
    "tenant": [
      "contact:contact.base:readonly",
      "docx:document:readonly",
      "im:chat:read",
      "im:chat:update",
      "im:message.group_at_msg:readonly",
      "im:message.p2p_msg:readonly",
      "im:message.pins:read",
      "im:message.pins:write_only",
      "im:message.reactions:read",
      "im:message.reactions:write_only",
      "im:message:readonly",
      "im:message:recall",
      "im:message:send_as_bot",
      "im:message:send_multi_users",
      "im:message:send_sys_msg",
      "im:message:update",
      "im:resource",
      "application:application:self_manage",
      "cardkit:card:write",
      "cardkit:card:read"
    ],
    "user": [
      "contact:user.employee_id:readonly",
      "offline_access",
      "im:chat.members:read",
      "im:chat:read",
      "im:message",
      "im:message.group_msg:get_as_user",
      "im:message.p2p_msg:get_as_user",
      "im:message:readonly"
    ]
  }
}
3. Get credentials and encryption parameters
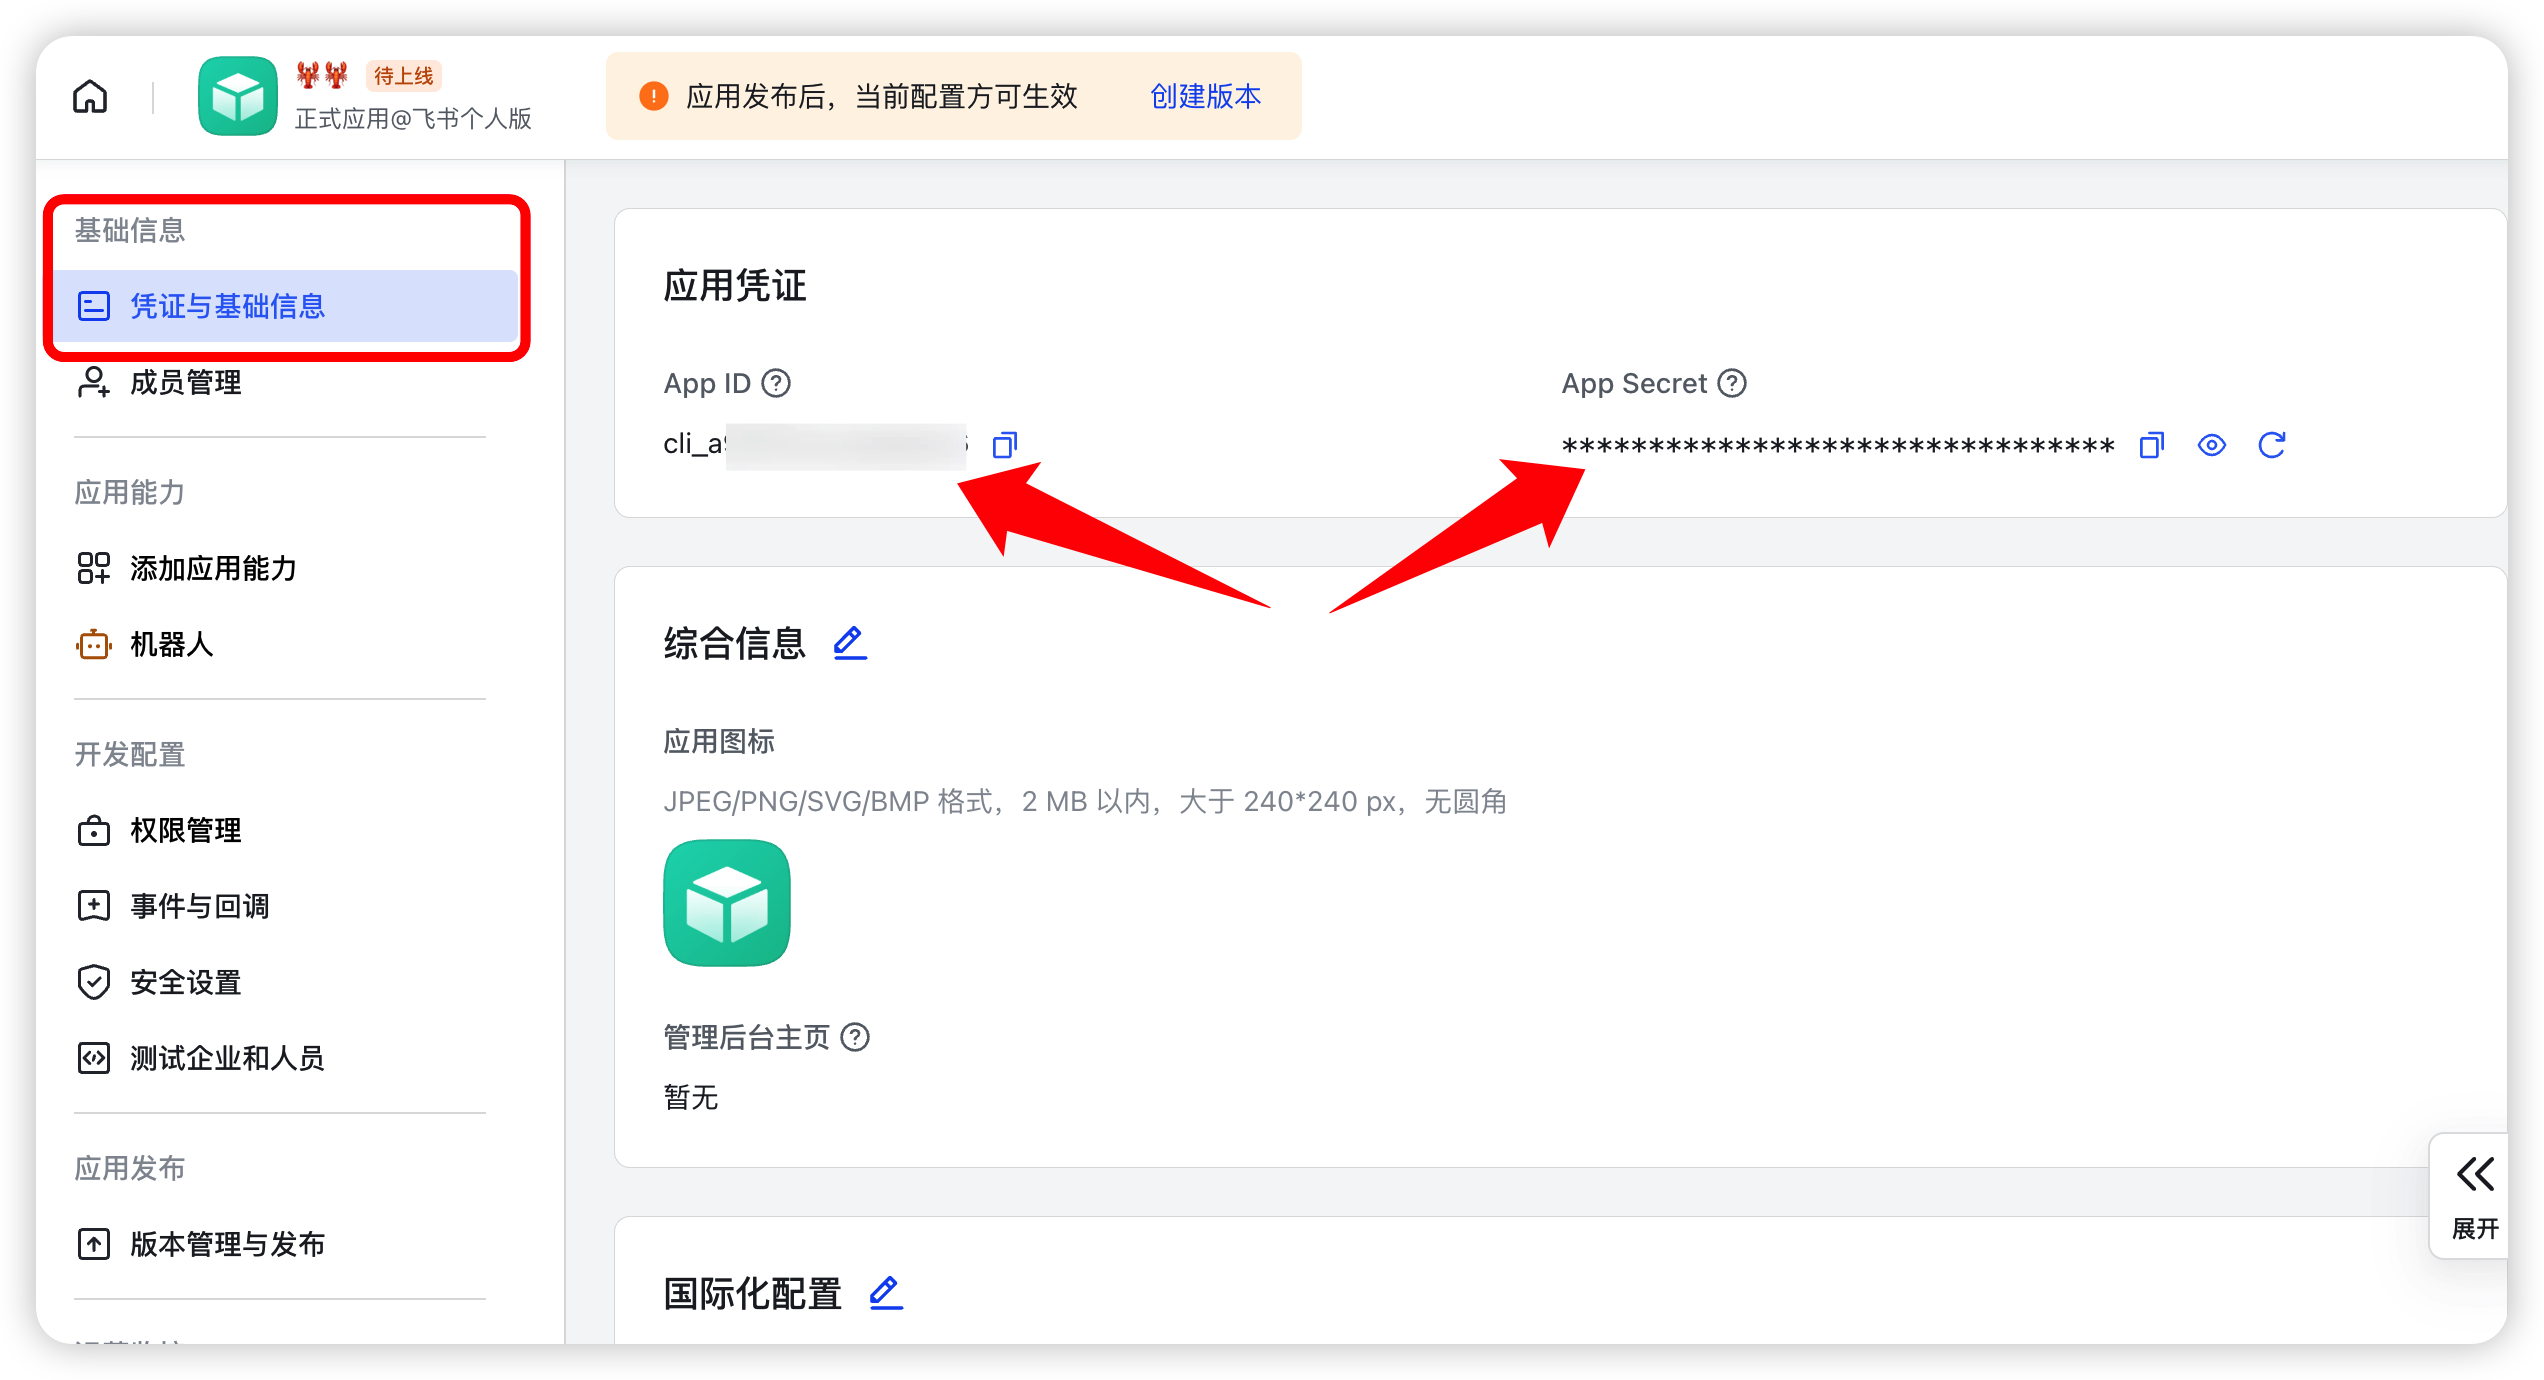
1. App ID / App Secret
Credentials & basic info:
Keep App Secret safe.
2. Encrypt Key / Verification Token
Go to Events & Callbacks → encryption strategy: refresh to generate or edit manually.
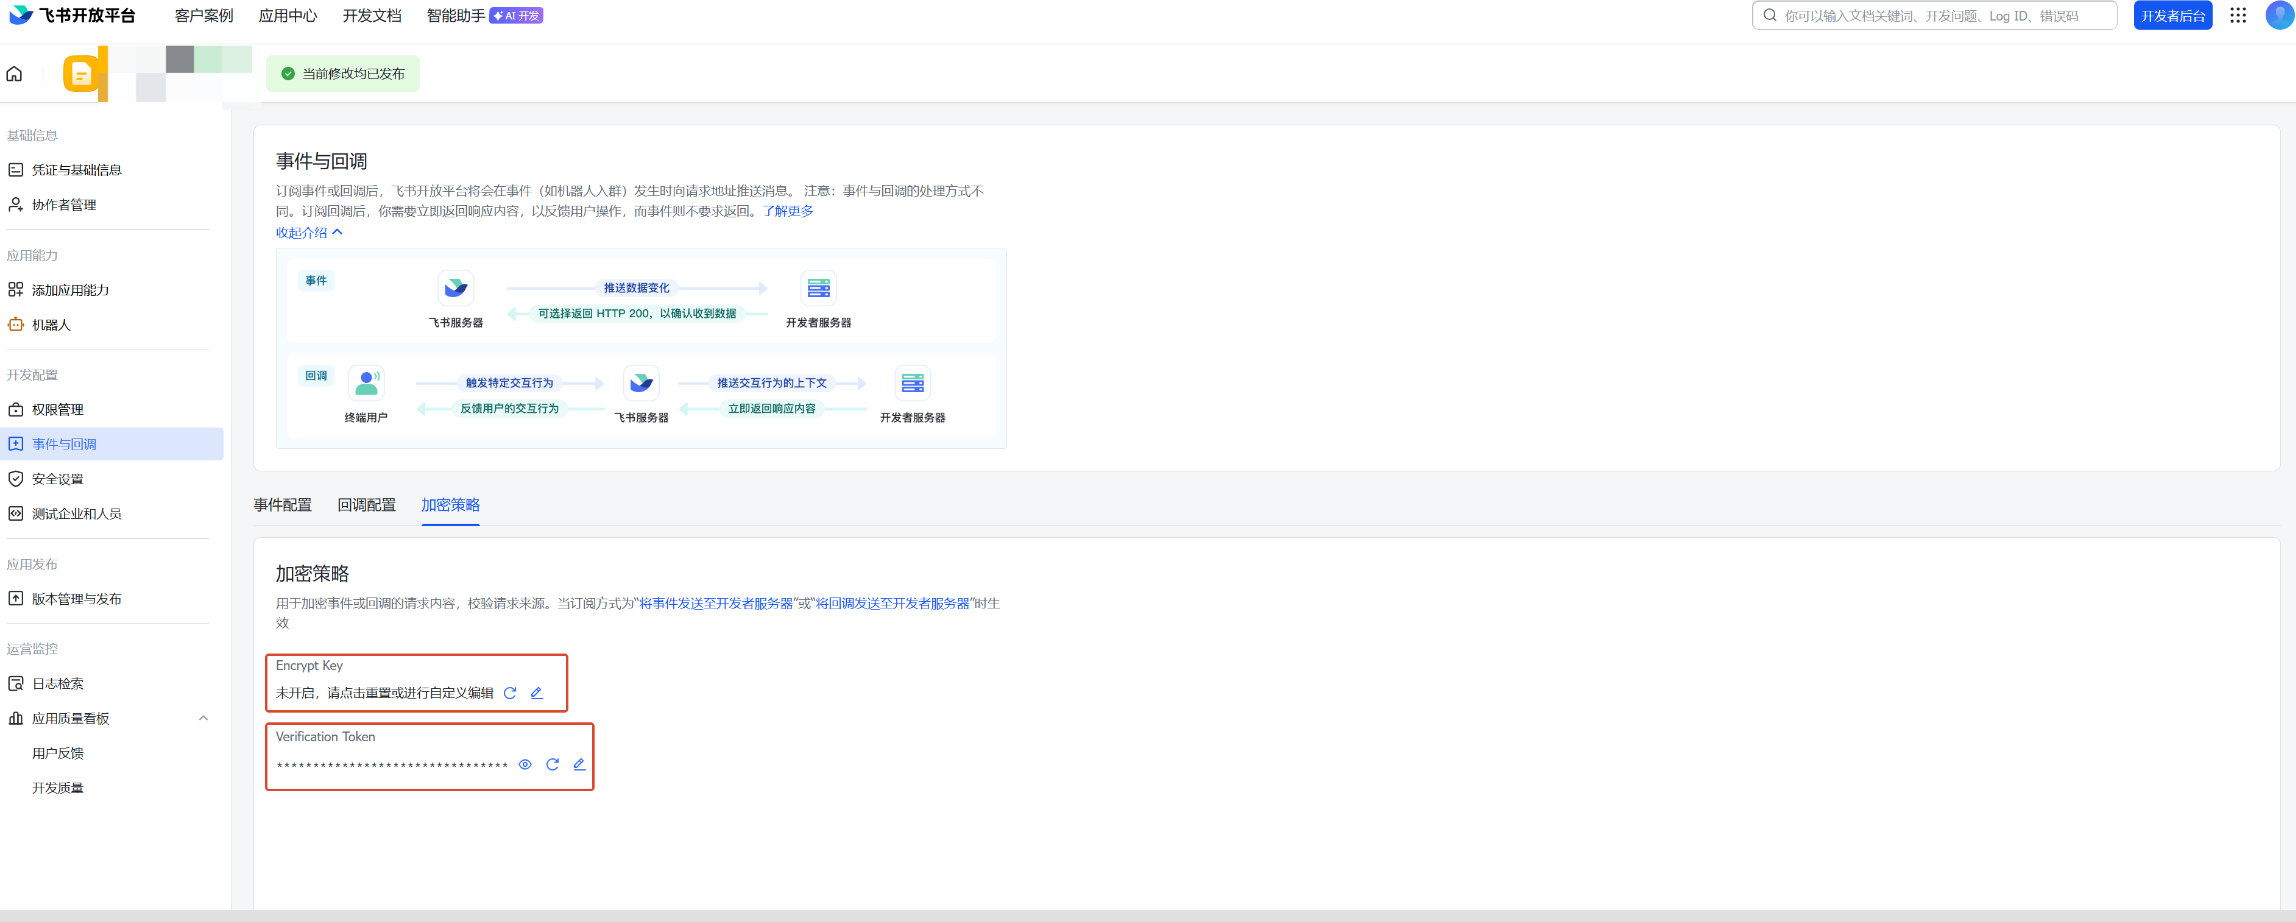
Encrypt Key is recommended; Verification Token is optional in AI Studio. Leave Encrypt Key empty to disable message encryption.
4. Configure Feishu in AI Studio (URL callback)
- Go to AI Studio → Security Operations → IM Channel → Feishu → Configure.
- Connection mode is fixed to Use URL callback (Webhook) (no long-connection option).
- Fill in the fields, click Save, and copy the Webhook.
| Field | Required | Description | Default | Validation |
|---|---|---|---|---|
| App ID | Yes | Feishu App ID | — | Non-empty; ≤1000; not masked |
| App Secret | Yes | App secret | — | Non-empty; ≤1000; masked |
| Encrypt Key | Recommended | Event encryption; leave empty to disable (per product) | — | ≤1000; masked |
| Verification Token | Optional | Event verification token | — | ≤1000; masked |
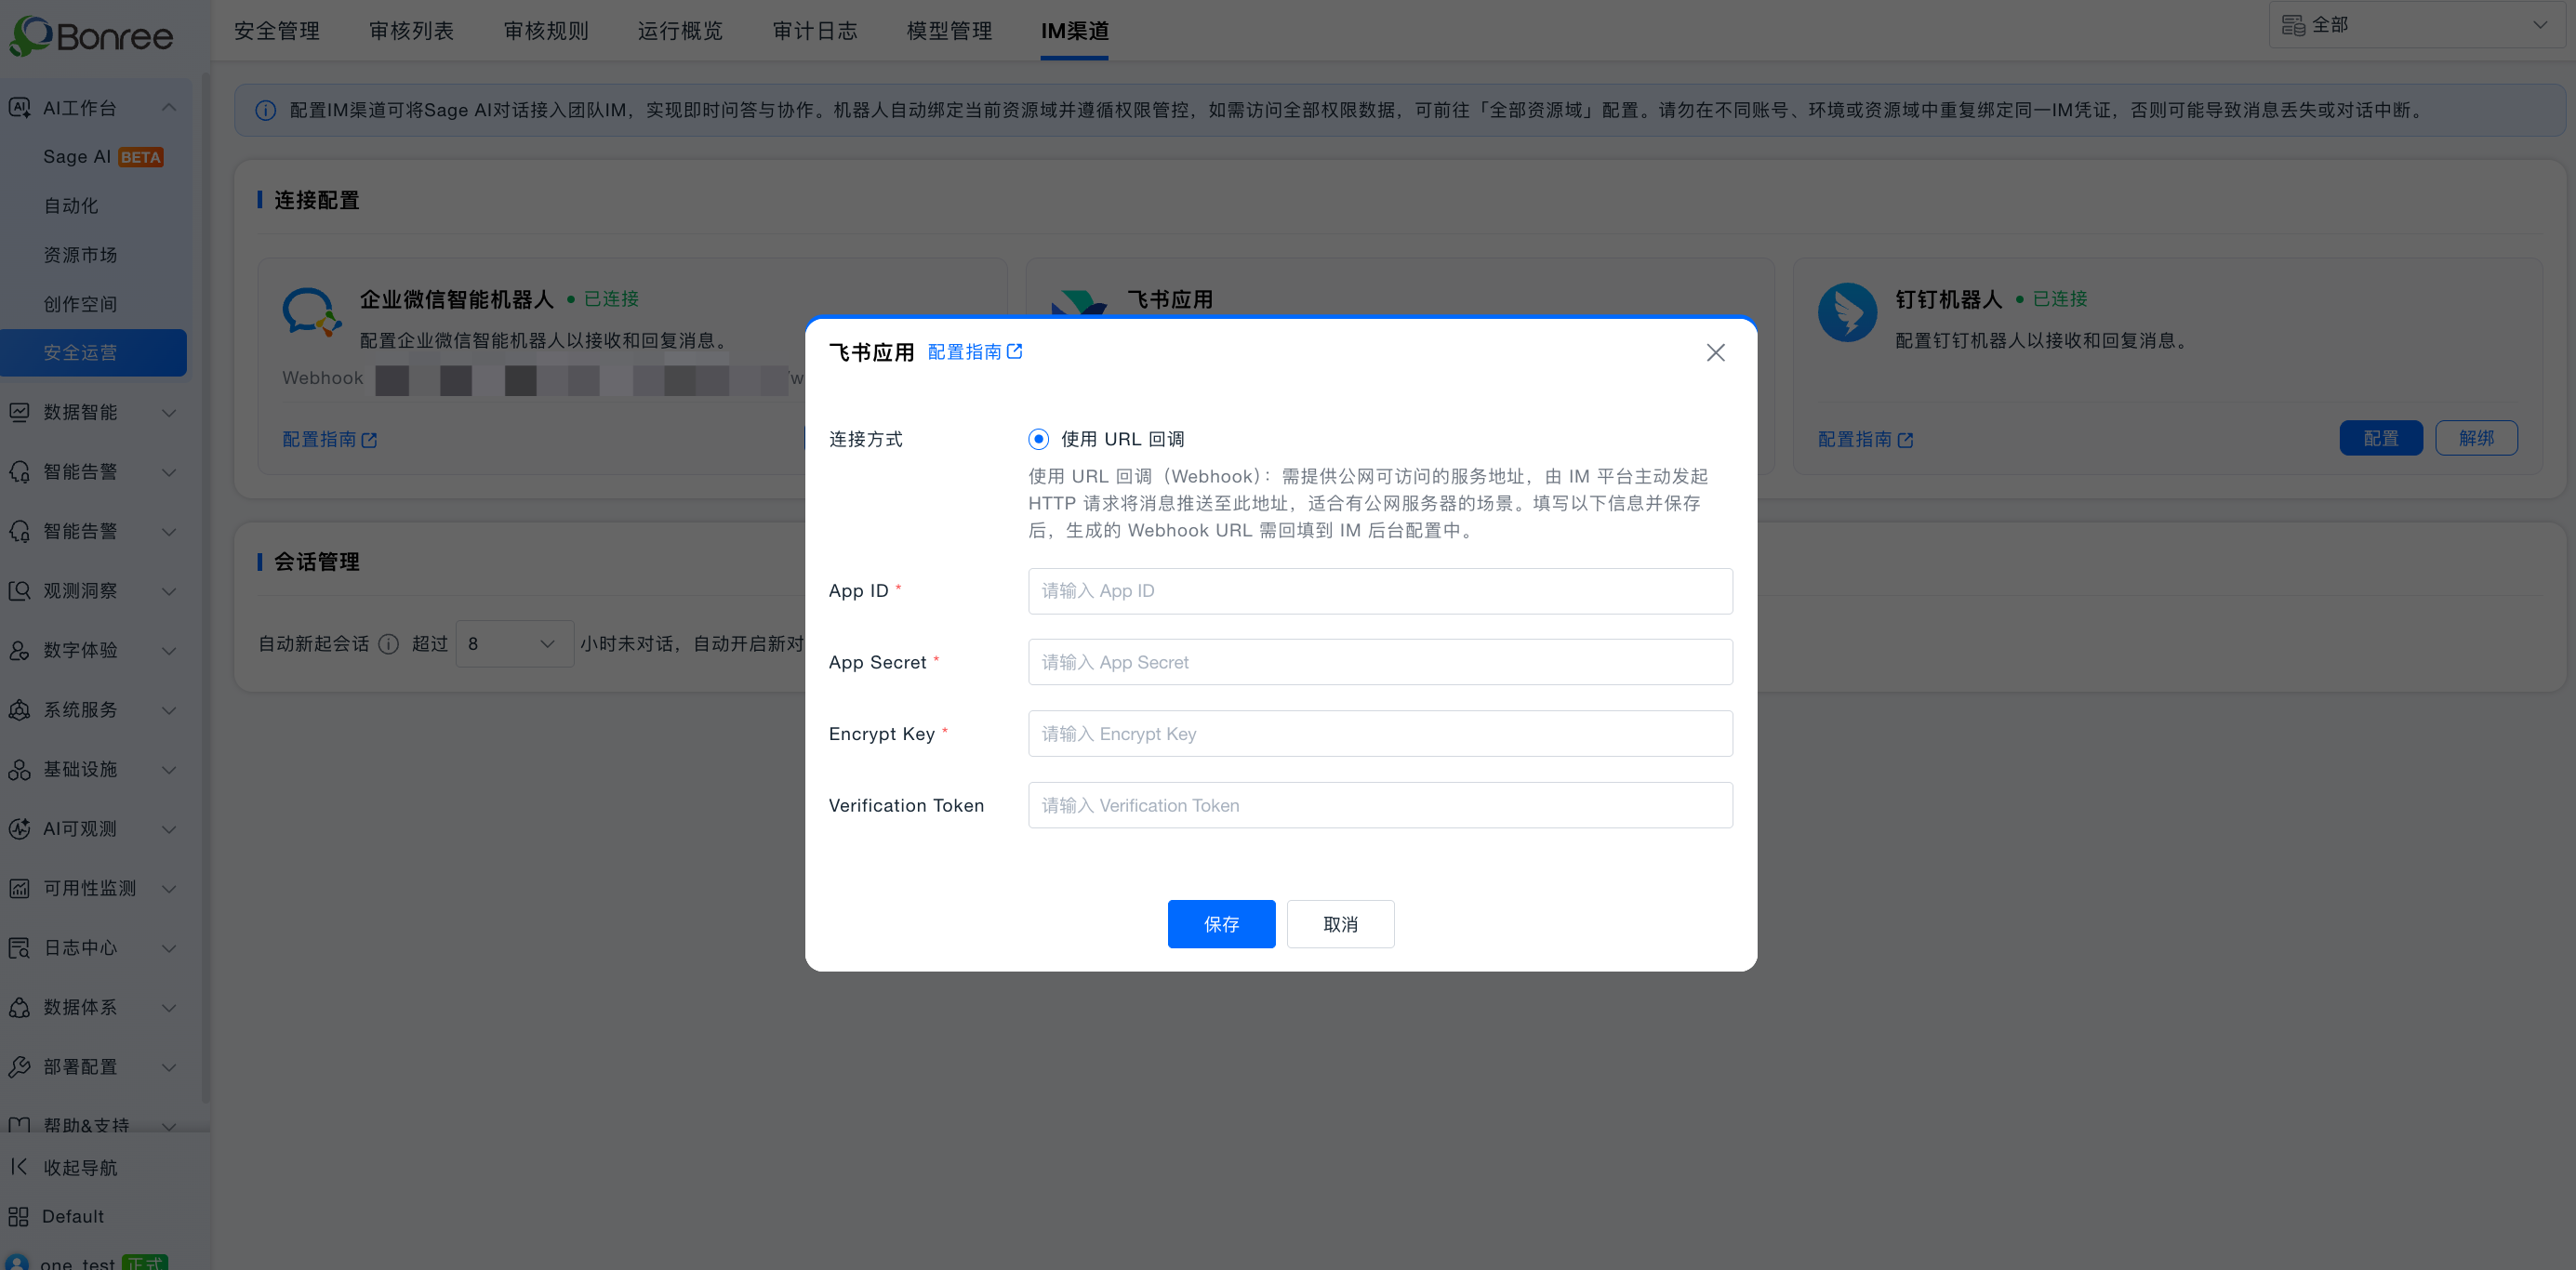
On save, App ID / Secret are validated. When they pass, status is Connected and a Webhook is generated.
Session management: auto-start new session, default 24 hours (1–24, cannot disable).
Click Unbind and confirm to remove the binding.
5. Configure Feishu events and card callbacks
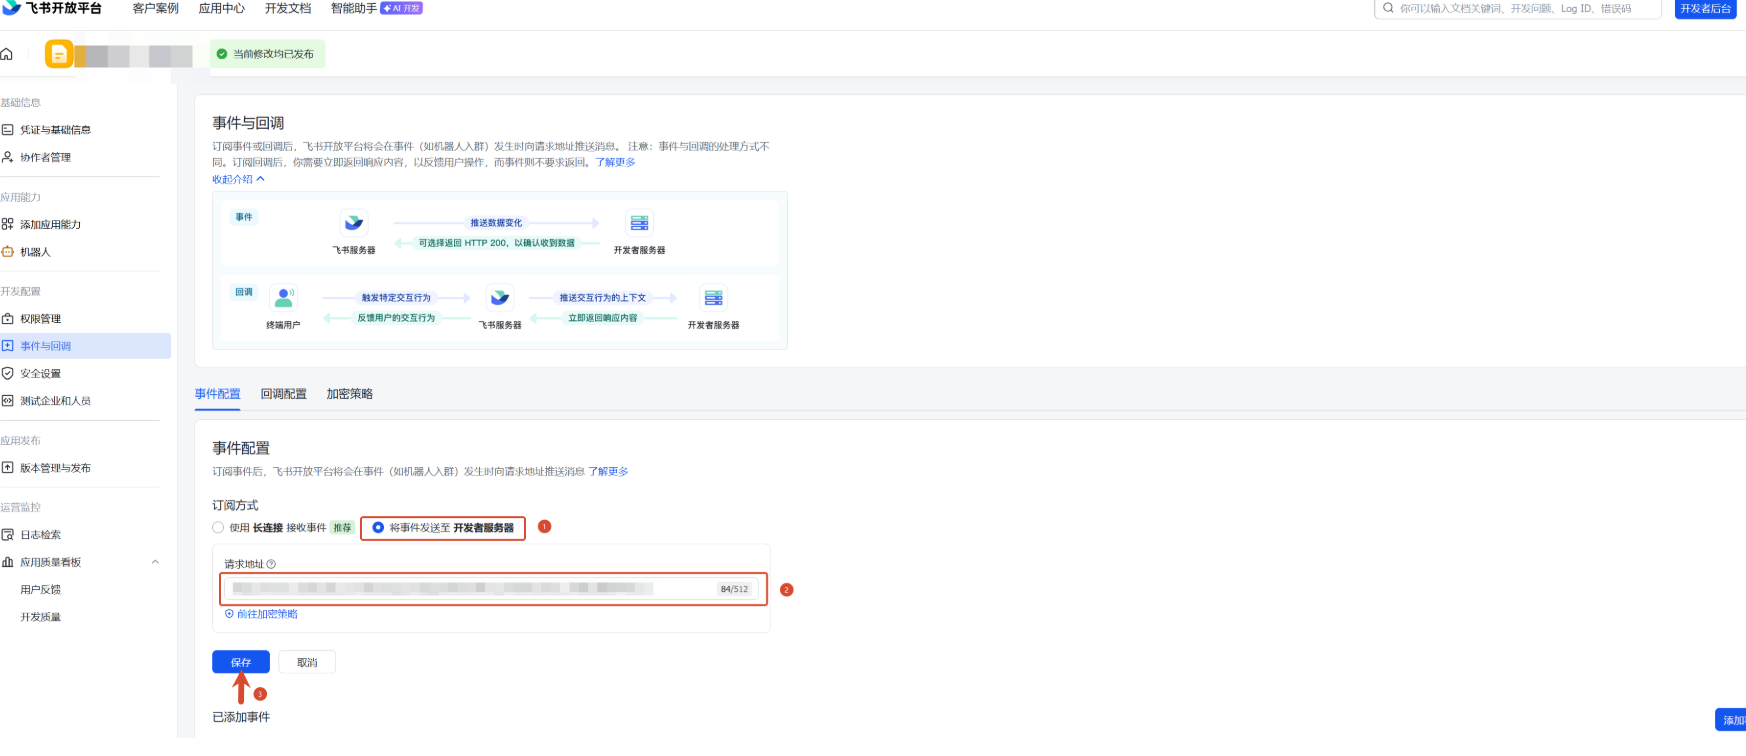
1. Event subscription (URL callback)
Back on Feishu Open Platform → Events & Callbacks, set subscription mode to Send events to developer server (do not choose long connection), paste the Webhook from AI Studio, and save:
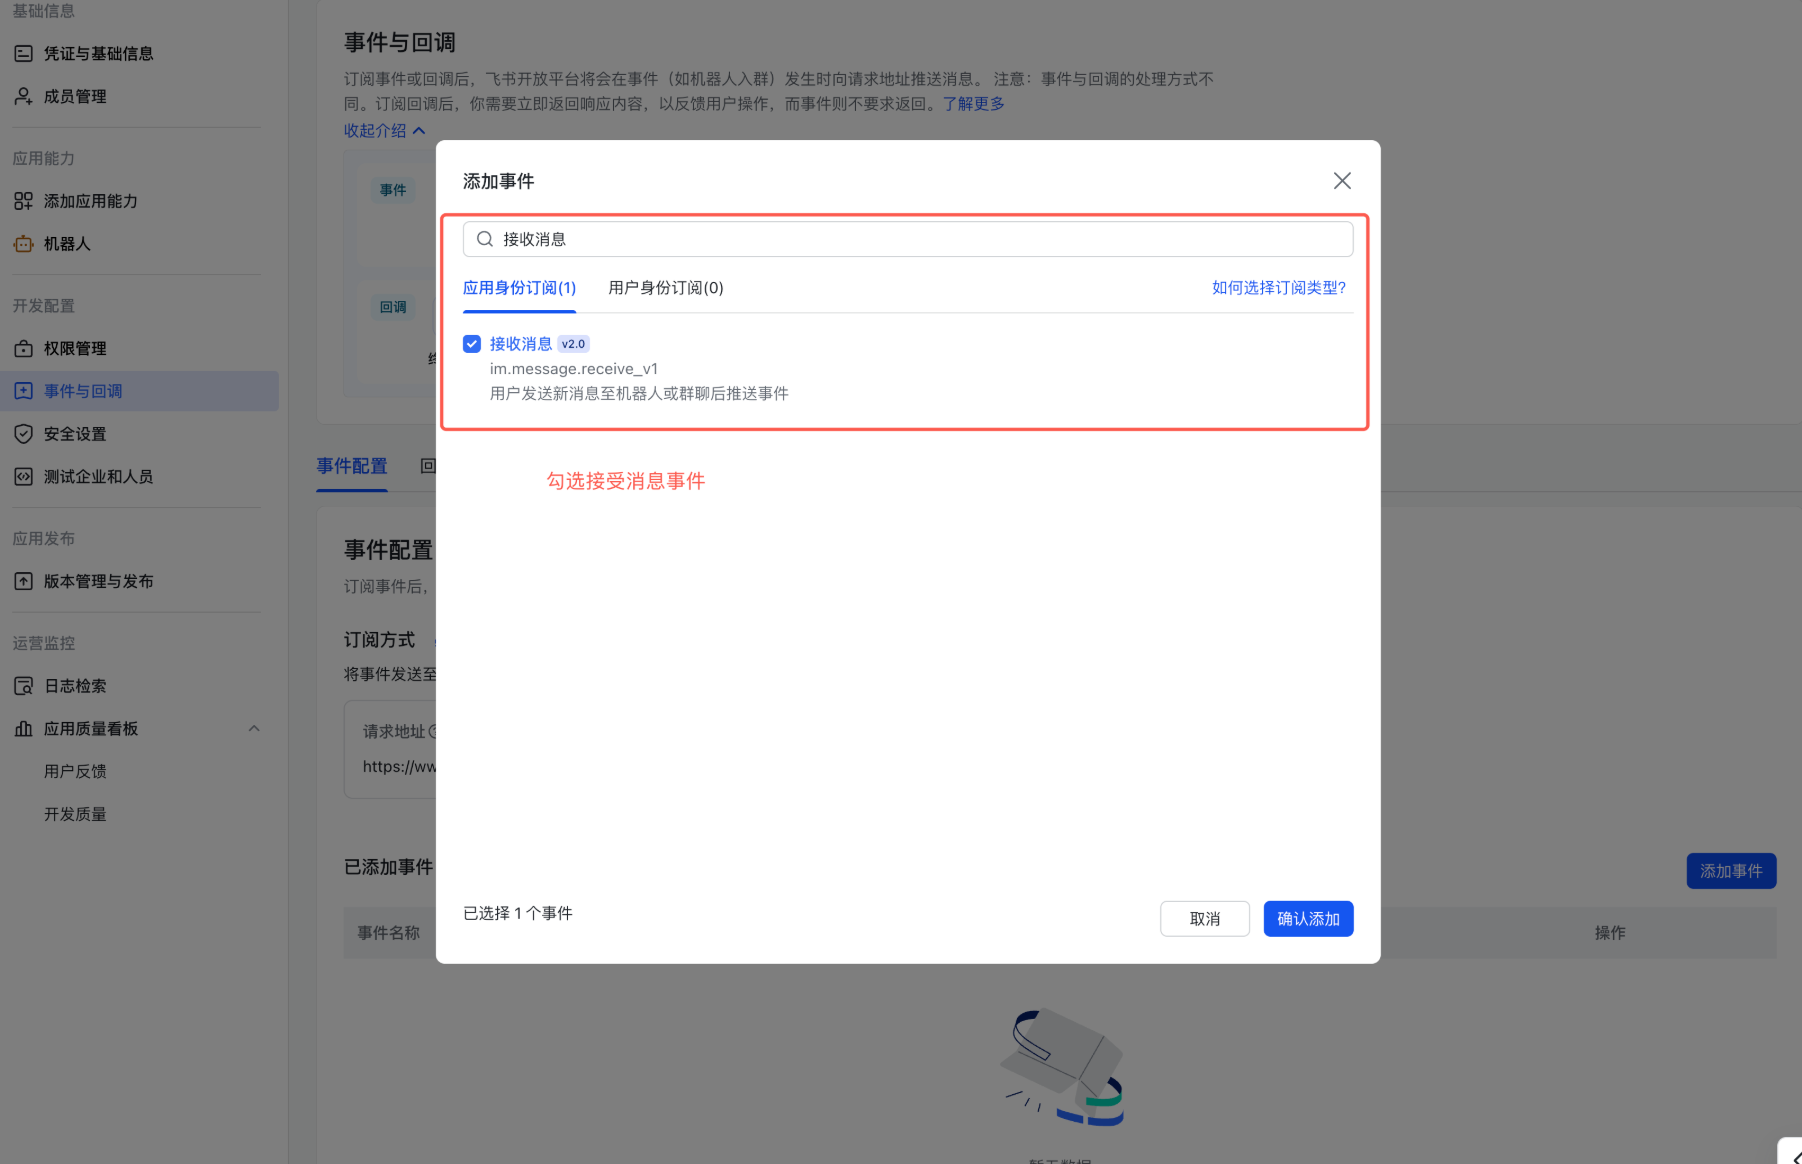
2. Add the Receive message event
Under Event configuration, click Add event, search for and add Receive message:
3. Configure app card callback (kept)
- Open the Callback configuration tab.
- Search for and add Card interaction callback.
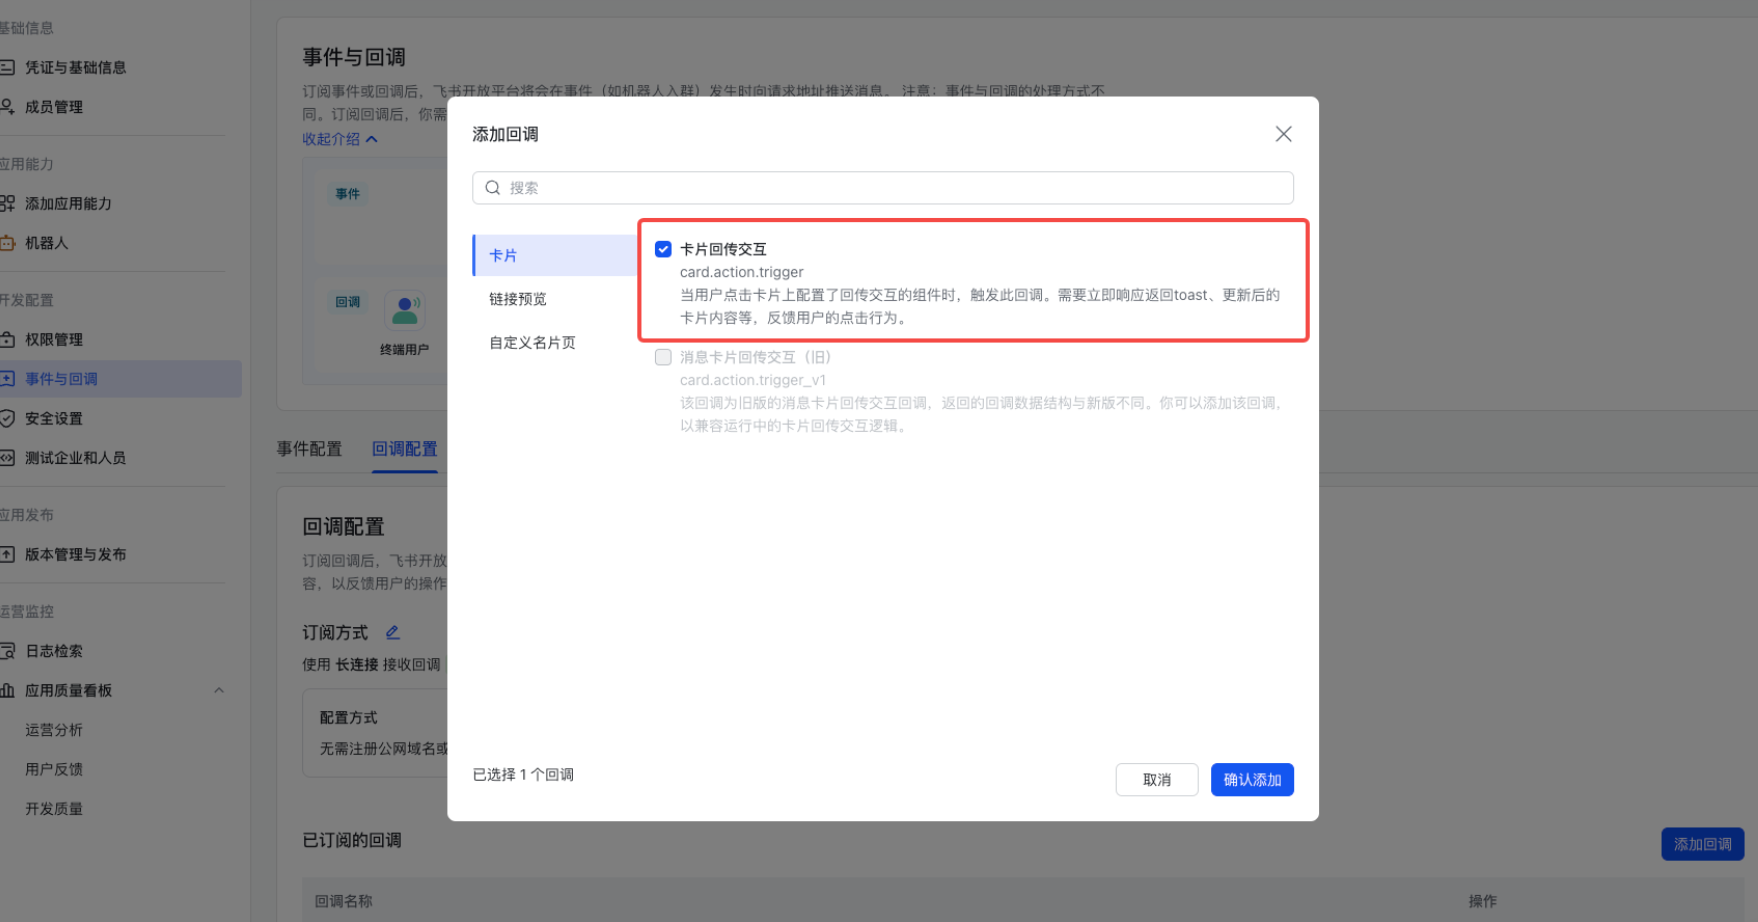
If card permissions or Card interaction callback are missing, card buttons may not respond.
6. Publish the app
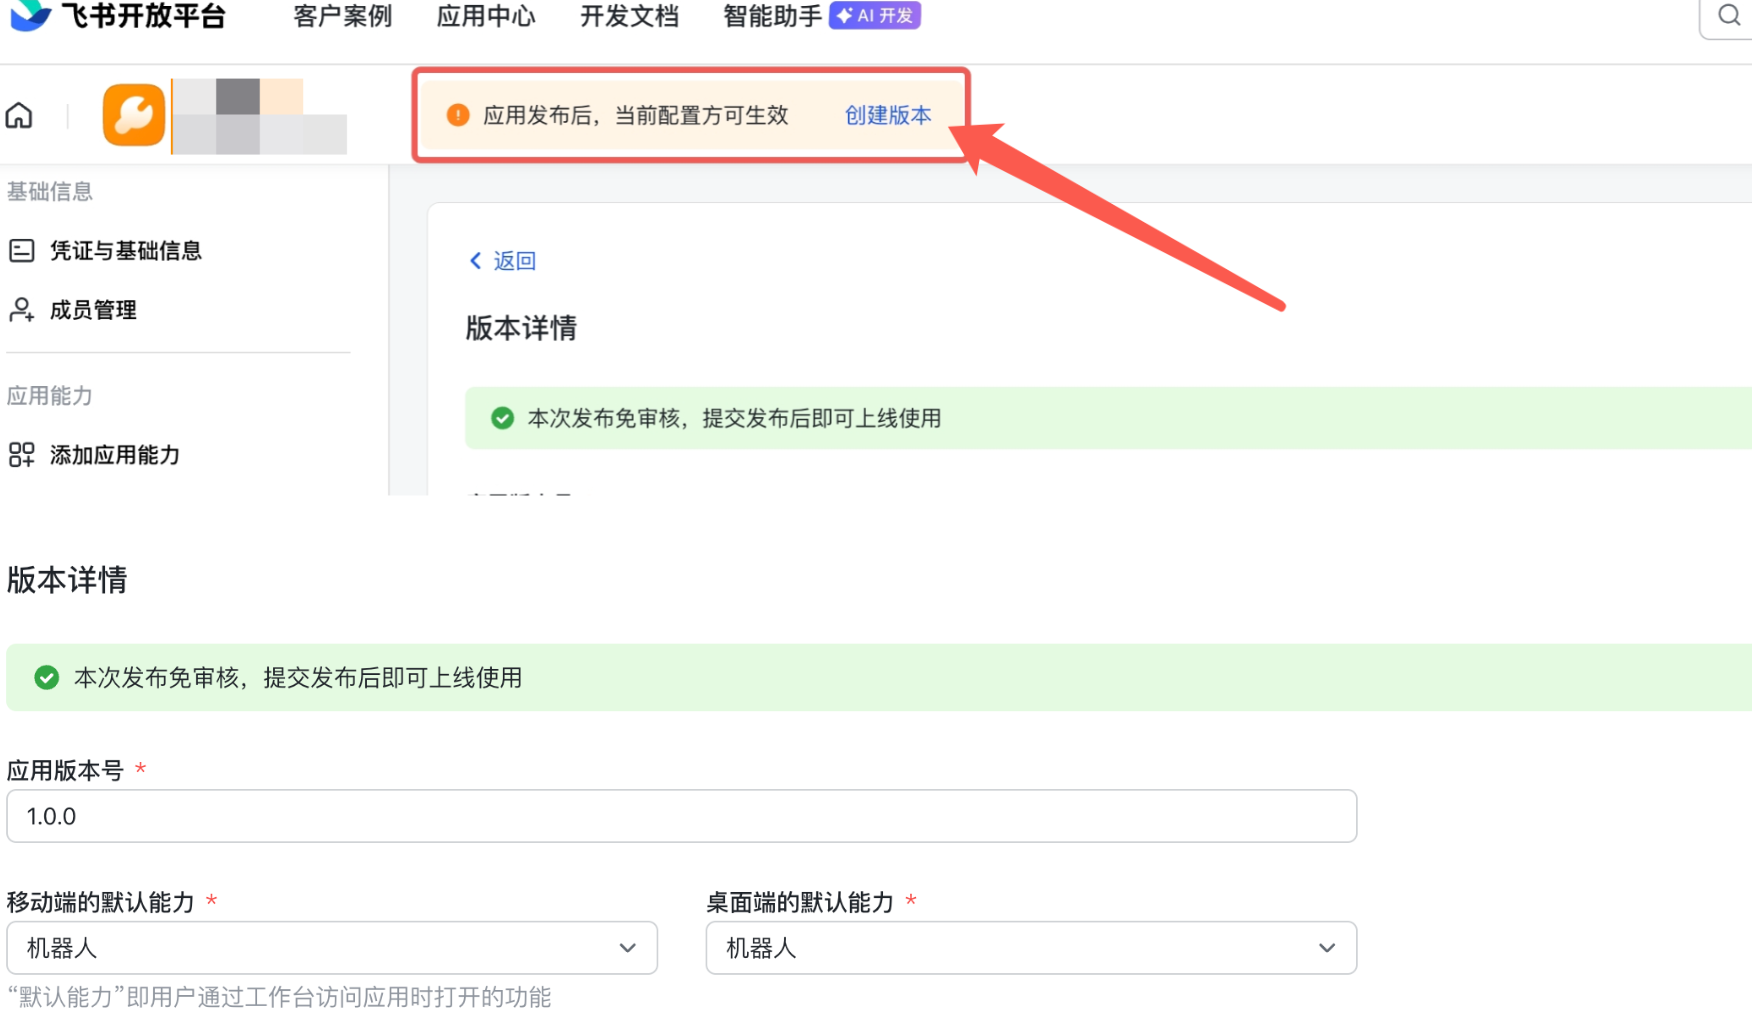
Set availability scope and wait for approval (admins are often auto-approved).
7. Get started
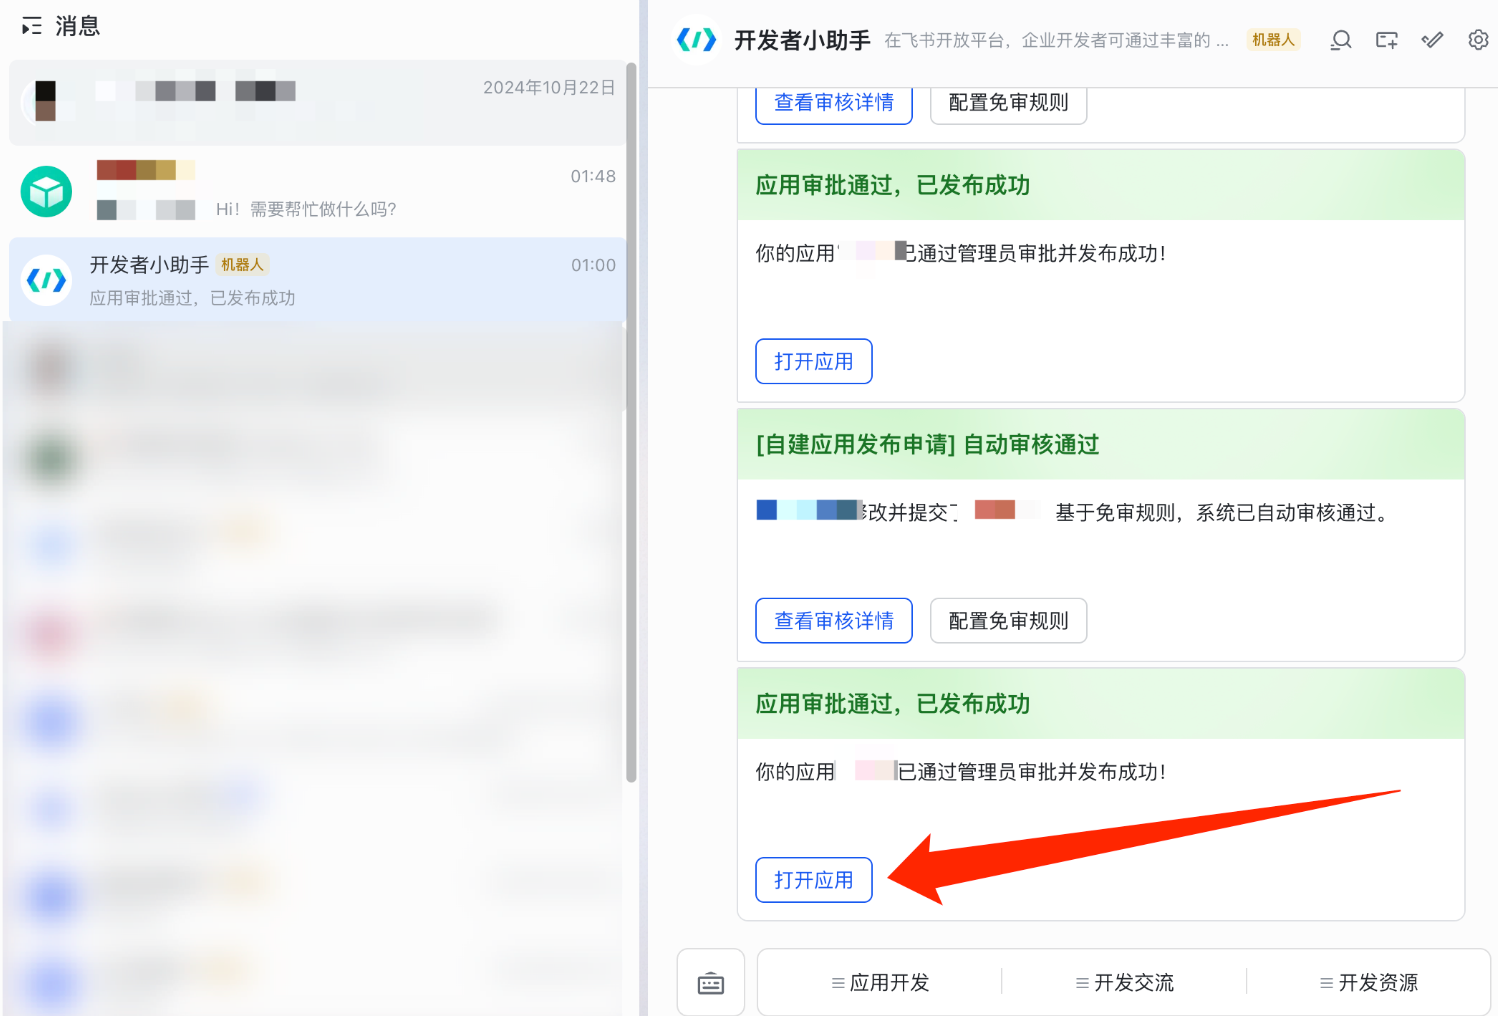
Send “hello” to verify connectivity; for confirmations, follow card prompts.
| Item | Description |
|---|---|
| Model | Auto routing |
| Resource scope | Bound account + “My” resources in the resource domain |
| Rate limit | About ≤ 20 questions per minute per bot |
8. FAQ
No reply from the bot?
- Confirm the app is published and within the availability scope.
- Confirm AI Studio and Feishu both use URL callback, and the Webhook is saved.
- Confirm Feishu is not using “Receive events via long connection”.
- Confirm Receive message and Card interaction callback are added.
- Check App ID / App Secret / Encrypt Key.